Скачать с ютуб HOW TO: Replicate a GM Seam Sealer Bead в хорошем качестве
HOW TO: Replicate a GM Seam Sealer Bead
4 года назад
Скачать бесплатно и смотреть ютуб-видео без блокировок HOW TO: Replicate a GM Seam Sealer Bead в качестве 4к (2к / 1080p)
У нас вы можете посмотреть бесплатно HOW TO: Replicate a GM Seam Sealer Bead или скачать в максимальном доступном качестве, которое было загружено на ютуб. Для скачивания выберите вариант из формы ниже:
Загрузить музыку / рингтон HOW TO: Replicate a GM Seam Sealer Bead в формате MP3:
Если кнопки скачивания не
загрузились
НАЖМИТЕ ЗДЕСЬ или обновите страницу
Если возникают проблемы со скачиванием, пожалуйста напишите в поддержку по адресу внизу
страницы.
Спасибо за использование сервиса savevideohd.ru
HOW TO: Replicate a GM Seam Sealer Bead
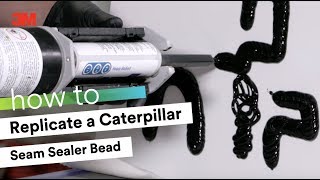
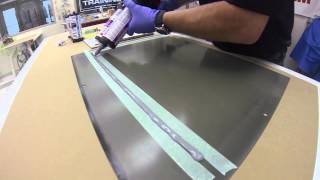
Ryan Marrinan, 3M Application Engineer, talks about how to replicate a door skin bead, particularly on a Chevy Malibu, which has a little higher-profile bead. Step 1: Prep your panel (00:28) Get your epoxy primer down to cover up any bare exposed metal. Tape off the bead width you want, and remember that the GM bead is a little bit taller and narrower. It’s going to have just a little bit of drop – it’ll widen out as it starts to settle down. Step 2: Prep your seam sealer (00:51) Grab your applicator and equalize the cartridge. For this application we’re using our 3M™ EZ Sand Multi Surface Repair Material 05887. As with all our cartridges, equalize it upward into a paper towel to make sure you’ve got equal parts A and B being dispensed. Put the lock ring back on the nozzle and dispense two to three inches of material out onto the mixing board or back into the paper towel to make sure you have an equal mix. Step 3: Lay the first bead (01:40) Apply the seam sealer right over the top of the hem flange. As you dispense the material, push it inward toward the flange, making sure it’s being forced onto the surface and along the seam so you get a nice tight seal and proper corrosion resistance. Next, take a spreader that’s been trimmed down to about a third of its regular size and knock down the surface so the material goes tape to tape. Best practice (02:38) When you’re working on a new panel, whether it’s a door, deck lid or hood, it’s important to start from one place each time as you go through the process. When you tape, when you dispense the material and knock it down, and when you apply the next bead, go back and start each step at the same spot. This way the material has a consistent amount of time to sit and you get a nice even look all the way around the panel. Step 4: Lay the second bead (03:20) After you’ve knocked it down, apply another bead right over the top. This material acts like a high-build controlled-flow seam sealer, and it’s going to melt nicely into the surface below because you’re still within the working window of both beads. As the second bead starts to melt in, you’ll get the look you’re trying to achieve. Step 5: Remove the tape (04:10) It’s important to pull the tape backward against itself or inward a little bit so you don’t accidentally make a little ledge or tidal wave off the edge of the seam sealer, which makes it difficult for the painter to ensure a full corrosion-resistant repair. So pull the tape off back against itself, and as you get to the corner, kind of roll it around, and again use the tape as a knife edge to create a nice clean cut. Step 6: Pinch off the corners (05:07) While you’re still within the working window, pinch off the corners. Some of the repair procedures tell you how far in or how much to pinch off, so some might be a little further in, some might be shallow. But the reason we do this is so water can drain out instead of building up along the edge and damaging the surface of the finish. Important note: There are of course many factors and variables that can affect an individual repair, so the technician and repair facility need to evaluate each specific application and repair process, including relevant vehicle, part and OEM guidelines, and determine what is appropriate for that repair. Products used in this video: 3M™ EZ Sand Multi Surface Repair Material 05887 https://www.3m.com/3M/en_US/company-u... 3M™ Dynatron™ Yellow Spreader https://www.3m.com/3M/en_US/company-u... For more advanced tutorials, check out 3M Collision Repair Academy https://www.3m.com/3M/en_US/collision... You’ll find courses that will expand your knowledge, deliver practical procedures that you can use right away, and, in many cases, earn you I-CAR credits. Website: 3MCollision.com Instagram: Instagram.com/3MCollision Facebook: facebook.com/3MCollision
Comments