Скачать с ютуб etrailer | Curt T-Connector Vehicle Wiring Harness Installation - 2019 Jeep Renegade в хорошем качестве
etrailer | Curt T-Connector Vehicle Wiring Harness Installation - 2019 Jeep Renegade
3 года назад
Скачать бесплатно и смотреть ютуб-видео без блокировок etrailer | Curt T-Connector Vehicle Wiring Harness Installation - 2019 Jeep Renegade в качестве 4к (2к / 1080p)
У нас вы можете посмотреть бесплатно etrailer | Curt T-Connector Vehicle Wiring Harness Installation - 2019 Jeep Renegade или скачать в максимальном доступном качестве, которое было загружено на ютуб. Для скачивания выберите вариант из формы ниже:
Загрузить музыку / рингтон etrailer | Curt T-Connector Vehicle Wiring Harness Installation - 2019 Jeep Renegade в формате MP3:
Если кнопки скачивания не
загрузились
НАЖМИТЕ ЗДЕСЬ или обновите страницу
Если возникают проблемы со скачиванием, пожалуйста напишите в поддержку по адресу внизу
страницы.
Спасибо за использование сервиса savevideohd.ru
etrailer | Curt T-Connector Vehicle Wiring Harness Installation - 2019 Jeep Renegade
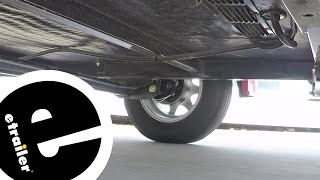
Click for more info and reviews of this CURT Custom Fit Vehicle Wiring: https://www.etrailer.com/Custom-Fit-V... https://www.etrailer.com Don’t forget to subscribe! / etrailertv Full transcript: https://www.etrailer.com/tv-install-c... Rob: Hey everybody, Rob here at etrailer.com. Today, we're going to be taking a look at the Curt T-connector vehicle wiring harness on our 2019 Jeep Renegade. Now our Curt T-connector is going to provide us the four-pole flat trailer connector. That way when we are pulling a trailer with our Renegade, we can have all the required lights to get down the road safely and legally. It's going to provide us our tail lights, our turn signals, and our stoplights. However, trailer wiring's not just good for trailers. There's a lot of times where we'll have a hitch-mounted accessory. Maybe it's a light kit for a cargo carrier, a step, pretty much anything that has lights on it typically has a four-pole flat trailer connector on it. And it's a lot easier to plug those in rather than trying to hardwire into your Renegade. So, even if you don't pull a trailer all the time, it's nice to have the connector here for those few different options.Now you will notice that the wire's actually coming from the back hatch and that's because our wiring is designed to stay on the inside of a Renegade until we're ready to use it. When we do want to use it, we simply just open the hatch and drop it out. And I do want to mention, you do want to stay away from the latch mechanism itself, but the weatherstripping has plenty of cushion to where it's not going to damage the wire when we close the gate, and whenever we're not using it, we can store our wiring down by our spare tire. That way it's out of the way. It's not going to interfere with anything. And we don't have to worry about any gear getting caught on it if, we want to use our hatch area. Now, I personally think, especially our Renegade. We're not going to be towing something every day, and we don't have a big trailer that we're constantly using.Having your wiring on the inside is really nice because they do provide you with a dust cover and that'll help keep all the dirt and debris out. But at the same time, it's going to be much more protected inside the hatch area because they won't be exposed to the elements. And we don't have to worry about any kind of corrosion building up inside of the connector, or even the wires just getting damaged from the sun. It's all going to be protected underneath all these panels until we're ready to use it. So, each time we use it, it should be in really good shape, especially if we're not using it that often. Now the installation of our wiring is pretty straight forward. There's no cutting or splicing on the Jeep itself. Just give me a T-connector that's going to plug inline behind our tail lights. And the nice thing is they already provide us with an access spot to get in and reach those wires.Now, our wiring is powered. There's a converter box. It's going to take the signals and turn it into a working signal for our trailer. But since it's power, we are going to have to run a wire up to the battery. That way it gets the power, but it's also going to help protect our Jeep's wiring. Say there was a problem on the trailer, we had some lights go out and there's a short, well that converter box is going to protect our Jeep's wiring from back feeding.So, it's just going to cut off the power to our trailer wiring and not affect our taillights at all. But now that we've seen the end result of our wiring, let's go ahead and go through the installation process together. So, you can have the confidence to do it at home. To begin our installation we want to take out all the floor coverings in the back of our Renegade, as well as the spare tire underneath. So, we just lift up, pull this panel out and you can send it to the side. We are going to unscrew, the hold down for our spare, pull that out. And we're also going to pull up both of the phone trays with all the spare tire tools.Our next step is for me to removing the threshold, that panel at the very back of the hatch, on the inside lip, we're going to have three fasteners, one on each side and one in the center. So, you want to grab a Phillips screwdriver or a film's bit 00:03:55 And pull all three of those out. Then on either side on the top section of the threshold, we're going to have these tie-down hooks. We're going to flip them open and take a flat blade screwdriver, a trim panel tool, and a pop open the cover, metal expose the bolt that's holding it in place. This time we want to grab a T-40 Torx bit, and we're going to pull those out.Again, we'll have one on the other side. So, pull that one out as well. Once you have all of those fasteners removed, when it come to the inside, grab the
Comments