Скачать с ютуб etrailer | Thule WingBar Evo Crossbars Installation - 2018 Nissan Rogue в хорошем качестве
etrailer | Thule WingBar Evo Crossbars Installation - 2018 Nissan Rogue
5 лет назад
2 Bars
4 Pack
47 Inch Bar Space
Aero Bars
Aluminum
Black
Crossbars
Evo Raised Rail Feet for Thule Crossbars - Qty 4
Feet
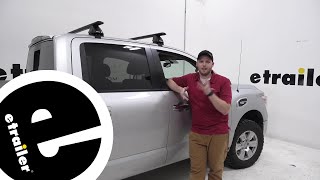
Installation of the Thule WingBar Evo Crossbars on a 2018 Nissan Rogue
Overhang
Qty
Roof Rack
Silver
Thule
Thule WingBar Evo Crossbars 47
Thule WingBar Evo Crossbars Installation - 2018 Nissan Rogue
Скачать бесплатно и смотреть ютуб-видео без блокировок etrailer | Thule WingBar Evo Crossbars Installation - 2018 Nissan Rogue в качестве 4к (2к / 1080p)
У нас вы можете посмотреть бесплатно etrailer | Thule WingBar Evo Crossbars Installation - 2018 Nissan Rogue или скачать в максимальном доступном качестве, которое было загружено на ютуб. Для скачивания выберите вариант из формы ниже:
Загрузить музыку / рингтон etrailer | Thule WingBar Evo Crossbars Installation - 2018 Nissan Rogue в формате MP3:
Если кнопки скачивания не
загрузились
НАЖМИТЕ ЗДЕСЬ или обновите страницу
Если возникают проблемы со скачиванием, пожалуйста напишите в поддержку по адресу внизу
страницы.
Спасибо за использование сервиса savevideohd.ru
etrailer | Thule WingBar Evo Crossbars Installation - 2018 Nissan Rogue
Click for more info and reviews of this Thule Roof Rack: https://www.etrailer.com/Roof-Rack/Th... https://www.etrailer.com Don’t forget to subscribe! / etrailertv Full transcript: https://www.etrailer.com/tv-install-t... Hey guys, Collin here at etrailer. Today we have a 2018 Nissan Rogue, and we're going to do a test fit of the Thule WingBar Evo roof rack system. Now, this system has been designed to mount to the raised side rails of your Nissan Rogue. It's going to allow you to get your favorite Thule accessories on top of your roof. Whether you've got a cargo box, a kayak carrier, or even just a bike rack. Now up top, we're going to have our 47 inch long WingBar, Evo crossbars. These are in black right now, but they're also available in silver. If that's something you're interested in, just see etrailer.com.Now with these aerodynamic crossbars, it's going to help cut down on wind noise and drag when you compare it to your standard square or round bar roof rack system. And what's really nice about these crossbars, that it's very easy to access our T slot. We no longer have to pull those rubber strips out and cut them to length. We can just slide the accessories into the channel without having to cut our rubber strips and try to replace them. Then when we're all done, we just flip over that cap, just like that.Now we have our Evo raised rail feet connecting our crossbars to the raised side rails. They just clamp onto over top and on the sides of our raised side rail. These are very easy to get installed, especially when you compare it to the standard padding clamp systems for naked roofs, it makes installation a breeze and you can take them off very easy if you need to conserve on space. Now, if we come over to the front and we take off the end cap, we'll see on the inside, we have the tightening bolts where we used to tighten down our raised rail feet, and then the end cap right here. Once we put that on, we can see we have these plastic locks. We can take those out and replace them with act with actual Thule Lock Cores. That'll provide more security for your roof rack, if that's something you're interested in just see etrailer.Now, I want to provide you guys with a few measurements to give you an idea of this space, this is going to take up on your roof. If we go from the top of our roof to the bottom of our WingBar, that's going to be two and three quarters of an inch. That's going to be more than enough space to get your clamp on accessories on your crossbars without risking damaging your roof. Or even if you have to come under with some rubber coated steel straps. Now, if we go from the top of our roof to the top of our wing bar, that's going to be three and three quarters of an inch.That's something to keep in mind cause you have that height added on to your vehicle. And we are going to have a 220 pound weight capacity for this WingBar setup. That's going to be a step up when compared to the previous AeroBlade edge bars, but you do want to make sure you double check with your vehicle's owner's manual and make sure your roof can handle that weight. Now that inaudible 00:02:31 most features about this refract setup. Let's show you how to get it installed.I'm just going to show you guys how to get your rear crossbar assembled. It's going to assemble and install the exact same way as your front one, as far as how the front one was installed. There's really no set place to put it. You can base it off of whatever accessory you might be using that day. If you want it more towards the front of the vehicle, then you should put it more towards the front of the side rails.But basically just pick a point on the roof rack. There's a little line right here on our raised side rails. I just measured from that to the edge of my raised rail foot. Get it even on both sides and then tighten it down. Now, like I said earlier, this is going to be a very easy roof rack to get installed, especially when you compare it to those naked roof, roof racks, where it's, a patent clamp and stuff like that. Now, all we're going to do is just come in and remove the end cap by pushing down on that button and then pulling the end cap off. Now we'll grab our raised rail foot and the tab right there is going to go into the track. And then just throw the end cap on and we can get it on our roof. When installing this on your roof and might be a good idea to go ahead and just hop up onto the rear door frame. That way you don't have to reach over and not see where you're going. Now, all we're going to do is just set up over the raised side rail on both sides.But from here, we're going to grab our tape measure and get our crossbar spread. This is what we're going to do is measure from the front of our back WingBar to the front of our front WingBar. There's no set measurement. You just want to make sure that it's the same on both si
Comments