Скачать с ютуб Preparing an Instax wide 100 to be a camera back в хорошем качестве
Preparing an Instax wide 100 to be a camera back
3 года назад
Скачать бесплатно и смотреть ютуб-видео без блокировок Preparing an Instax wide 100 to be a camera back в качестве 4к (2к / 1080p)
У нас вы можете посмотреть бесплатно Preparing an Instax wide 100 to be a camera back или скачать в максимальном доступном качестве, которое было загружено на ютуб. Для скачивания выберите вариант из формы ниже:
Загрузить музыку / рингтон Preparing an Instax wide 100 to be a camera back в формате MP3:
Если кнопки скачивания не
загрузились
НАЖМИТЕ ЗДЕСЬ или обновите страницу
Если возникают проблемы со скачиванием, пожалуйста напишите в поддержку по адресу внизу
страницы.
Спасибо за использование сервиса savevideohd.ru
Preparing an Instax wide 100 to be a camera back
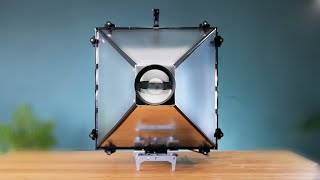
Instax wide format is the only instant photo format that is economical (around $1/photo) and that has decent quality. This is generating interest in converting cameras to use Instax wide. I converted a Polaroid pack film camera using an Instax wide 100, but didn't document all of the steps. This video documents the steps taken to prepare the Instax wide 100 to be used as a camera back, retaining the film ejection system. With additional prep on a Polaroid pack camera, this back can be mounted onto the back of a pack camera as in my previous video: • Converting a Polaroid model 100 pack ... . I have detailed the steps taken to prep a Polaroid 455 for this back, as well as the steps to mount it at • Making a Pola-Instax 455: Putting an ... It can also be used in other applications. I built a 5x7 camera back with dark slide for use with my large format camera. The Instax 100 back works in this application because the camera back with motor fits inside a 5x7 frame, so the motor/handle can be inset inside the camera. This of course will produce a much cropped photo, so using the 210mm lens for that camera will produce equivalent results of a 100mm lens on 35mm--great for portraits. The steps to preparing the Instax 100 are straightforward: remove the case, remove the lens, gear box, electronics, and cut off the lens housing. Then, wire the motor to the battery and shorten the following edge of the micro switch cam so the motor turns off a bit earlier. The existing shutter button can be used as a switch to kick start the motor, and can be soldered in parallel with the micro switch. The model 210 is similar, but with these differences: 1. The electronic boards are not screwed into the frame (just the LCD is). They are held on with plastic rivets. Just pry the boards off. 2. The lens housing is not part of the frame!! Removing the lens assembly removes everything. There are bits to trim off, but not all the cutting as shown in this video. 3. The micro switch rides on top of the gear that cycles once for each photo ejection, and drops into a slot to turn off. This slot in the gear needs to be lengthened, which will involve taking apart the gear box and drilling the slot longer. This is not a trivial task. 4. The shutter button is a micro switch and can be used as is (as opposed to a PCB contact requiring a piece of tin foil to complete contact). Overall, this makes it easier to modify a 210, though maybe more technical to take apart the gear box to modify the gear.
Comments