–°–∫–∞—á–∞—Ç—å —Å —é—Ç—É–± etrailer | DIY 2015 Ford Explorer Installation for the Curt Trailer Hitch Receiver –≤ —Ö–æ—Ä–æ—à–µ–º –∫–∞—á–µ—Å—Ç–≤–µ
etrailer | DIY 2015 Ford Explorer Installation for the Curt Trailer Hitch Receiver
5 –ª–µ—Ç –Ω–∞–∑–∞–¥
–°–∫–∞—á–∞—Ç—å –±–µ—Å–ø–ª–∞—Ç–Ω–æ –∏ —Å–º–æ—Ç—Ä–µ—Ç—å —é—Ç—É–±-–≤–∏–¥–µ–æ –±–µ–∑ –±–ª–æ–∫–∏—Ä–æ–≤–æ–∫ etrailer | DIY 2015 Ford Explorer Installation for the Curt Trailer Hitch Receiver –≤ –∫–∞—á–µ—Å—Ç–≤–µ 4–∫ (2–∫ / 1080p)
–£ –Ω–∞—Å –≤—ã –º–æ–∂–µ—Ç–µ –ø–æ—Å–º–æ—Ç—Ä–µ—Ç—å –±–µ—Å–ø–ª–∞—Ç–Ω–æ etrailer | DIY 2015 Ford Explorer Installation for the Curt Trailer Hitch Receiver –∏–ª–∏ —Å–∫–∞—á–∞—Ç—å –≤ –º–∞–∫—Å–∏–º–∞–ª—å–Ω–æ–º –¥–æ—Å—Ç—É–ø–Ω–æ–º –∫–∞—á–µ—Å—Ç–≤–µ, –∫–æ—Ç–æ—Ä–æ–µ –±—ã–ª–æ –∑–∞–≥—Ä—É–∂–µ–Ω–æ –Ω–∞ —é—Ç—É–±. –î–ª—è —Å–∫–∞—á–∏–≤–∞–Ω–∏—è –≤—ã–±–µ—Ä–∏—Ç–µ –≤–∞—Ä–∏–∞–Ω—Ç –∏–∑ —Ñ–æ—Ä–º—ã –Ω–∏–∂–µ:
–ó–∞–≥—Ä—É–∑–∏—Ç—å –º—É–∑—ã–∫—É / —Ä–∏–Ω–≥—Ç–æ–Ω etrailer | DIY 2015 Ford Explorer Installation for the Curt Trailer Hitch Receiver –≤ —Ñ–æ—Ä–º–∞—Ç–µ MP3:
–ï—Å–ª–∏ –∫–Ω–æ–ø–∫–∏ —Å–∫–∞—á–∏–≤–∞–Ω–∏—è –Ω–µ
–∑–∞–≥—Ä—É–∑–∏–ª–∏—Å—å
–ù–ê–ñ–ú–ò–¢–ï –ó–î–ï–°–¨ –∏–ª–∏ –æ–±–Ω–æ–≤–∏—Ç–µ —Å—Ç—Ä–∞–Ω–∏—Ü—É
–ï—Å–ª–∏ –≤–æ–∑–Ω–∏–∫–∞—é—Ç –ø—Ä–æ–±–ª–µ–º—ã —Å–æ —Å–∫–∞—á–∏–≤–∞–Ω–∏–µ–º, –ø–æ–∂–∞–ª—É–π—Å—Ç–∞ –Ω–∞–ø–∏—à–∏—Ç–µ –≤ –ø–æ–¥–¥–µ—Ä–∂–∫—É –ø–æ –∞–¥—Ä–µ—Å—É –≤–Ω–∏–∑—É
—Å—Ç—Ä–∞–Ω–∏—Ü—ã.
–°–ø–∞—Å–∏–±–æ –∑–∞ –∏—Å–ø–æ–ª—å–∑–æ–≤–∞–Ω–∏–µ —Å–µ—Ä–≤–∏—Å–∞ savevideohd.ru
etrailer | DIY 2015 Ford Explorer Installation for the Curt Trailer Hitch Receiver
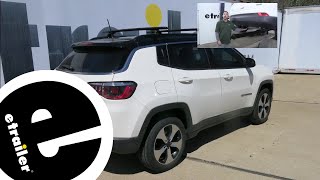
Click for more info and reviews of this CURT Trailer Hitch: https://www.etrailer.com/Trailer-Hitc... https://www.etrailer.com Don‚Äôt forget to subscribe! ¬Ý¬Ý¬Ý/¬Ýetrailertv¬Ý¬Ý Full transcript: https://www.etrailer.com/tv-install-t... Rob: Rob here at etrailer.com, and today we're gonna be taking a look at the Curt Class III custom fit trailer hitch receiver on our 2015 Ford Explorer. So here's what our hitch is going to look like once we have it installed. It is going to sit right below the bumper, and that crosstube's going to be visible, but it's kind of an angle, so the main thing we're going to see is that receiver tube sticking out. And since it's a Class III, it's going to give us that two inch by two inch receiver tube opening. We're gonna have a really wide variety of options when it comes to accessories.Now whatever you're going to be mounting, you're going to be using the hitch pin hole here on the side to mount it. It is going to accept a standard five eights pin and clip. Now these are not included with the kit, but you can pick them up here at etrailer.com along with some locking devices to make sure your accessories are secure.Now obviously, if you are towing, your going to need a spot to mount your safety chains. And our connection point is going to be a plate style welded to the bottom of the receiver tube, and we'll have plenty of room to get most size hooks on or off, but if you have some really small safety loops, try to come into the front, because as you can see, that large flange on the side will make it a little difficult to get those hooked on.Now, if you're looking for a hitch, you want to make sure it's up to the task no matter what we're going to be using it for. So as far as the weight rating goes, our hitch is going to have a 400 pound tongue weight, which is the maximum downward force on the receiver tube. It'll be great for some of those larger bike racks or really maximizing the capability of the cargo carriers that you use.Now as far as the gross trailer weight rating goes, it's going to have a 4,000 pound rating. That's how much our hitch can pull, including the trailer and everything we have loaded on it. Now the hitch is designed to work with weight distribution systems, as well. The tongue weight is going to bump up to 500 and the gross trailer weight rating is going to bump up to 5,000. But with all those numbers in mind, you want to double check your Explorer's owner's manual because you don't want to exceed the manufacturer's recommended weight.Now one question we do get a lot about the hitch with the Explorers is if the hands free lift gate is going to work or not. Now it will work, but we are going to be limited to going to either side of the receiver tube. Obviously, if we kick right here, the sensor's not going to pick it up. So if we just come to the side, the left or right of the receiver tube, it will still work.I'd like to give you a few measurements and these are going to help you whenever you're looking for accessories for your new hitch, like a ball mount, bike rack, or even a cargo carrier. From the center of the hitch pin hole to the outermost edge of the bumper, it's right about two and a half inches. Now that measurement is going to help you when you're looking at folding accessories to make sure you have enough room and that they're not going to come in contact with the rear bumper. And from the ground to the inside top edge of the receiver tube opening, it's going to be right about 16 and a half inches. That'll help you when you're looking for a ball mount to make sure you can find the appropriate riser drop to match up to your trailer.But now that you've seen what our hitch looks like and gone over some of the features, let's put it on together. To begin our installation, we'll come to the back of our Explorer and we're going to lower our exhaust down. We're going to have a total of three isolators, one at the back of each muffler, and then if we move forward where exhaust Y's, we're going to have another one right there, right by the rear axle.Before we lower our exhaust, I'm going to put a support strap up. That way it doesn't hang down too far or cause any damage. Just want to make sure you find a solid point on the frame or somewhere that's not going to move. And then I'll tighten the strap until we get those isolators loose. So it's definitely going to help if you take a little bit of spray lubricant and you spray it on the isolator and the metal hanger. It's just going to help it come off and slide off there easier. Now at this point, you just take a pry bar or long blade screwdriver and the main goal is just to slide that rubber piece off of the metal hanger.We'll repeat that for the other side and the other rubber isolator. And with both the mufflers loose and the hangers down, I'm going to go ahead and loosen that strap so we have a li
Comments