Скачать с ютуб This is my Raw Photo Color Grading Process in Lightroom Classic в хорошем качестве
This is my Raw Photo Color Grading Process in Lightroom Classic
1 год назад
Скачать бесплатно и смотреть ютуб-видео без блокировок This is my Raw Photo Color Grading Process in Lightroom Classic в качестве 4к (2к / 1080p)
У нас вы можете посмотреть бесплатно This is my Raw Photo Color Grading Process in Lightroom Classic или скачать в максимальном доступном качестве, которое было загружено на ютуб. Для скачивания выберите вариант из формы ниже:
Загрузить музыку / рингтон This is my Raw Photo Color Grading Process in Lightroom Classic в формате MP3:
Если кнопки скачивания не
загрузились
НАЖМИТЕ ЗДЕСЬ или обновите страницу
Если возникают проблемы со скачиванием, пожалуйста напишите в поддержку по адресу внизу
страницы.
Спасибо за использование сервиса savevideohd.ru
This is my Raw Photo Color Grading Process in Lightroom Classic
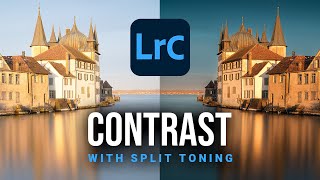
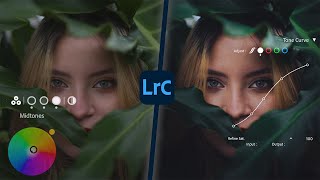
This is my #Lightroom #ColorGrading workflow for warm, dreamy sunset photos You can follow along this #LightroomTutorial by downloading the Raw photo here: https://drive.google.com/file/d/1zNT1... ▬▬▬▬▬▬▬▬▬▬▬▬▬▬▬▬▬ Thank you for watching my video! ► http://www.the-phlog.com ► Patreon: / phlog ► Instagram: / thephlog ▬▬▬▬▬▬▬▬▬▬▬▬▬▬▬▬▬ 0:00 Intro For this picture of the Drei Zinnen my goal was to bring back more of those warmer sunset colors, especially in the highlights, while still having some colder shadows, plus adding a bit mor econtrast overall. While 99% of the editing was done in Lightroom, I used a bit of Photoshop to add the final touch. 0:36 1. Basic Adjustments I switched the profile to Adobe Landscape for more base saturation, then adjusted the white balance by increasing the temperature to make the whole shot look warmer. Since the raw was rather dark, I slightly raised the exposure. Then, I added some texture and vibrance. 3:02 2. Masking Using a linear gradient, I targeted the bottom of the mountains and dropped the exposure, while raising the highlights. This made everything darker except for the snowy patched. Also, I brought down the white balance temperature to make the shadowy part of the mountain colder. Next, I targeted the sky with a color range mask set to blue and brought down the exposure to give the sky more contrast. To add a bit of glow, I used two radial filters on the right side and decreased the dehaze, increased the exposure, the temperature and the tint (for a warm glow). 6:25 3. Color Grading I started in the HSL panel by bringing up the red hue and thus making the mountain peaks a bit more orange. Also, I brought down the purple hue to fix any purple color cast in the blue sky. In the saturation tab, I reduced the orange tones since they were way too strong. Finally, In the luminance tab, I dropped the blue luminance to further add contrast to the sky. Very important for this shot was the split toning. As I wanted to have very vibrant and warm highlights, I added a well saturated yellow tone to the highlights and a vibrant orange tone to the mid-tones. For the shadows, I went with a cold color. 10:24 4. Photoshop Using a gradient map adjustment layer, I did some very minor color grading (think of it as like split toning) to enhance the shadows and highlights some more. This step was totally optional however.
Comments