Скачать с ютуб Triumph 650 Motorcycle Engine Disassembly & Rebuild Part 12 - Lowbrow Customs в хорошем качестве
Triumph 650 Motorcycle Engine Disassembly & Rebuild Part 12 - Lowbrow Customs
5 лет назад
Скачать бесплатно и смотреть ютуб-видео без блокировок Triumph 650 Motorcycle Engine Disassembly & Rebuild Part 12 - Lowbrow Customs в качестве 4к (2к / 1080p)
У нас вы можете посмотреть бесплатно Triumph 650 Motorcycle Engine Disassembly & Rebuild Part 12 - Lowbrow Customs или скачать в максимальном доступном качестве, которое было загружено на ютуб. Для скачивания выберите вариант из формы ниже:
Загрузить музыку / рингтон Triumph 650 Motorcycle Engine Disassembly & Rebuild Part 12 - Lowbrow Customs в формате MP3:
Если кнопки скачивания не
загрузились
НАЖМИТЕ ЗДЕСЬ или обновите страницу
Если возникают проблемы со скачиванием, пожалуйста напишите в поддержку по адресу внизу
страницы.
Спасибо за использование сервиса savevideohd.ru
Triumph 650 Motorcycle Engine Disassembly & Rebuild Part 12 - Lowbrow Customs
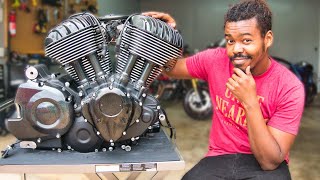
This video is presented by: http://www.lowbrowcustoms.com In this installment Todd gives you a step by step guide on how to rebuild your Triumph 650 primary drive. He shows how everything works and what to look for before reassembly. Todd shows what to look for in your clutch basket, clutch center and how to install everything in your primary case. If you missed Part 1 - • Triumph 650 Motorcycle Engine Disasse... If you missed Part 2 - • Triumph 650 Motorcycle Engine Disasse... If you missed Part 3 - • Triumph 650 Motorcycle Engine Disasse... If you missed part 4 - • Triumph 650 Motorcycle Engine Disasse... If you missed part 5 - • Triumph 650 Motorcycle Engine Disasse... If you missed part 6 - • Triumph 650 Motorcycle Engine Disasse... If you missed part 7 - • Triumph 650 Motorcycle Engine Disasse... If you missed part 8 - • Triumph 650 Motorcycle Engine Disasse... If you missed part 9 - • Triumph 650 Motorcycle Engine Disasse... If you missed part 10 - • Triumph 650 Motorcycle Engine Disasse... If you missed part 11 - • Triumph 650 Motorcycle Engine Disasse... Check out Part 13 - • Triumph 650 Motorcycle Engine Disasse... 00:01 - Intro 00:25 - What will we be working on? 01:20 - Looking and inspecting the clutch basket. 02:28 - Looking and Inspecting the clutch center. 05:13 - Installing the seal from the crank case to primary if you forgot to do it. 09:17 - Installing the oil seal in the main drive sprocket cover. 12:04 - Putting silicon sealer, gasket, and installing the main drive sprocket cover. 15:56 - Re-install the stator wire tube. 16:24 - Install the primary shoe and adjuster. 19:30 - Prepare the clutch basket, clutch center, clutch, front sprocket and chain to put on primary in one lump sum. 19:55 - Installing loose 20 roller bearings onto the clutch using grease. 22:04 - Place thrust washer over bearings, then clutch basket over top of clutch. 22:39 - Use a new chain! 23:39 - Installing the clutch center. Also a quick explanation on how to change the clutch center rubbers. 26:38 - Installing key on the main shaft. 28:04 - Installing the whole lump sum by sliding on the main shaft and crank shaft. 29:10 - Installing the main shaft washer and nut securing the clutch center/basket. 32:25 - Torque the main shaft nut. 32:50 - Is it ok to have a little wobble in the clutch basket after it has been torqued down? 33:26 - What to look for on a clutch pushrod, what's bad and whats good. 34:57 - Installing the clutch pushrod 35:20 - Installing the Stator studs that go into the case. 38:24 - Install the fat washer to space the rotor and square rotor key that goes on the crankshaft. 40:35 - It's cold in the garage... Installing clutch plates in. What does a worn out one look like? 42:11 - Installing the pressure plate. 46:00 - What does truing your pressure plate mean? 47:37 - Installing rotor and stator 48:50 - Uh Oh... my brand new rotor isn't fitting on the crankshaft! 53:21 - Install the lock tab and center nut to secure the rotor to the crankshaft. 53:56 - Torque the nut and bend the lock tab over. 56:28 - Installing the stator. 01:02:05 - Check clearance of the stator to rotor. 01:05:00 - Till next time WOOOoo! "Royal Treatment" "Raggae Music A Run De Place" Composed by: Vernon Maytone
Comments