Скачать с ютуб Create a Star Trails Timelapse Video в хорошем качестве
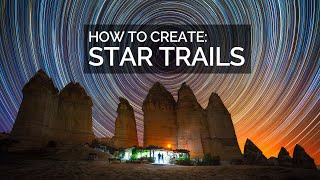
Create a Star Trails Timelapse Video
1 год назад
Скачать бесплатно и смотреть ютуб-видео без блокировок Create a Star Trails Timelapse Video в качестве 4к (2к / 1080p)
У нас вы можете посмотреть бесплатно Create a Star Trails Timelapse Video или скачать в максимальном доступном качестве, которое было загружено на ютуб. Для скачивания выберите вариант из формы ниже:
Загрузить музыку / рингтон Create a Star Trails Timelapse Video в формате MP3:
Если кнопки скачивания не
загрузились
НАЖМИТЕ ЗДЕСЬ или обновите страницу
Если возникают проблемы со скачиванием, пожалуйста напишите в поддержку по адресу внизу
страницы.
Спасибо за использование сервиса savevideohd.ru
Create a Star Trails Timelapse Video
To learn more about Star Trails, check out my new Star Trails Course on howtube: https://www.howtube.com/series/JOx736sk In this video I'll show you how to create a beautiful star trails timelapse video. You will need StarStaX for this workflow, which you can download using the link below. https://markus-enzweiler.de/software/... We'll start off editing the RAW photos in Adobe Bridge + Camera RAW. Be sure to fix the exposure, white balance, contrast, and saturation. Also, head to the Detail tab and lower the "Sharpening" slider to 0. You may also want to increase the "Noise Reduction" slider to around 10 -20. After you've made your edits, save the RAWs as JPEGS in a new folder. Next, use StarStaX to create a demo star trails image. This will show off any problems with your edits. If the final star trails image doesn't look good, you can always go back and re-edit your RAW photos again. If the star trails image looks good though, besides the planes, you can continue on. We'll head to Photoshop next and begin removing any planes or distracting lights from every single photo. This is optional, but highly recommended. Consider this - every light will be burned into the final video. Therefore, if a plane flies through the image within the first few photos, it will be there for the rest of the timelapse. After all the plane trails have been removed from the individual JPEG photos, you can head back to StarStaX. Run through the processing again, this time using "Save After Each Step" option. We'll use these JPEGS to create the final video. Finally, go back to Photoshop and click File - Open. Click on the first photo in the StarStaX folder, then click the "Open Image Sequence" button. Now click "Open" and Photoshop will take all of those photos and convert them to a video file. I recommend 24 FPS. Feel free to add any Adjustment Layers you want to the video. I'd recommend a Curves, Vibrance, and a few Selective Colors. 00:00 - Intro 01:04 - Camera RAW Processing 08:04 - Test Photos for Problems 10:13 - Remove Planes and Lights 14:38 - Use StarStaX to Create Timelapse Photos 16:36 - Fix remaining problems 19:42 - Create Timelapse Video 25:58 - Outro
Comments


![[Relaxing] Quick Image Processing of Sadr Region in Cygnus Region using DeepSkyStacker and Siril](https://i.ytimg.com/vi/SMLRfLcx82c/mqdefault.jpg)