–°–∫–∞—á–∞—Ç—å —Å —é—Ç—É–± etrailer | How to Install the Inno Square Bar Roof Rack for Naked Roofs on a 2018 Ford Flex –≤ —Ö–æ—Ä–æ—à–µ–º –∫–∞—á–µ—Å—Ç–≤–µ
etrailer | How to Install the Inno Square Bar Roof Rack for Naked Roofs on a 2018 Ford Flex
5 –ª–µ—Ç –Ω–∞–∑–∞–¥
–°–∫–∞—á–∞—Ç—å –±–µ—Å–ø–ª–∞—Ç–Ω–æ –∏ —Å–º–æ—Ç—Ä–µ—Ç—å —é—Ç—É–±-–≤–∏–¥–µ–æ –±–µ–∑ –±–ª–æ–∫–∏—Ä–æ–≤–æ–∫ etrailer | How to Install the Inno Square Bar Roof Rack for Naked Roofs on a 2018 Ford Flex –≤ –∫–∞—á–µ—Å—Ç–≤–µ 4–∫ (2–∫ / 1080p)
–£ –Ω–∞—Å –≤—ã –º–æ–∂–µ—Ç–µ –ø–æ—Å–º–æ—Ç—Ä–µ—Ç—å –±–µ—Å–ø–ª–∞—Ç–Ω–æ etrailer | How to Install the Inno Square Bar Roof Rack for Naked Roofs on a 2018 Ford Flex –∏–ª–∏ —Å–∫–∞—á–∞—Ç—å –≤ –º–∞–∫—Å–∏–º–∞–ª—å–Ω–æ–º –¥–æ—Å—Ç—É–ø–Ω–æ–º –∫–∞—á–µ—Å—Ç–≤–µ, –∫–æ—Ç–æ—Ä–æ–µ –±—ã–ª–æ –∑–∞–≥—Ä—É–∂–µ–Ω–æ –Ω–∞ —é—Ç—É–±. –î–ª—è —Å–∫–∞—á–∏–≤–∞–Ω–∏—è –≤—ã–±–µ—Ä–∏—Ç–µ –≤–∞—Ä–∏–∞–Ω—Ç –∏–∑ —Ñ–æ—Ä–º—ã –Ω–∏–∂–µ:
–ó–∞–≥—Ä—É–∑–∏—Ç—å –º—É–∑—ã–∫—É / —Ä–∏–Ω–≥—Ç–æ–Ω etrailer | How to Install the Inno Square Bar Roof Rack for Naked Roofs on a 2018 Ford Flex –≤ —Ñ–æ—Ä–º–∞—Ç–µ MP3:
–ï—Å–ª–∏ –∫–Ω–æ–ø–∫–∏ —Å–∫–∞—á–∏–≤–∞–Ω–∏—è –Ω–µ
–∑–∞–≥—Ä—É–∑–∏–ª–∏—Å—å
–ù–ê–ñ–ú–ò–¢–ï –ó–î–ï–°–¨ –∏–ª–∏ –æ–±–Ω–æ–≤–∏—Ç–µ —Å—Ç—Ä–∞–Ω–∏—Ü—É
–ï—Å–ª–∏ –≤–æ–∑–Ω–∏–∫–∞—é—Ç –ø—Ä–æ–±–ª–µ–º—ã —Å–æ —Å–∫–∞—á–∏–≤–∞–Ω–∏–µ–º, –ø–æ–∂–∞–ª—É–π—Å—Ç–∞ –Ω–∞–ø–∏—à–∏—Ç–µ –≤ –ø–æ–¥–¥–µ—Ä–∂–∫—É –ø–æ –∞–¥—Ä–µ—Å—É –≤–Ω–∏–∑—É
—Å—Ç—Ä–∞–Ω–∏—Ü—ã.
–°–ø–∞—Å–∏–±–æ –∑–∞ –∏—Å–ø–æ–ª—å–∑–æ–≤–∞–Ω–∏–µ —Å–µ—Ä–≤–∏—Å–∞ savevideohd.ru
etrailer | How to Install the Inno Square Bar Roof Rack for Naked Roofs on a 2018 Ford Flex
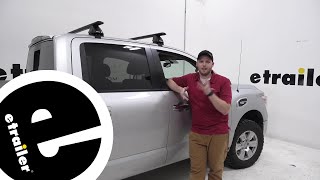
Click for more info and reviews of this Inno Roof Rack: https://www.etrailer.com/Roof-Rack/In... https://www.etrailer.com Don‚Äôt forget to subscribe! ¬Ý¬Ý¬Ý/¬Ýetrailertv¬Ý¬Ý Full transcript: https://www.etrailer.com/tv-install-i... Today, in our 2018 Ford Flex, we're going to be doing a test on the Inno Square Bar Roof Rack System.We'll be using part numbers INB147 for the 58 inch long black steel crossbars, and part number INSUT for the Inno feet for the square crossbars. Part number INK263 for the customer fit kit.This Inno roof rack system's going to allow us to carry roof mounted accessories on our Ford Flex. Things like bike racks, kayak carriers, roof boxes, and much more.It has the traditional square bar design. Now, these aren't going to be as quiet as an aero style. Like anything we put on a roof, it's going to make a little bit of noise. If you'd like to keep that down to a minimum, you can pick up a fairing to place on the front crossbar.Now, as I said in the intro, the bars are 58 inches long. When mounted, we've actually got about 49 inches of usable space. That's more than enough room to put a few accessories. They're going to work with your standard clamp on accessories.The crossbars are held in place by four Inno feet. These are designed perfectly to work with our naked roof on our Flex. That way they don't harm or scratch that room. The hooks that secure our roof rack system to the inside of the door jam also offers some protection. They're rubber coated, and they, too, are custom fit to work with our Flex.This roof rack system also includes locks. That way no one can remove it from our roof. This is a step up compared to other roof rack systems, where you have to pick up separate cores. This includes them, so you don't have to pick up any other parts. You can see here how it even covers our hardware. That way, it cannot be tampered with.When using this roof rack system, if you have the sunroof option, I'd like to point out that you still have full operation of that.This roof rack system has a weight capacity of 220 pounds. That's a step up, compared to other roof rack systems. You're going to be able to carry a lot more accessories on this system without worrying about the weight. You do, however, want to check with your vehicle's owner's manual, to see if your roof can support that much weight.Now, I'll give you some dimensions. This may help up when carrying accessories, or pulling and out of your garage. From the top of the roof to the underside of the square bar is about two inches. From the top of the roof to the top of the square bar is about three inches.Now that we've gone over the features, I'll show you how to go ahead and get in installed. We've already got our front crossbar in place. Let's show you how we did that.Per our instructions, we measured over from the two doors to center, on both sides, and got our placement. The rear one installs the same way. Let's go ahead and get started.I've already got one of my feet installed on the bar here. Let's do the other side together. We'll grab the other foot, and we're going to do some assembly. What I want to do is, we'll grab our hook. We're going to set it in place, on top of the bolt there. Then, we'll grab the locking bracket. Put that over top. Then, we'll take the large, square nut and start threading that on.We'll do a couple threads. We just want it loosely installed, like so. Then, we'll take that locking bracket. Set it over. We'll be sure that the opening is facing up, as you see it here. Then, we'll take our large nut and thread that on a little bit. We don't want to thread it on all the way. We want it loosely installed, like so.Now, before you put the foot in place on the bar, it's important that the ridges on the square bar are facing up. The way you slide it onto the square bar is you press down on the bolt here, where my thumb is. It releases the grip here. As we push down, you can see that move. From here, we can take it, while holding it down, and slide it in place. Then, as we let go, it grips and is locked in.Now, we need to take a measurement and make sure that our feet are in the correct position on the square bar. We can grab our included tape measure and, what we need to do first, is find the center of the crossbar. The nice thing is about the included tape, is that it finds the center of the bar for us. It's actually labeled. We'll zero it at the end of the bar, here. We'll stretch it out until we find the part number of the actual square bar, which is located right here. The part number is INB147. So, the arrow here marks our center.Now, you can do this a few different ways. You can mark it with a pen. I like to use my finger nail. Just give a little . Just apply a little bit of pressure, and then we've got our mark.From here, we can turn our tape measure around, place the zero on the center, and, per our inst
Comments