Скачать с ютуб How to Assemble a Wood Picture Frame Kit в хорошем качестве
How to Assemble a Wood Picture Frame Kit
2 года назад
Скачать бесплатно и смотреть ютуб-видео без блокировок How to Assemble a Wood Picture Frame Kit в качестве 4к (2к / 1080p)
У нас вы можете посмотреть бесплатно How to Assemble a Wood Picture Frame Kit или скачать в максимальном доступном качестве, которое было загружено на ютуб. Для скачивания выберите вариант из формы ниже:
Загрузить музыку / рингтон How to Assemble a Wood Picture Frame Kit в формате MP3:
Если кнопки скачивания не
загрузились
НАЖМИТЕ ЗДЕСЬ или обновите страницу
Если возникают проблемы со скачиванием, пожалуйста напишите в поддержку по адресу внизу
страницы.
Спасибо за использование сервиса savevideohd.ru
How to Assemble a Wood Picture Frame Kit
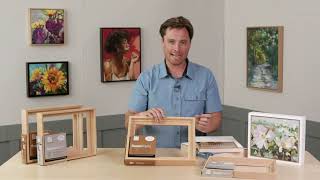
In this video I demonstrate how to assemble a wood frame kit for a painting. The supplies that I used in the video are listed below. Affiliate Disclosure- the following links to Blick Art Materials are affiliate links which means I earn a commission when you click on them and make a purchase. FRAME Wood Frame http://shrsl.com/367bh POINT DRIVERS Fletcher point driver. This is the yellow one I used in the video. It uses flexible points which are very convenient when you want to reuse the frame. http://shrsl.com/367bo Fletcher FrameMate: this is a manual point driver. It uses rigid points so you won't be able to bend the points back to remove the painting. This might not matter to you. You can always just remove the points, replace the painting and then drive more points to hold it in place. http://shrsl.com/367by Fletcher PushMate: this is the most affordable solution but it's entirely manual. The points are rigid so you can't bend them back to remove the painting. It's a good solution though if you're just starting out or only plan on framing a few things. http://shrsl.com/367c2 PICTURE HANING WIRE Plastic coated stainless steel picture hanging wire http://shrsl.com/367c5 RUBBER BUMPER PADS 3M self adhesive rubber bumper pads http://shrsl.com/367ca CANVAS PANELS Raymar smooth portrait canvas panels. These are the panels that I use most often. They have a melamine backing that makes them more rigid and less prone to warping than regular canvas panels. http://shrsl.com/367cc PICTURE HANGING HARDWARE Picture hanging hooks http://shrsl.com/367ci Please remember to wear safety glasses when using tools! The wood frames that I use in the video are easy to put together.You don't need to do any sawing yourself, the frames come in a variety of lengths that are ready to be assembled. You don't too many tools to assemble a DIY picture framing kit like the one I use in the video. Just a hammer and some sort of point driver. There's a wide range of point drivers that you can use. The manual point drivers can be very affordable. You also need wood glue, picture hanging wire, rubber pads (optional), and some type of point driver. The kit comes with plastic thumbnails that you use to add strength to the corners. They call them thumbnails because you're supposed to be able to push them in using your thumbs. I find that you have to use a hammer to drive them into the slots in the corners. Before you do that though, you want to use apply wood glue in a thin layer to the inside edges of the corners. I work on one corner at a time, except for the last two which I glue at the same time. Towards the end of the video, I show how you can switch the painting with a new one in under 20 seconds. That's why I use a point driver to frame my canvas panels. It's so much convenient to do it yourself than it is to take it to a picture framing shop. It's also much more affordable too! I use eye hooks and picture framing wire to hang my paintings. I demonstrate how I attach the wire to the frame. At the end I show that a regular canvas fits into the frame too so you can use these frames to frame the canvases that are 3/4 "deep.
Comments