Скачать с ютуб Induction Hob Repair Cracked Chipped Glass в хорошем качестве
Induction Hob Repair Cracked Chipped Glass
6 месяцев назад
Скачать бесплатно и смотреть ютуб-видео без блокировок Induction Hob Repair Cracked Chipped Glass в качестве 4к (2к / 1080p)
У нас вы можете посмотреть бесплатно Induction Hob Repair Cracked Chipped Glass или скачать в максимальном доступном качестве, которое было загружено на ютуб. Для скачивания выберите вариант из формы ниже:
Загрузить музыку / рингтон Induction Hob Repair Cracked Chipped Glass в формате MP3:
Если кнопки скачивания не
загрузились
НАЖМИТЕ ЗДЕСЬ или обновите страницу
Если возникают проблемы со скачиванием, пожалуйста напишите в поддержку по адресу внизу
страницы.
Спасибо за использование сервиса savevideohd.ru
Induction Hob Repair Cracked Chipped Glass
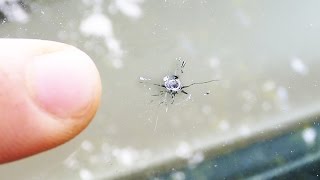
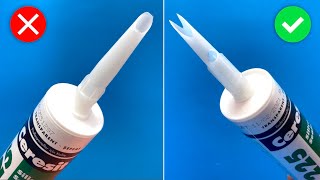
This video is on how to repair cracks and chips on a induction hob glass, something fell on to the edge of our hob so we now have two chips broken off the edge, hobs have adhesive foam underneath to act as a shock absorber for when you place heavy pans on it. This foam is actually holding the long section of our damage in place, so as a first stage I am going to use glass superglue to bond this section back in place. Make sure everything is as clean and as dry as you can get it, apply the glue into the length of the crack once done squeeze and hold it in place, the glue takes about 30 seconds to hold it its self, wipe off any excess glue with a slightly damp cloth, it takes up to 15 minutes to fully cure, I left it for over a hour. To fix the missing chip of glass, which is difficult to see on camera but basically most of the corner has broken away, we need to fill this with the epoxy, I purchased a kit from Fascinating Finishers their details are in the description, for clarity I have have no involvement with them other then as a happy customer. this is what you get in the kit, the two part epoxy, some gloss enamel paint and an application tool. First we need to mix the two part epoxy, take even measures of the black and grey putties and fully mix them until they are a uniform colour, I only needed a small amount but mixed more than I needed as it as easier. The epoxy takes about 10 minutes to start curing, so this is how long you have to work it, I am applying it with my finger which I dipped in water first for some lubrication, working it into the gaps, then using he straight edge on the tool, again dipped in water, I shaped the epoxy to match the exiting glass, the total curing time is 3 to 4 hours, I left it over night, you can clean the tools with water. The next stage is to apply the enamel paint, I masked off the areas I didn’t want to paint as the bottom edge is clear glass, trimming the section on the corner which is all epoxy filled it should also be clear but this can’t be helped, once I was happy with it I left it overnight. In the morning I got some 800 grit paper and with a small amount of water and gently polished the painted area to give a nice smooth gloss finish. Ebay Store https://www.ebay.co.uk/str/ppbsupplie... Website https://www.paintsrus.co.uk/1-x-ceram...
Comments


![Jak uzupełnić ubytek w szkle ? [odpryski, rysy, pęknięcia]](https://i.ytimg.com/vi/pDeQO-uoyO4/mqdefault.jpg)