Скачать с ютуб Lock Laces Boot Installation в хорошем качестве
Lock Laces Boot Installation
6 лет назад
Скачать бесплатно и смотреть ютуб-видео без блокировок Lock Laces Boot Installation в качестве 4к (2к / 1080p)
У нас вы можете посмотреть бесплатно Lock Laces Boot Installation или скачать в максимальном доступном качестве, которое было загружено на ютуб. Для скачивания выберите вариант из формы ниже:
Загрузить музыку / рингтон Lock Laces Boot Installation в формате MP3:
Если кнопки скачивания не
загрузились
НАЖМИТЕ ЗДЕСЬ или обновите страницу
Если возникают проблемы со скачиванием, пожалуйста напишите в поддержку по адресу внизу
страницы.
Спасибо за использование сервиса savevideohd.ru
Lock Laces Boot Installation
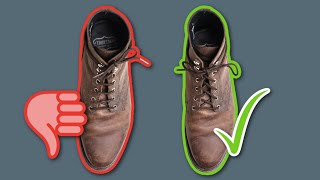
Step-by-step video instructions on how to install and use Lock Laces® Boot Laces. Follow us through this simple 5-minute installation guide and never tie your shoes again™! When you open your package of Lock Laces®, you should find the following: 2 48” Elastic Shoelaces 2 lock devices 2 cord clips If you do not have any boot laces, you can find them on our online store https://www.locklaces.com/collections... You will also need: 1 pair of shoes 1 pair of scissors Step 1: Replace Your Laces Put your feet in the shoes. We always recommend keeping your feet in the shoes throughout the installation process to ensure a proper fit. Now remove your old shoelaces and lace up with your new elastic shoelaces. Step 2: Lock-In Grab a lock device (the piece that says “LOCK LACES®” on it). Press down on the top of the lock to open the passages, and thread the ends of the laces through the passages with your other hand. Once the laces have been threaded through, press down on the top of the lock again and slide the lock to the tongue of the shoe. Release to secure the lock device into place. Step 3: Trim to Fit Before trimming the excess lace, make sure your laces fit snugly but are not too tight. We recommend wiggling your foot in the shoe or, better yet, standing up and walking around the room to make sure they are at a comfortable length. If your laces are too tight, slide the lock toward the toe of the shoe slightly, readjust the laces and repeat. Once your laces fit comfortably, use a pair of scissors to trim off some of the excess lace. We recommend cutting about 2-3 inches below the lock device to leave room for future adjustments. Step 4: Secure Finally, slide the cord clip onto the ends of the laces and align the trimmed ends with the teeth inside the cord clip. It is very important that you align the ends with the cord clip properly to ensure that the cord clip stays securely attached. Then, simply snap the cord clip together to secure. If you have any difficulty with your cord clip, please see our article on reopening and reinstalling your cord clip. Congratulations! Your Lock Laces® are now installed and guaranteed for the life of your boots. If you have any questions or experience any difficulty with installation, please contact us. We’re always happy to help. Make sure to connect with us! / locklaces / locklaces / locklaces
Comments


![[ASMR] Everyone Does It Wrong! - How to Clean Red Wings, Thorogood, Thursday Boots](https://i.ytimg.com/vi/3cWM7W9vMJ4/mqdefault.jpg)