Скачать с ютуб How to Wrap Custom 3D Tiger Wraps | A Step-By-Step Guide with Mud Hole Custom Tackle в хорошем качестве
How to Wrap Custom 3D Tiger Wraps | A Step-By-Step Guide with Mud Hole Custom Tackle
3 года назад
Скачать бесплатно и смотреть ютуб-видео без блокировок How to Wrap Custom 3D Tiger Wraps | A Step-By-Step Guide with Mud Hole Custom Tackle в качестве 4к (2к / 1080p)
У нас вы можете посмотреть бесплатно How to Wrap Custom 3D Tiger Wraps | A Step-By-Step Guide with Mud Hole Custom Tackle или скачать в максимальном доступном качестве, которое было загружено на ютуб. Для скачивания выберите вариант из формы ниже:
Загрузить музыку / рингтон How to Wrap Custom 3D Tiger Wraps | A Step-By-Step Guide with Mud Hole Custom Tackle в формате MP3:
Если кнопки скачивания не
загрузились
НАЖМИТЕ ЗДЕСЬ или обновите страницу
Если возникают проблемы со скачиванием, пожалуйста напишите в поддержку по адресу внизу
страницы.
Спасибо за использование сервиса savevideohd.ru
How to Wrap Custom 3D Tiger Wraps | A Step-By-Step Guide with Mud Hole Custom Tackle
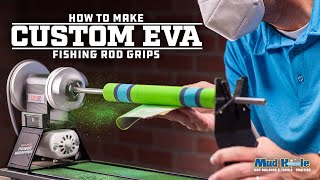
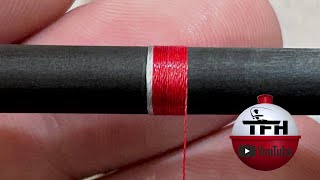
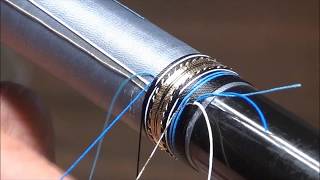
Learn how to wrap rod building's wildest decorative thread wrap - the tiger wrap - in just 6 simple steps with Mud Hole Custom Tackle. Choose your favorite thread colors and let your custom rod's tiger wrap really roar! 3-D tiger thread wraps can range from bold to subtle in design, but one thing is for sure, tiger wraps are one of the most unique patterns in rod building. Although doing your own tiger wrap may seem intimidating, with the help of Mud Hole’s resources, it’s actually easier than ever. Just follow this step-by-step tiger wrap guide! Let's start with the supplies: - Finishing Kit with Epoxy Mixer: https://www.mudhole.com/Finishing-Kit... - RDS Rod Dryer with Clutch: https://www.mudhole.com/RDS-Rod-Dryer... - CRB Thread Tool Combo: https://www.mudhole.com/Thread-Tool-C... - RBS 4-Spool Rolling Thread Carriage: https://www.mudhole.com/4-Spool-Rolli... - ProWrap 18-Spool ColorFast Thread Assortment Kit: https://www.mudhole.com/ProWrap-18-Sp... - Heat Gun: https://www.mudhole.com/Rod-Builders-... - Alcohol Burner: https://www.mudhole.com/Alcohol-Burner - Razor Blades: https://www.mudhole.com/Single-Edge-R... 1. Select Threads and Prepare Tools For the base thread pattern, pick (3) thread colors and make sure to keep them side-by-side while you wrap. 2. Wrap Base Thread Pattern Begin your wrap normally, make sure to keep your threads in order as you wrap. 3. Burnish and Epoxy Base Thread Wrap With the wrap in place, take your burnishing tool and run it back and forth over the base layer. Burnish the thread in shorter strokes from various angles to break up the uniform stripes. 4. Wrap and Burnish Outer Wrap Wrapping the outer layer is similar to the base layer, however, one striking difference is that the outer layer is wrapped the opposite direction of the base. 5. Heat Outer Threads and Remove Sacrificial Thread With the outer layer burnished to your liking, use a heat gun to apply a steady heat over the outer threads. This heat will act to set the outer wrap softly into the epoxied base layer, but without penetrating too deep into it. 6. Epoxy Wrap and Flame Finish With the sacrificial threads removed, you can now mix and apply your final epoxy finish. For the full breakdown of information from this video, read our blog here: https://blog.mudhole.com/6-simple-ste... ---------------------------------------------------------------------------------------------------------------------------------------- FOLLOW US: Website: http://www.mudhole.com/ Facebook: / mudhole Twitter: / mudholetackle Instagram: / mudholetackle FOLLOW OUR BLOG: Click Here: http://blog.mudhole.com/ SIGN UP FOR A LOCAL CLASS: Rod Building Classes: https://www.mudhole.com/Mud-Hole-Spec... CONTACT US: MUD HOLE CUSTOM TACKLE, INC. 2133 Component Loop Suite 1001 Oviedo, FL 32765 Local Telephone: (407) 447-7637 Toll-Free: (866) 790-7637 International Fax: (407) 447-7640
Comments