Скачать с ютуб Early Ford Banjo Assembly | Belly Tank Lakester Build Ep.25 в хорошем качестве
Early Ford Banjo Assembly | Belly Tank Lakester Build Ep.25
2 года назад
Скачать бесплатно и смотреть ютуб-видео без блокировок Early Ford Banjo Assembly | Belly Tank Lakester Build Ep.25 в качестве 4к (2к / 1080p)
У нас вы можете посмотреть бесплатно Early Ford Banjo Assembly | Belly Tank Lakester Build Ep.25 или скачать в максимальном доступном качестве, которое было загружено на ютуб. Для скачивания выберите вариант из формы ниже:
Загрузить музыку / рингтон Early Ford Banjo Assembly | Belly Tank Lakester Build Ep.25 в формате MP3:
Если кнопки скачивания не
загрузились
НАЖМИТЕ ЗДЕСЬ или обновите страницу
Если возникают проблемы со скачиванием, пожалуйста напишите в поддержку по адресу внизу
страницы.
Спасибо за использование сервиса savevideohd.ru
Early Ford Banjo Assembly | Belly Tank Lakester Build Ep.25
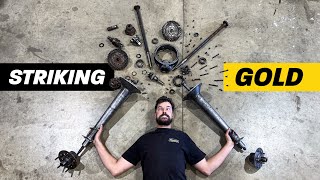
Assembling the banjo rear axle as a newbie to Early Fords. I cover my experience doing this for the first time in great detail including issues such as the: - differential bearing pre-load (using the different thicknesses of large axle housing gaskets) - pinion bearing preload with some home-made tools - the pinion input shaft backlash (by adjusting the thickness of the selected axle housing gaskets again) and using a dial gauge. I also make some more special tools to overcome a number of problems actually doing this, as you do. Adjustment of the axle housing gaskets to set both the diff bearing drag and then the pinion backlash can be really confusing and parts of it are mentioned only briefly in some manuals. The reason I was doing this was to replace the pinion and crown wheel to change my diff gear ratio. Also see the 2 previous videos which relate to the rear axle: Episode 24: Removing the right differential bearing from the crown wheel. • Early Ford Crown Wheel Removal | Bell... and Episode 23: I take apart the old pinion shaft and remove the bearings from it. • Early Ford: Changing pinion gear | Be... MY OWN CHECKLIST (NB: I am not an expert, I just made this myself from info I could get hold of) These notes made using information taken from Vern Tardel booklet, YouTube video comments sections and a copy of the original 1937 Ford manual. September 2022. 1) Fit PASSENGER SIDE axle housing to the banjo first. i.e. the axle housing on the RIGHT if you are standing at rear of the car looking forwards. 2) Start with THINNEST gasket between axle housing and banjo case. 3) Make sure the punch marks between housing and banjo case match up 4) Grease carrier bearings each side. 5) Insert whole assembled diff internals into the open side of the case. 6) Feed axle through the grease retaining seal at outer end of the axle housing as you insert the whole assembly. Additional tip at this stage from 1937 and 38 Ford original manual to get the Differential Side Bearings adjusted for play: (for 37 and 38 cars only – not sure why) 7) Bolt axle housings to banjo with diff contents already fitted, but with pinion assembly NOT fitted yet. Use an 0.008” to 0.010” gasket on each side to begin with. 8) ROTATE BOTH AXLES IN SAME DIRECTION BY HAND (Note: Can also do this by reaching into banjo case through where the pinion assembly would go, and rotate the crown wheel with your fingers. Again, should be no sideways play and should be a slight drag but still spin easily by hand). There should be a slight perceptible bearing drag BUT should still all be free enough to be turned by hand. 9) MAKE A RECORD OF THE THICKNESS OF GASKET ON EACH SIDE ONCE YOU HAVE GOT THIS RIGHT. 10) Take off left side axle housing 11) Remove diff contents and axles. 12) NOW heat end of the banjo case, insert the pinion assembly and get the 15 inch pounds resistance to turning set up right (NOT the pinion backlash, that comes later using the dial gauge): Inserting Pinion assembly: - Put pinion assembly back into the Banjo casing (nothing else in the casing). - Heat the case first until warm. - HOW WARM ???? NOTE: I found a reference regarding this that in the old days you could dip end of case in boiling water. So, if true then perhaps 70°C may be reasonable? I have never seen a video of anyone actually doing this, just heating with a blowtorch. - Once whole input shaft and its 2 big bearings are fully inserted (tap in with copper hammer or similar), tighten inner shaft nut until shaft just starts to turn at 15 Inch Pounds - Add locking ring then tighten second outer nut up against the inner nut - don't move inner nut - This means you need 2 spanners in theory, one to hold inner nut still while second one clamped up tight against it, once the 15 inch pounds turning torque has been set. - See my video where I set the 15 inch pounds. You need small torque wrench and home made adapter to hold input shaft splines still while you tighten the inner nut. I made my own spanner for the large nuts. 13) Now insert diff again from the left hand side. 14) Bolt left hand axle housing back on using same thickness gasket you used when setting the side bearing play earlier (may adjust this later). 15) BIG ONE: CHECK the backlash at the pinion. IF TOO MUCH THEN MAKE THE RIGHT HAND GASKET THINNER AND LEFT HAND GASKET THICKER BY SAME AMOUNT SO TOTAL OVERALL GASKET THICKNESS IS SAME AS WHEN YOU SET THE DIFF SIDE BEARING PLAY EARLIER. This brings crown wheel slightly closer to the pinion gear so when you check backlash again it will have reduced slightly. Do opposite if backlash is too small. Backlash at pinion should be between 0.003” and 0.008” (Vern Tardel booklet). Should be no more than 0.010” according to the original 37/38 manual. To measure backlash mount dial gauge against splines then see how much they turn when rocking pinion both ways while crown wheel is stationary. 16) Silicone (or just a dab of grease) in the gaskets and reassemble finally.
Comments