Скачать с ютуб Unity 2017 Cinemachine Clear Shot Camera Tutorial в хорошем качестве
Unity 2017 Cinemachine Clear Shot Camera Tutorial
7 лет назад
Скачать бесплатно и смотреть ютуб-видео без блокировок Unity 2017 Cinemachine Clear Shot Camera Tutorial в качестве 4к (2к / 1080p)
У нас вы можете посмотреть бесплатно Unity 2017 Cinemachine Clear Shot Camera Tutorial или скачать в максимальном доступном качестве, которое было загружено на ютуб. Для скачивания выберите вариант из формы ниже:
Загрузить музыку / рингтон Unity 2017 Cinemachine Clear Shot Camera Tutorial в формате MP3:
Если кнопки скачивания не
загрузились
НАЖМИТЕ ЗДЕСЬ или обновите страницу
Если возникают проблемы со скачиванием, пожалуйста напишите в поддержку по адресу внизу
страницы.
Спасибо за использование сервиса savevideohd.ru
Unity 2017 Cinemachine Clear Shot Camera Tutorial
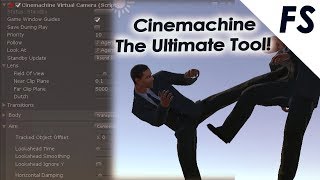
Learn how to use Cinemachine Clear Shot to always pick a valid shot for the subject of your game or animation. Download the assets for this tutorial here - https://www.dropbox.com/s/vc4draw6rg2... And open the project with Unity 2017.x. To begin, open the ‘ClearShot-Start’ Scene inside the _Tutorial folder. Learning Objectives - 1. How to add Clear Shot system to a scene 2. How to follow focus with Post Processing Stack and Cinemachine 3. How to make jump cuts 4. How to create variety using differing 'lenses' in the scene Recap of the key steps - 1. From the Top Menu - Cinemachine - 'Create ClearShot Virtual Camera' and assign 'Look At' of the Clear Shot component to Character's follow target child object. 2. The Main Camera gets a 'Cinemachine Brain' component added automatically 3. We add a 'Cinemachine Post FX' component to Main Camera to sync it with the Post Processing Stack. We assign the same Post Processing Profile asset to the component, and check 'Focus Tracks Target' to enable follow focus. 4. We ensure that the 'Clear Shot' GameObject also has a Cinemachine Collider component attached to make it aware of the 3D space. 5. To jump cut between cameras, we choose Default Blend 'Cut' on the Clear Shot component. Enjoy! Note: Apologies for the poor capture quality in the majority of this, the update to Screenflow set it's recording back to adaptive instead of lossless. oops.
Comments

![Unity 2017 - Dolly Track Cinemachine [C#][Tutorial]](https://i.ytimg.com/vi/IFeKFr4kOkc/mqdefault.jpg)


![Unity 2017 - Cinemachine - Virtual Camera [Tutorial][C#]](https://i.ytimg.com/vi/slDg-RDahxU/mqdefault.jpg)