Скачать с ютуб How To Screenshot On Mac / MacBook в хорошем качестве
How To Screenshot On Mac / MacBook
5 месяцев назад
How To Screenshot On Mac
Screenshot On Mac
Mac How To Screenshot
Mac Screenshot
How To Screenshot On MacBook
Screenshot On MacBook
MacBook How To Screenshot
MacBook Screenshot
How To Take Screenshots On Mac
Take Screenshots On Mac
Mac How To Take Screenshots
Mac Take Screenshots
How To Take Screenshots On MacBook
Take Screenshots On MacBook
MacBook How To Take Screenshots
MacBook Take Screenshots
Mac Screenshots
MacBook Screenshots
Screenshot On Mac &MacBook
Скачать бесплатно и смотреть ютуб-видео без блокировок How To Screenshot On Mac / MacBook в качестве 4к (2к / 1080p)
У нас вы можете посмотреть бесплатно How To Screenshot On Mac / MacBook или скачать в максимальном доступном качестве, которое было загружено на ютуб. Для скачивания выберите вариант из формы ниже:
Загрузить музыку / рингтон How To Screenshot On Mac / MacBook в формате MP3:
Если кнопки скачивания не
загрузились
НАЖМИТЕ ЗДЕСЬ или обновите страницу
Если возникают проблемы со скачиванием, пожалуйста напишите в поддержку по адресу внизу
страницы.
Спасибо за использование сервиса savevideohd.ru
How To Screenshot On Mac / MacBook
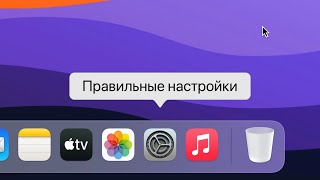
Learn how to screenshot on Mac and MacBook. Whether you're a seasoned Mac user or just getting started with your new MacBook, knowing how to capture your screen is an essential skill. Read: https://www.webproeducation.org/how-t... In this video, we'll walk you through all the different methods for taking screenshots on your Mac, from capturing the entire screen to selecting specific portions and even grabbing screenshots of specific windows. Whether you're documenting important information, sharing moments with friends, or troubleshooting technical issues, knowing how to capture what's on your screen is incredibly useful. Screenshot On Mac or MacBook: How To Screenshot On Mac: How To Screenshot On MacBook: Method 1: Capturing the Entire Screen Taking a screenshot of the entire screen on your Mac is straightforward and requires just a few simple steps: Step 1: Press Command + Shift + 3. This keyboard shortcut captures the entire screen and saves the screenshot as a file on your desktop by default. Step 2: Once you've taken the screenshot, you'll find the image saved as a .png file on your desktop, labeled with the date and time of capture. Method 2: Capturing a Selected Portion of the Screen If you only need to capture a specific portion of your screen, macOS offers a built-in tool for selecting the area you want to screenshot: Step 1: Press Command + Shift + 4. This keyboard shortcut turns your cursor into a crosshair. Step 2: Select the Screenshot area. Click and drag to select the portion of the screen you want to capture. Release the mouse button to take the screenshot. Step 3: Similar to capturing the entire screen, the selected portion will be saved as a .png file on your desktop. Method 3: Capturing Specific Windows Sometimes, you may want to capture a screenshot of a specific window or application without including the entire screen. macOS provides a convenient way to do this: Step 1: Press Command + Shift + 4, then press Spacebar. This keyboard shortcut changes the crosshair cursor into a camera icon. Step 2: Move the camera icon over the window or application you want to capture and click once. The screenshot will include only the selected window or application. Step 3: Like the previous methods, the screenshot will be saved as a .png file on your desktop. Samsung Galaxy S24 Ultra (Factory Unlocked) : https://amzn.to/3UprMJi Samsung Galaxy A25 5G, Factory Unlocked GSM : https://amzn.to/3wKYjQe SAMSUNG Galaxy FIT 3 : https://amzn.to/3IxyGVK Samsung Galaxy A14 (Factory Unlocked) : https://amzn.to/42qe7TO Samsung Galaxy A15 : https://amzn.to/48Mas5A Samsung Galaxy A05 (Unlocked) : https://amzn.to/3uaivK7 #mac #recoverymode #macos #imac #macmini #applemac #macbook #macbooktips #macbookpro #macbookair #apple #macbookaccessories #macos #applemacbook #applemacbookpro #applemacbookair #techtutorial #techtutorials ----My Gear for YouTube videos---- Main Camera (iPhone 13 pro): https://amzn.to/3GZztve Tripod: https://amzn.to/35acqRa Cell Phone Tripod Adapter: https://amzn.to/3v3wFuI Lights: https://amzn.to/3vkoGK7 As full disclosure, I use affiliate links on this channel and purchasing through these links earns me a small commission. The price you pay will be the same! Website: https://www.webproeducation.org Facebook: / webproeducation.org Twitter: / webpro_e Instagram: / webproeducation
Comments