Скачать с ютуб Traditional Japanning and Restoring 130-year-old Bolt Cutters в хорошем качестве
Traditional Japanning and Restoring 130-year-old Bolt Cutters
1 год назад
Скачать бесплатно и смотреть ютуб-видео без блокировок Traditional Japanning and Restoring 130-year-old Bolt Cutters в качестве 4к (2к / 1080p)
У нас вы можете посмотреть бесплатно Traditional Japanning and Restoring 130-year-old Bolt Cutters или скачать в максимальном доступном качестве, которое было загружено на ютуб. Для скачивания выберите вариант из формы ниже:
Загрузить музыку / рингтон Traditional Japanning and Restoring 130-year-old Bolt Cutters в формате MP3:
Если кнопки скачивания не
загрузились
НАЖМИТЕ ЗДЕСЬ или обновите страницу
Если возникают проблемы со скачиванием, пожалуйста напишите в поддержку по адресу внизу
страницы.
Спасибо за использование сервиса savevideohd.ru
Traditional Japanning and Restoring 130-year-old Bolt Cutters
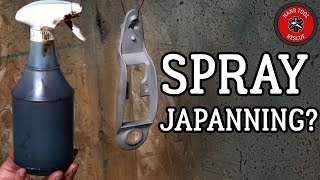
These bolt cutters (actually called bolt ‘clippers’ in the original patent) were patented in October of 1892 by Henry K. Porter himself (patent # 484,670). It’s unclear exactly when this exact pair was made, but signs point to at least the early 1900’s. I found these for $5 at a flea market with several non-original parts and the bumpers missing. In the early HK Porter factories, these bolt cutters were japanned – a lacquer and asphaltum-based finish that was baked to provide an incredibly durable coating. It was a cheap and effective way to protect the tools from damage and rusting as well as giving them a clean, high-gloss finish. In fact, Ford’s first Model T cars were painted using a similar japanning technique. I carefully examined every single piece of the tool to determine which pieces contained japanning so I could accurately reproduce what a pair of these bolt cutters looked like fresh from the factory floor. CATALYST RESTORATIONS MERCH SHOP: https://my-store-cae4fb.creator-sprin... ___________Japanning Tips and Resources _______________ I followed @HandToolRescue 's formula for mixing a batch of japanning ( • Best Japanning Recipe ): 50% Turpentine (~4 TBsp) 30% Asphaltum/Gilsonite (~4 TBsp, if you don’t pack it down in each spoonful) 20% Boiled Linseed Oil (~2 TBsp) Powdered Asphaltum: https://www.renaissancegraphics.com/p... After mixing, let it sit untouched for at least 24 hours before using. Baking: Note: Do not use your home cooking oven! Buy a cheap toaster oven at a thrift store. All ovens have different temperature profiles – test on a piece of scrap steel first. My oven heats up very quickly, so I had to reduce the temperatures from what @Handtoolrescue uses in his oven. Heating up a part too quickly causes bubbles when a “skin” forms on the japanning and the turpentine has no where to evaporate to. Slow cool to room temperature between each baking step. 1. 150F for 1 hour 2. 250F for 1 hour 3. 300F for 1 hour 4. Apply second coat if necessary and repeat steps 1-3 5. 350F for 30 minutes 6. 400F for 30 minutes ______________ Timestamps _______________ 0:00 – 1:12 Overview 1:13 – 5:15 Disassembly 5:16 – 8:06 Rust Removal Small Parts 8:07 – 8:46 Threading and Tapping Parts 8:47 – 11:44 Electrolysis/Rust Removal Large Parts 11:45 – 12:15 Resurfacing Jaws 12:23 – 15:49 Japanning 15:50 – 16:43 Making New Pins and Bumpers 16:44 – 20:52 Reassembly 20:53 – 21:21 Jaw Adjustments 21:22 – 21:38 Final Touchups 21:39 – 22:30 Before/After 22:31 – 22:41 Testing 22:42 – 22:56 MERCH and Thank You _________ Tips for restoring your own HK Porter bolt cutters ________ Start by removing as much of the hardware as you can without grinding off any rivets. WD-40 can help loosen up stuck hardware. Keep all the hardware from the left-hand side, right-hand side, and cutting jaws in separate containers throughout the cleaning and restoration process to make sure everything goes back exactly where it came from. Then, you can decide if you want to remove the rivets on the upper handle portion – if you’re careful with cleaning and masking, you can probably get away with painting or japanning without having to remove them and make new ones. Cleaning and rust removal can be done several ways. I prefer Evapo-Rust or electrolysis, but a cheaper solution is plain old vinegar. Soak for a day, then scrub with a steel wire brush and your parts will be cleaned to bare metal! For paint or japanning surface prep, be sure to wipe all the parts with a degreasing solution or acetone and mask off/do not paint any areas with mechanical motion – the paint layers will cause interference or rubbing. When you get to cleaning up the jaws, be extremely careful not to grind too hard or too long on the jaws, as you’ll heat them up and ruin the hardened condition of the blades. Start by cleaning up all the edges just enough to remove any chipped edges. Then, reshape the jaw tips by following the existing slope of the jaw and then beveling just near the tip. The goal is not to create a sharp tip, but a sharp-ish blunted tip to maximize the cutting power without damaging the jaws on every cut. To replace the rubber bumpers, I bought some rubber stoppers from Home Depot for $1.50 and cut them to size. The original bumpers were probably leather, so that could be used too. After everything is painted or japanned, reverse your disassembly to get the final product! Be sure to oil the joints regularly. You can also paint the raised letters on the handles a different color to stand out from the paint or japanning, but they did not originally come like that from the factory. Electrolysis tutorial: • Infinite Rust Removal? DIY Electrolys... __________ Social Media _________ Instagram: @catalyst_restorations #restoration #antique #boltcutter
Comments