Скачать с ютуб How to Polish a Scratched or Faded Head Unit Radio Screen в хорошем качестве
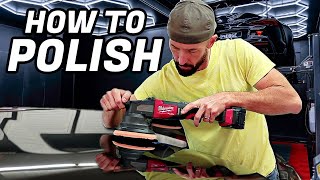
How to Polish a Scratched or Faded Head Unit Radio Screen
3 года назад
Скачать бесплатно и смотреть ютуб-видео без блокировок How to Polish a Scratched or Faded Head Unit Radio Screen в качестве 4к (2к / 1080p)
У нас вы можете посмотреть бесплатно How to Polish a Scratched or Faded Head Unit Radio Screen или скачать в максимальном доступном качестве, которое было загружено на ютуб. Для скачивания выберите вариант из формы ниже:
Загрузить музыку / рингтон How to Polish a Scratched or Faded Head Unit Radio Screen в формате MP3:
Если кнопки скачивания не
загрузились
НАЖМИТЕ ЗДЕСЬ или обновите страницу
Если возникают проблемы со скачиванием, пожалуйста напишите в поддержку по адресу внизу
страницы.
Спасибо за использование сервиса savevideohd.ru
How to Polish a Scratched or Faded Head Unit Radio Screen
How to restore a scratched, scuffed, or dull radio display. This involves polishing the plastic surface, for this I’m using an aftermarket head unit display. This can be applied to stock radios, along with other clear plastic glossy overlays found throughout a video such as a clock, shifter display, gauge cluster, etc. This cannot be applied to touch screens or screens with an anti-glare coating, it can cause damage. #detailing #Lithium Inner Space: https://lithiumautocare.com/products/... Website: http://4diyers.com Patreon: / 4diyers Facebook: / 4diyers Twitter: / 4diyers Instagram: / 4diyers Tumblr: / 4diyers Pintrest: / 4diyers Tools/Supplies Needed: -Meguiars M205 polish -Lithium Inner Space -microfiber clothes -soft cloth -tape Chapters: 00:00 Intro 00:34 Preparation 01:19 Removing Surface Damage 03:30 Inspection 03:50 Final Protection 04:40 Before/After 05:00 Another Example Procedure: The screen on the head unit does have some light scratches and scuffs, both on the screen and buttons. Ensure the display is clean and free of any contaminants when may cause damage during the polishing process. We will be working with polish, for the largest area, using a little more polishing compound may be needed so it’s a good idea to cover up any buttons with tape. The tape will also cover some of the text labels. These labels are printed on the outside surface of the screen, be extremely careful with them. I’m using #Meguiars M205 ultra finishing polish, this is only plastic so I would not recommend anything course. Mix the polish accordingly, then apply it to a soft cloth. Only a drop is needed as it’s a small area and we won’t be left with excessive build-up on the display where it can be hard to clean or it’ll get stuck in any crevices such as around other buttons. Use your finger to work it into the cloth. Then work the polish into the surface. Light pressure is only needed, don’t become too aggressive where it can cause damage to the display. As mentioned earlier, this only applies to glossy overlays. If your display has a satin finish, this process will damage it, just like satin paint. Apply more polish if need to the cloth, use your finger to work it into the cloth before polishing the screen. This will remove any light imperfections, if you have a scratch that you can feel with your nail, it can be lightened up with this method, but it cannot be completely removed. Inspect the area as needed. Working around the volume knob can be tough, you’ll have to work in a variety of directions to work around more complicated areas. Once done with the main area, then remove the tape. While the button surfaces are not clear, they do have a similar black glossy plastic finish so I can use the same method. With the surface of the cloth being moist with polish, lightly go over these areas. Do not over-saturate with polish, this can cause the polish to built up around the buttons making it difficult to clean afterward. The clear door for the USB and auxiliary port has is clear plastic and received the same treatment. The chrome trim portions did have some scratching as well, I did go over the area lightly and they were cleaned up too. And the buttons on the other side of the volume knob received the same treatment too. Once satisfied, finished up with a clean soft microfiber cloth for a final polish and to remove any polishing residue. The fibers will help to clean up any residue around the buttons. If you have any excessive polish build-up in any cracks, a soft detailing brush may be needed. The one label next to the volume knob has been slightly removed. When this happens, unfortunately, there is no way to replace them. The clarity has greatly improved in the readout display area along with the overall shine. As a final step to protect the bare plastic from UV deterioration and repel any dust, use a plastic interior detailing solution. Here I’m using Inner Space from Lithium. Spray this on a microfibre cloth and apply it to the surface. Once it’s been evenly applied to the surface, fold over the microfibre cloth to a dry area, then polish the leftover residue. With this being a glossy surface, you’ll be left with a clean gloss finish. There is a big improvement in the display area readout, along with the surrounding black glossy areas. Even after turning on the head unit, there was a big improvement in the illumination clarity as well. Thank you to all those who watch my videos and support my content. Don't forget to subscribe to my channel for future tutorial videos and like my video if you found it helpful. New videos are always being uploaded every week! © 4DIYers 2013 All Rights Reserved No part of this video or any of its contents may be reproduced, copied, modified or adapted, without the prior written consent of the author.
Comments