Скачать с ютуб How to Replace the Control Arm (Passenger Side) on a 2010 Subaru Outback в хорошем качестве
How to Replace the Control Arm (Passenger Side) on a 2010 Subaru Outback
3 года назад
Скачать бесплатно и смотреть ютуб-видео без блокировок How to Replace the Control Arm (Passenger Side) on a 2010 Subaru Outback в качестве 4к (2к / 1080p)
У нас вы можете посмотреть бесплатно How to Replace the Control Arm (Passenger Side) on a 2010 Subaru Outback или скачать в максимальном доступном качестве, которое было загружено на ютуб. Для скачивания выберите вариант из формы ниже:
Загрузить музыку / рингтон How to Replace the Control Arm (Passenger Side) on a 2010 Subaru Outback в формате MP3:
Если кнопки скачивания не
загрузились
НАЖМИТЕ ЗДЕСЬ или обновите страницу
Если возникают проблемы со скачиванием, пожалуйста напишите в поддержку по адресу внизу
страницы.
Спасибо за использование сервиса savevideohd.ru
How to Replace the Control Arm (Passenger Side) on a 2010 Subaru Outback
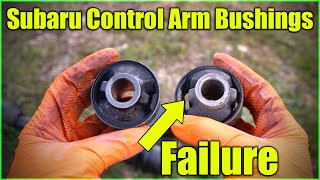
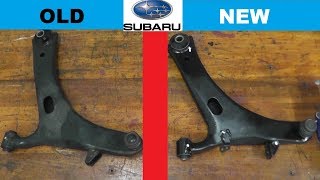
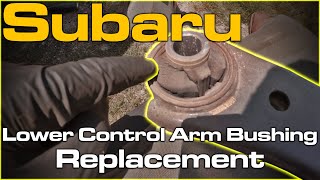
Easy to follow step-by-step guide on how to replace the (passenger/right side control arm on your car. If you have any questions, drop them in the comments below and I'll get back to you. Tools Used: -Pry bar. -Ball peen hammer. -3lbs hammer. -Punch. -Brass punch. -1/2in impact. -32mm socket. -19mm socket. -17mm flex socket. -17mm standard socket. -1/2in extension. -14mm socket. -3/8in extension. -14mm socket. -19mm wrench. -Two different 17mm wrench. -Two different length 3/8in ratchet. -6mm alen wrench socket. -Water pump pliers. -A block of wood. -Anti seize. Part Used (front passenger/right side): -Control arm w/ball joint (brand used: Autozone part# CA12642 [CA126411 LEFT]). As always make sure you subscribe, give me the thumbs up, and share with your friends & family! Thanks for watching, aloha!
Comments