Скачать с ютуб DIY Guide: Extending Your NOCO Genius GenPro Charging Cable в хорошем качестве
DIY Guide: Extending Your NOCO Genius GenPro Charging Cable
4 месяца назад
Скачать бесплатно и смотреть ютуб-видео без блокировок DIY Guide: Extending Your NOCO Genius GenPro Charging Cable в качестве 4к (2к / 1080p)
У нас вы можете посмотреть бесплатно DIY Guide: Extending Your NOCO Genius GenPro Charging Cable или скачать в максимальном доступном качестве, которое было загружено на ютуб. Для скачивания выберите вариант из формы ниже:
Загрузить музыку / рингтон DIY Guide: Extending Your NOCO Genius GenPro Charging Cable в формате MP3:
Если кнопки скачивания не
загрузились
НАЖМИТЕ ЗДЕСЬ или обновите страницу
Если возникают проблемы со скачиванием, пожалуйста напишите в поддержку по адресу внизу
страницы.
Спасибо за использование сервиса savevideohd.ru
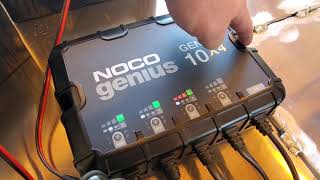
DIY Guide: Extending Your NOCO Genius GenPro Charging Cable
NOCO Genius GENPRO10X3: https://amzn.to/3V84DLo Fiberglass Wire Puller: https://amzn.to/3XZkoE0 Wire Stripper: https://amzn.to/4c2g399 Wire: https://amzn.to/3wRB9YB 10 AWG Terminals: https://amzn.to/4axjVh0 Solder Seal Wire Connectors: https://amzn.to/4anB6S1 Heat Gun: Heat Gun: https://amzn.to/3aPQtaM Side Cutter: https://amzn.to/3K9c0vF Sony ZV-1: https://amzn.to/3QIEKwN M3 Gimbal: https://amzn.to/458cxXb GoPro Hero: https://amzn.to/2NusMv0 DJI Wireless Microphone: https://amzn.to/3vSrdeh ULANZI Case w Cold Shoe: https://amzn.to/3kLXldf Tripod: https://amzn.to/3a0oF1u GoPro Quick Release Mounts: https://amzn.to/2L2zFTu GoPro Quick Release Buckle: https://amzn.to/3ocyp1h In this video, I'm going to show how to extend the battery charging cable on your NOCO Genius GenPro. We'll start by going over everything you need to get started, then I'll guide you through the step-by-step process of extending your charging cables. After contacting NOCO, I learned that it's possible to extend the battery charging cables on your onboard GenPro Series battery charger. NOCO informed me that you can add an additional 10 feet using 14 AWG wire by snipping the wires after the inline fuses. Here's what you'll need: 14 AWG stranded copper wire Solder seal wire connectors (with built-in shrink tubing and solder) Battery terminals Wire puller Wire snips Wire crimper Wire stripper Heat gun I'll also provide links to all these products in the description for your convenience. Steps: Run the wire puller from the battery under the gunwale to the front, underneath the console. Tape the positive and negative cables securely to the wire puller and feed it through. Strip about a half inch of wire from all ends and use solder seal connectors to join the wires. Use the heat gun to shrink the tubing and melt the solder. Repeat for both positive and negative cables. Connect the extended wires to the battery terminals. Program the third bank on your NOCO Genius GenPro charger according to your battery type (e.g., lead acid). After extending the charging cables and connecting everything, you can charge your batteries and get back on the water. For a detailed guide on installing and programming the NOCO Genius GenPro, check out my other video linked here: • NOCO Genius GenPro 10x3 Onboard Boat ... If you have any questions, leave them in the comments below. Thanks for watching and remember to get outdoors! Don't forget to like, comment, and subscribe to our channel for more exciting content like this. Let's get started! As an Amazon Associate, I may earn from qualifying purchases. At no extra cost to you, your purchases help support this channel. Thank you! #NOCOGenius #BatteryCharger #Boat
Comments