Скачать с ютуб DIY Tilting Solar Mount Build! в хорошем качестве
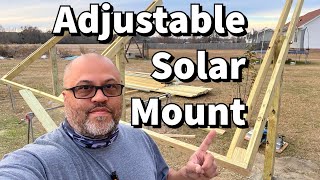
DIY Tilting Solar Mount Build!
1 год назад
Скачать бесплатно и смотреть ютуб-видео без блокировок DIY Tilting Solar Mount Build! в качестве 4к (2к / 1080p)
У нас вы можете посмотреть бесплатно DIY Tilting Solar Mount Build! или скачать в максимальном доступном качестве, которое было загружено на ютуб. Для скачивания выберите вариант из формы ниже:
Загрузить музыку / рингтон DIY Tilting Solar Mount Build! в формате MP3:
Если кнопки скачивания не
загрузились
НАЖМИТЕ ЗДЕСЬ или обновите страницу
Если возникают проблемы со скачиванием, пожалуйста напишите в поддержку по адресу внизу
страницы.
Спасибо за использование сервиса savevideohd.ru
DIY Tilting Solar Mount Build!
In this video i show you how i put my tilting mount together. Stay tuned for more solar stuff coming. Check these guys out!! And don't forget to sub and like!! @AveRage_Joe @OffGridGarageAustralia Step-by-Step Build Instructions for DIY Tilting Solar Mount: Prepare the Poles: Use 4x6 poles buried 3-4 feet in the ground. Ensure they are all straight and level to the top of each other. Use high-strength concrete to stabilize them. Install Bolts: Once the poles are in place, measure down two inches from the top of the post and put a center mark on that two-inch line. Drill a 1-inch hole, and insert an 8-inch-long 7/8 bolt. Repeat for each pole. Build the Frame: Cut treated 2x6 boards into 9-foot lengths. Use a saw to reverse crown the boards, so the high side is down in the center. Put two washers on the bolt, then slide the board onto the bolts. Add another washer to keep the board from locking to the wood. Repeat the process for the next board. Use blocks cut from 12-foot pieces to lock the boards together. Put two screws on each side and screw them together. Build the Rest of the Frame: Divide the nine-foot boards into three-foot sections, and measure and cut pieces for the inside blocks. Screw these in place to support the 2x6 boards. Mount the Solar Panels: Install hangers to hold the solar panels. Measure the outside edge to the center of the next block to ensure they are all the same length. Screw on the faceboard, then attach the cap board. Test the Mount: The completed mount can hold up to 12 large solar panels and cost around $360 to build. The mount can be easily tilted up and down, and it can be moved around to adjust for seasonal changes. Thank you to James Edwards for the write up!!!
Comments