Скачать с ютуб Rhino-Rack | Ford Ranger P703 Backbone and Pioneer Installation в хорошем качестве
Rhino-Rack | Ford Ranger P703 Backbone and Pioneer Installation
2 года назад
Скачать бесплатно и смотреть ютуб-видео без блокировок Rhino-Rack | Ford Ranger P703 Backbone and Pioneer Installation в качестве 4к (2к / 1080p)
У нас вы можете посмотреть бесплатно Rhino-Rack | Ford Ranger P703 Backbone and Pioneer Installation или скачать в максимальном доступном качестве, которое было загружено на ютуб. Для скачивания выберите вариант из формы ниже:
Загрузить музыку / рингтон Rhino-Rack | Ford Ranger P703 Backbone and Pioneer Installation в формате MP3:
Если кнопки скачивания не
загрузились
НАЖМИТЕ ЗДЕСЬ или обновите страницу
Если возникают проблемы со скачиванием, пожалуйста напишите в поддержку по адресу внизу
страницы.
Спасибо за использование сервиса savevideohd.ru
Rhino-Rack | Ford Ranger P703 Backbone and Pioneer Installation
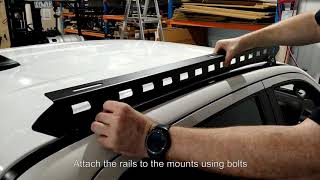
The Rhino-Rack Backbone, designed to complement the much-anticipated next gen Ford Ranger, is finally here! ‘Built Rhino Tough’ and vigorously tested to meet the needs of any adventurer, the Rhino-Rack Backbone (RFRB3) is the most highly anticipated fit for the new P703 Ford Ranger. Paired with the Pioneer Platform (52100), this stylish duo is compatible with the XL, XLS, XLT, Sport and Wildtrak variants. Functionality uncompromised, this combination utilises 100% of the vehicle’s roof to maximise load and storage space, ready for any overlanding adventure. The RFRB3 requires no drilling, uses pre-existing factory roof mounting points, has concealed fixing for seamless transition between product and vehicle, and comes with a comprehensive step-by-step installation guide - if you choose to install it yourself. Learn More: https://www.rhinorack.com/en-au/produ... View all Ford Ranger fits: https://www.rhinorack.com/en-au/vehic... Follow us on social media! Instagram: / rhinorackau Facebook: / rhinorack TIMESTAMPS 00:00 Ford Ranger P703 Backbone Install 00:21 Removing interior of vehicle 00:40 Phase 1: Roof Preparation 00:46 Step 1: Removing pillar grab handles 01:00 Step 2: Removing roof grab handles 01:10 Step 3: Removing front visors 01:19 Step 4: Removing visor roof clips 01:25 Step 5: Removing rear ceiling hooks 01:34 Step 6: Removing B-pillar seatbelts 01:44 Step 7: Removing rubber seals 01:49 Step 8: Collapse rear seats 01:55 Step 9: Removing seatbelt caps 02:02 Step 10: Removing middle seatbelt pillar 02:07 Step 11: Removing rubber stoppers 02:14 Step 12: Removing rear panel 02:19 Step 13: Loosen lower C-pillar covers 02:25 Step 14: Removing upper C-pillar covers 02:30 Step 15: Removing B-pillar covers 02:38 Step 16: Removing A-pillar covers 02:49 Step 17: Add tape above rear vision mirror 02:59 Step 18: Removing roof centre console 03:17 Step 19: Disconnecting wires from centre console 03:28 Step 20: Remove screws from centre console 03:34 Step 21: Lowering roof lining 03:51 Phase 2: Backbone Installation 04:10 Raised Rail removal 04:15 - 04:33 Bare roof ditch rubber removal 07:31 Phase 3: Platform Installation
Comments