Скачать с ютуб Shirt Drafting using the simplest Method step by step guide. в хорошем качестве
Shirt Drafting using the simplest Method step by step guide.
6 месяцев назад
Скачать бесплатно и смотреть ютуб-видео без блокировок Shirt Drafting using the simplest Method step by step guide. в качестве 4к (2к / 1080p)
У нас вы можете посмотреть бесплатно Shirt Drafting using the simplest Method step by step guide. или скачать в максимальном доступном качестве, которое было загружено на ютуб. Для скачивания выберите вариант из формы ниже:
Загрузить музыку / рингтон Shirt Drafting using the simplest Method step by step guide. в формате MP3:
Если кнопки скачивания не
загрузились
НАЖМИТЕ ЗДЕСЬ или обновите страницу
Если возникают проблемы со скачиванием, пожалуйста напишите в поддержку по адресу внизу
страницы.
Спасибо за использование сервиса savevideohd.ru
Shirt Drafting using the simplest Method step by step guide.
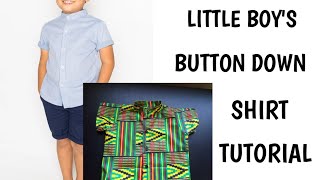
Shirt Drafting using the simplest Method step by step guide. A Step by Step Guide on how to cut a Perfect vintage shirt for men. #viral #fashion #diy #male #nigeria #reels #video #contentcreator #shirts #vintage here's a step-by-step guide using simple keywords for drafting a shirt: Measurements: Take body measurements including chest, waist, hip, shoulder width, sleeve length, and desired shirt length. Pattern: Draw a rectangle representing the front and back of the shirt, with a width equal to half the chest measurement plus ease, and a length equal to the desired shirt length plus seam allowance. Neckline: Mark the center of the top edge for the neckline. Draw a curve for the neckline based on desired style (round, V-neck, etc.). Shoulder and Armhole: From the neckline point, measure down the shoulder width and mark. Draw a straight line down to the desired armhole depth. Armhole Curve: At the end of the shoulder line, measure half the shoulder to chest measurement and mark. Curve the armhole from this point to the bottom corner of the pattern. Side Seam: Connect the bottom corners of the pattern with a slightly curved line for the side seam. Front Neckline: For a button-up shirt, draw a line perpendicular to the neckline at desired button placement, and extend downwards for button placket. Back Neckline: For the back piece, draw a slightly deeper neckline compared to the front. Sleeve: Draw a rectangle for the sleeve with a width equal to half the bicep measurement plus ease, and a length equal to desired sleeve length plus seam allowance. Sleeve Cap: At the top of the sleeve, mark points at one-third and two-thirds of the sleeve width. Curve the sleeve cap using these points as guides. Sleeve Seam: Connect the bottom corners of the sleeve with a slightly curved line for the sleeve seam. Finishing: Add seam allowances (typically ½ inch) around all edges of the pattern. Cut out the pattern pieces and use them to cut fabric for sewing. Remember, this is a basic guide and may need adjustments based on individual measurements and preferences. Always test the pattern with muslin or scrap fabric before cutting into the final fabric. Shirt Drafting using the simplest Method step by step guide.,Shirt Drafting using the simplest Method,shirt drafting using the simplest method step by step guide.,pattern drafting,how to sew,sewing,shirt drafting using the simplest method,Shirt Drafting,fashion,pattern making,shirt cutting and stitching,the simplest Method step by step guide.,the simplest method step by step guide.,fashion trends,2024 fashion trends,sewing tutorial,beginner sewing,t-shirt design ShirtDrafting PatternMaking SewingBasics DIYFashion Tailoring GarmentConstruction FashionDesign HandmadeShirt Crafting ApparelDesign PatternDrafting SewingTutorial ClothingPattern SimpleSewing ShirtPattern GarmentPattern SewingProject DIYClothing FashionCraft CreativeStitching
Comments


![[ DETAILED] HOW TO DRAFT A BASIC SLEEVE BLOCK | EASY |PATTERNYOURSTYLE #sleevesdesign #patternmaking](https://i.ytimg.com/vi/VkTWcVSt1hU/mqdefault.jpg)