Скачать с ютуб How to install a PID on a Gaggia Classic Pro - DIY, cheap and good looking! в хорошем качестве
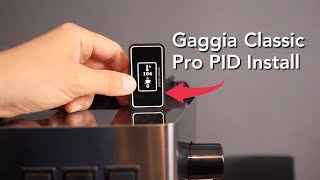
How to install a PID on a Gaggia Classic Pro - DIY, cheap and good looking!
3 года назад
Скачать бесплатно и смотреть ютуб-видео без блокировок How to install a PID on a Gaggia Classic Pro - DIY, cheap and good looking! в качестве 4к (2к / 1080p)
У нас вы можете посмотреть бесплатно How to install a PID on a Gaggia Classic Pro - DIY, cheap and good looking! или скачать в максимальном доступном качестве, которое было загружено на ютуб. Для скачивания выберите вариант из формы ниже:
Загрузить музыку / рингтон How to install a PID on a Gaggia Classic Pro - DIY, cheap and good looking! в формате MP3:
Если кнопки скачивания не
загрузились
НАЖМИТЕ ЗДЕСЬ или обновите страницу
Если возникают проблемы со скачиванием, пожалуйста напишите в поддержку по адресу внизу
страницы.
Спасибо за использование сервиса savevideohd.ru
How to install a PID on a Gaggia Classic Pro - DIY, cheap and good looking!
In this video I'll install a PID unit on my Gaggia Classic Pro. As you'll see, it isn't that complicated and really takes the humble Classic to a higher level! 00:24 - Introduction 02:10 - A list of parts 05:58 - What NOT to do first 06:50 - Disassembling the machine 09:27 - Installing the temperature sensor 10:55 - Making connections 15:10 - Installing the solid state relay 18:44 - Tidying up the cables 20:01 - Connecting the PID 22:45 - Cost summary 24:15 - Autotuning 24:51 - Was it worth it? In contrast to the most popular solutions in the market, my PID will sit at the back of the machine and be no bigger than the unit itself. It will also be completely reversible and much cheaper than ready made solutions! This clip can also be treated as a how-to instructional video for anyone wishing to go the DIY way. Please note that I'm only using the PID to control the brew temperature. Steaming will remain controlled by the Gaggia's stock thermostat. It just overrides the PID and heats up the boiler to the factory preset steaming temperature. Links to parts [None are affiliate links] https://bit.ly/3gL9c95 - XMT 7100 PID unit https://bit.ly/3xgAHhc - PT100 precision temperature sensor https://bit.ly/3wnZD6l - Fotek solid state relay 25Amp https://amzn.to/3xamPFg - cable sleeve (different widths available) https://amzn.to/2RSAge0 - magnetic tape (example link, different widths available) https://www.thingiverse.com/thing:367... - 3D printed case file (print this locally) https://bit.ly/3pPphP0 - the unattractive aluminium enclosure if you wish to go that route You will also need: 1. About 60cm of SiHF 2x0,5mm2 cable connecting the PID do the SSR 2. About 60cm of 1mm2 (17AWG) cable to deliver power from the Gaggia to the PID 3. About 60cm of FLRY 1.5mm2 cable to connect the SSR to the Gaggia 4. Ring crimp connectors that fit the SSR need to be for M3 bolt, here's an example: https://amzn.to/3xcWBCq 5. Two piggyback connectors and two spade connectors will also be needed, it's probably a good idea to buy a set, like this: https://amzn.to/3qOx9Rq or find a shop where you can buy those per piece. The video that turned me into a home espresso fanatic, by the ever brilliant James Hoffmann: • The Best Cheap Espresso Setup (£250 B... If you don't want to go the PID way just yet, here's an excellent video how to get the most out of your Gaggia Classic Pro on The Majestic Bean Channel: • How To Get The Best Results On The Ga... Wonderful video by Damian Witoński on how to mod your XMT7100 to control two SSRs and therefore also the steaming temperature: • PID XMT7100 dual SSR mod / Modyfikacj... Music credits: "Montauk Point" Kevin MacLeod (incompetech.com) Licensed under Creative Commons: By Attribution 4.0 License http://creativecommons.org/licenses/b... "Perspectives" Kevin MacLeod (incompetech.com) Licensed under Creative Commons: By Attribution 4.0 License http://creativecommons.org/licenses/b...
Comments