Скачать с ютуб How to create worksheets in PowerPoint (Tips & tricks) в хорошем качестве
How to create worksheets in PowerPoint (Tips & tricks)
3 года назад
teacher tools online
teacher tools
teaching tools
teachers tools
tool for teacher
class tools
tool for teaching
classroom materials
class room resources
instructional materials
tools for teaching
tools for teachers
class room materials
class room teaching
teaching aids
teacher's tools
interactive class room
technological tools for teachers
technology tools for teaching
tool for educators
education tools
educational tools
quizlet
worksheets
powerpoint
Скачать бесплатно и смотреть ютуб-видео без блокировок How to create worksheets in PowerPoint (Tips & tricks) в качестве 4к (2к / 1080p)
У нас вы можете посмотреть бесплатно How to create worksheets in PowerPoint (Tips & tricks) или скачать в максимальном доступном качестве, которое было загружено на ютуб. Для скачивания выберите вариант из формы ниже:
Загрузить музыку / рингтон How to create worksheets in PowerPoint (Tips & tricks) в формате MP3:
Если кнопки скачивания не
загрузились
НАЖМИТЕ ЗДЕСЬ или обновите страницу
Если возникают проблемы со скачиванием, пожалуйста напишите в поддержку по адресу внизу
страницы.
Спасибо за использование сервиса savevideohd.ru
How to create worksheets in PowerPoint (Tips & tricks)
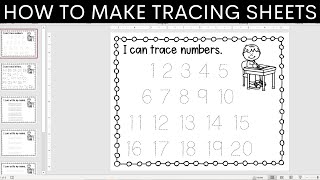
Have you ever wanted to create your own customized math worksheets in Powerpoint? Quizlet contributor Rory Yakubov shows you how she builds them quickly and easily in Microsoft PowerPoint. You won’t want to miss these sneaky tips and tricks that are great for any grade or subject. Rory likes to make her worksheets in PowerPoint instead of Word, because PowerPoint offers more control over text and image placement. Set up your PowerPoint page Rory selects everything and deletes it to start with a blank slate. Using the options Design - Slide Size, she changes the size to 4x3, which is more in-line with a standard letter-sized paper. Then she changes the orientation of the page to Portrait. Now she’s ready to create a worksheet that will fit on regular printer paper. Use guides and gridlines PowerPoint has a grid option, which is great for making sure all the page elements are perfectly aligned and centered. To activate the grid and other useful guides, go to View, then click on the checkboxes for the ruler, gridlines and guides. Now you have all the guides you’ll need to ensure that your worksheet looks neat and professional. Use interesting fonts Rory downloads fun fonts from different web sites. She recommends her favorites: teacherspayteachers.com, dafont.com and 1001fonts.com. In the video, Rory offers some tips on how to center her text boxes. You can extend the text box all the way to the left- and right-hand sides of the page and then use the centered alignment tool to center your text. Duplicate elements You can duplicate elements easily and quickly in PowerPoint, which is very useful for worksheets. Use the CTRL+D duplication command and the guidelines that you set up in an earlier step to make sure everything is aligned. Rory shows you how in this video. Align and distribute The Shape Format - Align give you lots of options for aligning and distributing your text. This makes it very simple to create a neat, even row of problems. Bubble letters Rory likes using bubble, or outline letters on her worksheets. You can do this with the Shape Format - Text Fill option. Fill in the letters in white and make the text outline black. You can change the weight of the line to make it darker as well. Easily create a number line or graph It’s a snap to make a number line in PowerPoint as well. Rory shows you how, using the line and line segment tools under Shape. You can change the weight of your line to make it thicker, and easily copy and distribute vertical lines to make the tick marks. Create a coordinate plane Rory also demonstrates how to easily create a coordinate plane with just a few commands. First, insert a table. Use the options to turn it into a basic black-and-white grid. Make sure that the height and width are identical. You can add axes with the line tool. Draw a line, then change the weight to make it heavier. Once you have your x-axis line the length you want, use CTRL+D to make the y-axis, then drag it into place. You can also add text box to label the axes. These are all the starters you need for making any kind of worksheet, especially math worksheets. These tips are useful regardless of the grade or type of math you’re teaching. We hope these tips were helpful to you. Thanks for watching! #quizlet #teacher #teachingtools
Comments