Скачать с ютуб Bell Huey Iroquois UH-1C variant - Part 1 в хорошем качестве
Bell Huey Iroquois UH-1C variant - Part 1
9 месяцев назад
Скачать бесплатно и смотреть ютуб-видео без блокировок Bell Huey Iroquois UH-1C variant - Part 1 в качестве 4к (2к / 1080p)
У нас вы можете посмотреть бесплатно Bell Huey Iroquois UH-1C variant - Part 1 или скачать в максимальном доступном качестве, которое было загружено на ютуб. Для скачивания выберите вариант из формы ниже:
Загрузить музыку / рингтон Bell Huey Iroquois UH-1C variant - Part 1 в формате MP3:
Если кнопки скачивания не
загрузились
НАЖМИТЕ ЗДЕСЬ или обновите страницу
Если возникают проблемы со скачиванием, пожалуйста напишите в поддержку по адресу внизу
страницы.
Спасибо за использование сервиса savevideohd.ru
Bell Huey Iroquois UH-1C variant - Part 1
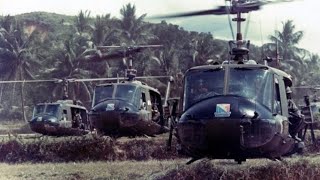
00:00 Hello my friends. 00:05 In this modelling project, I am building a multipart project of the Bell Huey Iroquois UH-1C variant in scale 1 to 35 from Revell. 02:23 Finally. After such a long time. This is the box of the legendary Bell Huey UH-1C in scale 1 to 35 from Revell for skill level #5 aka the hardest level. 02:35 The box includes 245 parts. The length of the helicopter is 46 cm (18.1102 inches) & the blades are 41,8 cm (16.4566 inches). As you can see its a big 1😅 02:46 This is the back side of the box with some extra information & photos with details. Let's open the box. 02:52 1st of all the manual which I like the fact that Revell makes it in color. I wish more companies would do the same. 02:59 Plenty of decals that are for 3 different versions. I will see later on which version I will do. 03:21 1st are the cockpit's clear sprue. The main body sprue which is quite big. These must be ammunition or something & they are soft plastic. 03:32 The body seems to have plenty of details. 03:44 Couple more sprue related to weapons & cockpit. Detailed just like the body. 04:14 The last 2 sprue. It is very nice that the kit includes the crew figures. These are the engine, interior, etc parts. Let's go. 04:33 Starting with the cockpit, cutting & then smoothing out the parts with the hobby knife, file &/or sandpaper. When needed, using the hobby knife carefully in the opposite direction to avoid cutting or damaging the parts. Will be finishing & preparing parts off camera too. 05:24 More holes on this part. Whole lotta drillin' goin' on🤣 05:34 Will finish off camera. 05:37 Done & cut open these parts too. 05:41 Also, did these ones. 05:43 Gluing time. 08:02 Prepared this stretcher carriage but I will glue it after the paint job. 08:12 Removing. 08:30 Gluing. 10:20 Need to remove this. 10:51 Back to gluing. 13:12 These inside parts are done. Onto the crew now. 14:19 German panzer grey primer & airbrushing. 16:11 Not as good job as the original but still😅 16:14 Airbrushing US olive drab. 16:56 Mix sunny skin tone & little bit of pale brown. Painting the face. 2, maybe 3 coatings. Any mistakes, I will fix them later. 17:23 Heavy khaki painting the vest & gloves. 18:00 Boots, weapon holster & glasses with matt black. 18:46 Did the knife off camera. Highlights now with a mix of US olive drab, white & yellow. 19:30 Did this little mic with some wire off camera. Flesh washing the face. 19:51 Black washing. 20:24 Dry brushing with a mix of US olive drab & white. 20:48 Crew is done. 21:06 I did a mustache on this figure. 22:10 Anthracite matt. 22:47 USAF olive drab. 23:23 Did the fire extinguishers off camera & with USAF olive drab I did these boxes. 23:30 I will paint the seats with US olive drab & their shields with USAF olive drab. 24:16 Mix of deep green & gunship green, 50-50. 24:57 Silver metallic. 25:40 Will not make any details since this will be covered. Did some decals off camera. 25:48 Mig's decal set before placing the decals & Mig's decal fix afterwards. The 1st prepares the surface & the 2nd takes care of any curves, bumps, etc. 26:11 Pressing with a cotton swab to take away the excess air or liquids below the decal without damaging it. 26:51 Finished the decals & placed the 1st pilot. Super gluing the 2nd pilot. 27:21 Making the seat belts like so. Do not mind the wire job since it will be kinda hidden😅 28:50 Painted the belt with gray & little bit metallic. Attaching & super gluing. 29:26 Placed the stretcher carriage. Chipping with USAF light gray & this little sponge. 29:49 Some rust work. 30:17 Enamel dark brown washing. 30:44 Some dark washing. 31:15 Little brown washing. 31:30 Removed some of the excess wash with a cotton swab. Removing some more. 31:55 Dark earth pigment. 32:07 Removing the excess pigment. 32:19 Hopefully you liked the project & please be patient for the release of its presentation. Because I love this amazing art & I strive to be better, please do help me by sharing your words of wisdom in the comments below. 32:32 TO BE CONTINUED. 32:45 Hit the Like, Subscribe & Notifications Bell "buttons". This way, together, we can grow a community around the exciting art of scale modelling! 32:54 Stay "tuned" for more Bell UH-1C inspired content as well as for more scale modelling videos. 33:02 Thanks for watching! 33:05 Free B-Roll & Stock Videos provided by Videezy http://www.videezy.com Genesis • Nostalgic Synthwave *No Beat* - Genes... Reflections • Retrowave / Chill Synthwave / Vaporwa... Solara • Nostalgic Synthwave *No Beat* - Solar... Black Cream • Epic Synthwave / Spacewave - Black Cr... Horizon • Chill Synthwave / Retrowave - Horizon... Ghoul • Horror Dark Synthwave - Ghoul // Roya... 33:05 by Karl Casey @ White Bat Audio Website https://whitebataudio.com/ YouTube / @whitebataudio
Comments