Скачать с ютуб How to Replace the Main Engine Radiator in a 2011-2015 Chevy Volt в хорошем качестве
How to Replace the Main Engine Radiator in a 2011-2015 Chevy Volt
4 года назад
Скачать бесплатно и смотреть ютуб-видео без блокировок How to Replace the Main Engine Radiator in a 2011-2015 Chevy Volt в качестве 4к (2к / 1080p)
У нас вы можете посмотреть бесплатно How to Replace the Main Engine Radiator in a 2011-2015 Chevy Volt или скачать в максимальном доступном качестве, которое было загружено на ютуб. Для скачивания выберите вариант из формы ниже:
Загрузить музыку / рингтон How to Replace the Main Engine Radiator in a 2011-2015 Chevy Volt в формате MP3:
Если кнопки скачивания не
загрузились
НАЖМИТЕ ЗДЕСЬ или обновите страницу
Если возникают проблемы со скачиванием, пожалуйста напишите в поддержку по адресу внизу
страницы.
Спасибо за использование сервиса savevideohd.ru
How to Replace the Main Engine Radiator in a 2011-2015 Chevy Volt
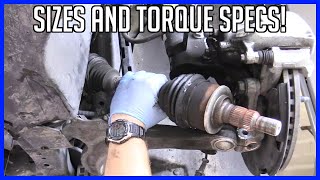
This is a tutorial on how to replace the main engine radiator on a 2011-2015 Chevy Volt. This is a very difficult repair and takes a lot of patience! Expect a minimum of 4 hours, but more likely to be 8+ hours. Several people have noted if you remove the lower radiator bracket "horns", the replacement procedure is easier. I provide a bit more details and tips at the end of the video, so make sure you watch it all the way through. Good luck and don't hesitate to ask questions down below. Please subscribe, like and share for more content in the future. Thanks! Here are the steps to complete this job: 1. Disable the high voltage system. 2. Remove the front wheelhouse liner on the passenger side. 3. Drain the engine radiator coolant by removing the coolant temperature sensor. 4. Remove the radiator upper brackets and support beam. 5. Remove the drive motor battery radiator surge tank. 6. Remove the cooling fan and shroud. 7. Remove the front bumper fascia. 8. Drain the front radiator coolant. 9. Remove the front radiator. 10. Remove the driver side headlamp. 11. Remove transmission fluid auxiliary cooler and air conditioning condenser from plastic casing bracket. 12. Rotate and remove the plastic bracket. 13. Rotate and remove the main radiator. #BusinessTips #DIYprojects #BusinessSuccess #BusinessAdvice #CarMaintenance #ServicePricing
Comments