Скачать с ютуб How to Windshield Repair: Combination Rock Chip Tutorial#4 в хорошем качестве
How to Windshield Repair: Combination Rock Chip Tutorial#4
15 лет назад
Скачать бесплатно и смотреть ютуб-видео без блокировок How to Windshield Repair: Combination Rock Chip Tutorial#4 в качестве 4к (2к / 1080p)
У нас вы можете посмотреть бесплатно How to Windshield Repair: Combination Rock Chip Tutorial#4 или скачать в максимальном доступном качестве, которое было загружено на ютуб. Для скачивания выберите вариант из формы ниже:
Загрузить музыку / рингтон How to Windshield Repair: Combination Rock Chip Tutorial#4 в формате MP3:
Если кнопки скачивания не
загрузились
НАЖМИТЕ ЗДЕСЬ или обновите страницу
Если возникают проблемы со скачиванием, пожалуйста напишите в поддержку по адресу внизу
страницы.
Спасибо за использование сервиса savevideohd.ru
How to Windshield Repair: Combination Rock Chip Tutorial#4
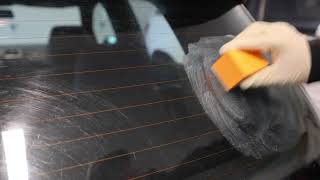
http://tiny.cc/dki-windshield-repair► This video shows how to properly repair a combination break like the professionals do. Using a Delta Kits windshield repair system, the trained and certified technician demonstrates the windshield repair process from start to finish. The windshield repair technician starts by cleaning the damage with a stainless steel probe. Next, he lines the injector of the windshield repair bridge over the impact point of the chip, and secures it to the glass by tightening the back legs of the bridge (once the legs are touching the glass, they should tightened with 2 full turns). The injector is then screwed down until it touches the glass. Once touching the glass, it gets one 1/2 turn. The technician then squeezes Delta Kits MagniBond resin into the injector barrel and screws in the Delta Kits Spring Loaded injector piston into the barrel in the "up" position, just until it stops. Once inserted, the technician pulls up and gives the injector piston one 1/2 turn clockwise, placing the injector in the 5 minute pressure cycle. Watch the chip fill immediately with resin! While holding the injector barrel with one hand and the piston in the other, the technician pulls up on the piston and give one more 1/2 turn clockwise, placing the injector into vacuum cycle. The number of vacuum and pressure cycles that one should go through is dependent upon how bad the combination break is. In this video the damage filled quickly and the air was removed, so the technician only needed to complete one pressure and vacuum cycle. Once the break is filled, Delta Kits pit resin is placed just below the impact point and pulled over the impact point with a mylar U.V. curing tab. Notice how the technician just drops it over the pit resin and does NOT PUSH ON THE TAB. There needs to be a dome of resin over the impact point if the repair is to be smooth after being scraped. The repair is cured for 5 minutes with a U.V. light. The resin should be hardened and not tacky at this point. The curing tab is lifted off the repaired area and resin is scraped off with a NEW razor blade at a 90 degree angle. Use a NEW razor blade for each repair. Once the resin has been removed, the repair is polished with the Delta Kits Pit Polish, to remove any fine scratches. And that's it! You're all done and have a very happy customer! Call our free tech support if you have any questions, even if you have not purchased our equipment we are here to help. 1.888.811.3451 Delta Kits offers a library of videos that demonstrate the proper way to repair multiple types of rock chips, breaks, and cracks. While the main steps of the windshield repair process are the same from one break to the next, each break is a little different from the last, and there are different techniques that can help you succeed as a windshield repair technician and professional. VISIT DeltaKits.com FOR MORE VIDEOS AND TECH TIPS http://www.deltakits.com/training/vid... SUBSCRIBE NOW FOR MORE STEP-BY-STEP VIDEOS http://tiny.cc/deltakits-youtube SUBSCRIBE NOW TO OUR WISECRACK NEWSLETTER https://www.deltakits.com/wise-crack SUBSCRIBE TO THE WINDSHIELD REPAIR FORUM http://www.windshield-repair-forum.com/ LET'S CONNECT! Google+ ► https://goo.gl/QRDaHN Facebook ► / deltakitsinc Twitter ► / deltakits LinkedIn ►https://goo.gl/TDnruA Delta Kits, Inc. ►http://www.deltakits.com/
Comments