Скачать с ютуб Visualization in IGV в хорошем качестве
Visualization in IGV
7 лет назад
Скачать бесплатно и смотреть ютуб-видео без блокировок Visualization in IGV в качестве 4к (2к / 1080p)
У нас вы можете посмотреть бесплатно Visualization in IGV или скачать в максимальном доступном качестве, которое было загружено на ютуб. Для скачивания выберите вариант из формы ниже:
Загрузить музыку / рингтон Visualization in IGV в формате MP3:
Если кнопки скачивания не
загрузились
НАЖМИТЕ ЗДЕСЬ или обновите страницу
Если возникают проблемы со скачиванием, пожалуйста напишите в поддержку по адресу внизу
страницы.
Спасибо за использование сервиса savevideohd.ru
Visualization in IGV
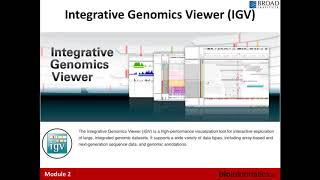
This is step 11 of the recipe, "Identify regions of DNA modification and their influence on associated gene expression", which can be found at: http://recipes.genomespace.org/view/69. Next we will visualize our files in the Integrative Genomics Viewer, or IGV. This visualization tool will allow us to identify the transcription factor binding site and will illustrate whether surrounding genes are up or down regulated as a result. Launch IGV in the GenomeSpace UI. When this instance of IGV has downloaded, double-click. Then select "Run" on the pop-up menu. If it isn't already selected be sure to select the mouse mm9 reference genome. To upload our files from GenomeSpace select GenomeSpace in the toolbar, then "Load file from GenomeSpace". Navigate to the appropriate folder. We will start by loading the wild-type gene expression data. Note: you will repeat these steps for the remaining files, but for the sake of this demonstration we have skipped over these repetitive steps. Start by moving the narrow peak track by clicking and dragging it to the third track slot. Then change the color of the top track by right-clicking the wild-type gene expression track, selecting "Change Track Color (Positive)", and selecting the desired color. Next highlight both gene expression tracks and right-click change their track heights to 150. Then, highlight all three MACS output files and right-click. Change their tracks to 60. And finally, change the track of the mouse reference genome to 60. Next we will want to auto scale all peak files and gene expression files to better interpret this data. Do this by highlighting each track and right-clicking. Then select "Group auto scale". For the sake of demonstration we will observe a region on chromosome 7 that illustrates the differential gene expression of the gene IGF2. A gene known to promote the growth and proliferation of cells. In the top two tracks you can already identify the differential expression between samples. In the third track you can see its corresponding transcription factor binding sites. To observe the peaks within both samples the wild-type and knock-out, and the transcription factor binding site continue to scroll left and zoom in. At this magnification we can observe the differing peak pile up between samples and the peak of the transcription factor binding site. Be sure to record this locus region for later use. Now input the original region locus to observe how this binding event has regulated the IGF2 gene. Just as was done before continue to zoom and scroll until both gene expression tracks are in the desired layout. Then highlight both expression tracks, right click and select "Overlay tracks". This will better illustrate the differing gene expression between samples Input the recorded locus region from the binding site before the current locus region in the text box. Then hit the space bar and select "Go". This will create a split screen allowing us to see the binding site and gene expression in one frame. With the wild-type in red and the knockout in blue we can see that the binding of the Prep1 transcription factor results in an upregulation of this gene's expression.
Comments

![[WEBINAR] Intro to Bioinformatics Pipelines for ChIP-Seq](https://i.ytimg.com/vi/BACMdx5X3yQ/mqdefault.jpg)