Скачать с ютуб Color Gels Photography: How to Create Gradient Backgrounds | Inside Beauty Photography with Lindsay в хорошем качестве
Color Gels Photography: How to Create Gradient Backgrounds | Inside Beauty Photography with Lindsay
1 год назад
Скачать бесплатно и смотреть ютуб-видео без блокировок Color Gels Photography: How to Create Gradient Backgrounds | Inside Beauty Photography with Lindsay в качестве 4к (2к / 1080p)
У нас вы можете посмотреть бесплатно Color Gels Photography: How to Create Gradient Backgrounds | Inside Beauty Photography with Lindsay или скачать в максимальном доступном качестве, которое было загружено на ютуб. Для скачивания выберите вариант из формы ниже:
Загрузить музыку / рингтон Color Gels Photography: How to Create Gradient Backgrounds | Inside Beauty Photography with Lindsay в формате MP3:
Если кнопки скачивания не
загрузились
НАЖМИТЕ ЗДЕСЬ или обновите страницу
Если возникают проблемы со скачиванием, пожалуйста напишите в поддержку по адресу внизу
страницы.
Спасибо за использование сервиса savevideohd.ru
Color Gels Photography: How to Create Gradient Backgrounds | Inside Beauty Photography with Lindsay
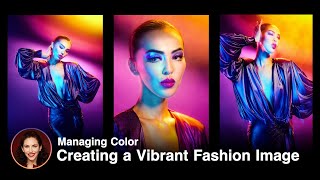
What’s my NEWEST fashion photography obsession? Colored gels photography and creating beautiful gradient backgrounds. This lighting technique has become a popular trend in fashion photography – seen everywhere from celebrity photoshoots to beauty campaigns. But the high-end look is easier to recreate than you may think. In this video, I will teach you how to achieve the color gradient background effect using three strobes and two colored gels. How to build a gradient background step-by-step: Step 1: Setting up the First Strobe & Orange Colored Gel I place the first strobe with a saturated orange-colored gel upwards and close to the white/gray backdrop. This creates a gradient effect with the color changing from yellow-orange near the light source to a deeper orange further away. Step 2: Adding the Second Strobe & Magenta Colored Gel Next, I position the second strobe directly behind my subject on a floor stand and attach a magenta gel to it. This creates a saturated color close to the strobe that gradually fades and blends into the orange, creating the gradient effect. Step 3: Introducing the Main Light Then, I introduce the main light that will illuminate my subject – making sure it does not spill onto the background to keep the colors vibrant. I use this light to cast a narrow beam on my subject's face, which is why a light with a grid or one that offers restricted light, like the Westcott Optical Spot is my go-to. Now that we've set up our lights, it's time to get the shot. In this video, I am shooting with a Canon R5 and a Canon RF 24-105 lens, which provides flexibility and sharpness. The trend of colored gel photography in fashion is absolutely captivating - it is vibrant, and daring, and makes any backdrop look interesting. Although I achieved this effect with strobe lights, you can definitely do it with continuous lights too. The possibilities of colored gels are endless. Don't forget you can experiment with different colors and color combinations to create your own unique look. Interested in taking a deeper dive into colored gels? Check out my class The Magic of Gels: https://learn.lindsayadlerphotography... 0:00 Intro 1:23 Building The Background: Orange Gel (Light #1) 2:32 Building The Background: Magenta Gel (Light #2) 3:13 Main Light Positioning (Light #3) 4:30 Shooting the Subject 5:06 Restricted Light Effect 6:16 Final Thoughts SUBSCRIBE AND BE PART OF THE ADORAMA FAMILY: ➥ / adoramatv __________________________________ Be the first to shop our great deals and sales by signing up for emails from Adorama! https://www.adorama.com/MyAccount/Login __________________________________ ✘ PRODUCTS USED: Strobes – Profoto D2s https://adorama.rfvk.net/BXPXqL Profoto XL Umbrella (white) https://adorama.rfvk.net/mVQaD Rosco Creative Effects Kits https://adorama.rfvk.net/oZDno Westcott Optical Spot by Lindsay Adler https://adorama.rfvk.net/P0r7rY Camera: Canon R5 https://adorama.rfvk.net/JxzdE Lens: Canon RF 24-105mm https://adorama.rfvk.net/q74XY Nanlite Pavo Tubes https://adorama.rfvk.net/JrVx9q #beautyportraits #beautyphotography #adorama __________________________________ ❐ LET'S GET SOCIAL ❏ ➥ Facebook / adorama ➥ Instagram / adorama ➥ Twitter / adorama ❐ MORE ADORAMA ❏ ➥ Shop https://www.adorama.com/ ➥ Blog https://www.adorama.com/alc/ ➥ Live Events https://www.adorama.com/g/42-live __________________________________ Video: Samuel Bouret @samuelbouret Hair: Linh Nguyen @linhhair Makeup: Collin Rishell @collin_rishell Styling: Raytell Bridges @raytell_bridges Model: Andrea @andrea.carrazco __________________________________ THANKS SO MUCH FOR WATCHING!
Comments