Скачать с ютуб AquaMaxx HOB 1.5: How to Assemble, Prime the Pump, and Clean Your Protein Skimmer в хорошем качестве
AquaMaxx HOB 1.5: How to Assemble, Prime the Pump, and Clean Your Protein Skimmer
5 лет назад
Скачать бесплатно и смотреть ютуб-видео без блокировок AquaMaxx HOB 1.5: How to Assemble, Prime the Pump, and Clean Your Protein Skimmer в качестве 4к (2к / 1080p)
У нас вы можете посмотреть бесплатно AquaMaxx HOB 1.5: How to Assemble, Prime the Pump, and Clean Your Protein Skimmer или скачать в максимальном доступном качестве, которое было загружено на ютуб. Для скачивания выберите вариант из формы ниже:
Загрузить музыку / рингтон AquaMaxx HOB 1.5: How to Assemble, Prime the Pump, and Clean Your Protein Skimmer в формате MP3:
Если кнопки скачивания не
загрузились
НАЖМИТЕ ЗДЕСЬ или обновите страницу
Если возникают проблемы со скачиванием, пожалуйста напишите в поддержку по адресу внизу
страницы.
Спасибо за использование сервиса savevideohd.ru
AquaMaxx HOB 1.5: How to Assemble, Prime the Pump, and Clean Your Protein Skimmer
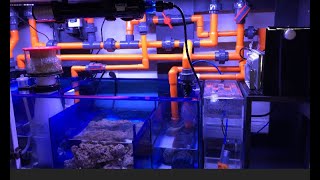
https://https://mdshop.us/HOB-15 A protein skimmer is one of the most important pieces of a successful reef system, but sometimes it can be tough to find space for one, especially if you don’t have a sump. One great solution to this problem is the HOB 1.5 Hang-on-back Protein Skimmer from AquaMaxx. Although it is possible to run a reef tank without a skimmer, a protein skimmer is a KEY piece of filtration equipment that will make your life much easier in the long run. This protein skimmer functions by drawing both air and water through the pump inlet. Then, the protein skimmer uses a needle wheel impeller to chop and mix the air & water together. The bubbles in the heavily-aerated water then travel up through the chamber, stripping the water of both dissolved organic waste and inorganic waste. Once they reach the top, the bubbles then dissipate in the collection cup, leaving only the dissolved waste which can then be easily removed. Because this process is the major way that biological waste is removed from a tank before it can break down into pollutants, having a protein skimmer is the best way to ensure that your tank parameters stay in check. The issue is that most protein skimmers can be very large and often require a sump to have enough space to house one. The AquaMaxx HOB 1.5 allows sump-less tanks the luxury of having a skimmer without needing the additional investment of a sump and the work that goes along with it. Out of the box, there is a bit of assembly required, but that’s why we are here to help. First things first, we need to put together the internal plumbing. Locate the inlet pipe and attach to the down tube, at the elbow. Then take the red O-ring from the parts bag and slide it over the shorter tube. Once that is secured, attach the elbow of the other inlet tube without the other strainer to the other side. Next locate the pump and secure the bubble plate to its outlet, using the plastic screw to secure it in place until it is finger tight. Find the yellow airline and attach it to the venturi on the pump inlet as well. Now, take your inlet assembly and attach it to the inlet of the pump. Take the the inlet assembly that we initially put together and fit it into the pump inlet. Once those are together, remove the clear divider from the skimmer body. Slide that pump assembly into it with the bubble plate resting on the brackets in the pump chamber. On the inlet, make sure that the O-ring is on the inside of the skimmer body to ensure that no water leaks out of the body when full. Replace the divider and hand tighten the black body screw. Find the loose end of the yellow tube and attach it to the shorter tube on the lid-mounted silencer. The last step is just to add the outlet assembly to the opening right of the bracket. This is also the place where the optional bubble stopper can be installed Make sure that T pipe is attached to the skimmer body by the bottom of the T. Doing this allows air to flow into the outlet through the open top-side of the T, preventing gurgling sounds. Next Grab the collection cup, lid, and large O-ring. Slide the O-ring around the collection cup. Insert the cup into the opening on top left side of the skimmer and place the lid onto the cup. Lastly, attach the white silicone emergency drain to the outlet on the cup. Now, you’re all set to put the skimmer on your tank. Hang your skimmer on the rim of your tank with the bracket, inlet assembly and outlet assembly on the inside. Use the screws on the bracket to position the skimmer vertically. Please keep in mind that these screws are only for adjusting the angle of the skimmer and not for securing it to the tank so take it easy on them. Once the skimmer is mounted on your tank, fill the body with water. Disconnect the airline from the silencer and submerge it in water to purge the air from it. Plug the power cord in and the wait for the pump to prime, but keep in mind that this can take a few minutes. You will know that the pump is fully primed once the skimmer is actively taking in water and you can see it coming out of the outlet. At this point you can take the airline out of the water and reattach it to the silencer. Now you should be seeing the skimmer pulling air in and bubbling up. Adjusting the collection cup to achieve wet or dry skimmate is pretty simple. Just remove the collection cup and adjust the O-ring to the desired level. Raising the collection cup will allow for dryer, more concentrated skimmate, whereas lowering the cup will allow for less concentrated skimmate..Both types of skimming (wet or dry) have their benefits. Be patient, as this may take some trial and error to get dialed in. As skimmers tend to be a bit erratic until they’re broken in, we would recommend keeping your cup at the highest level for a couple weeks to accommodate the changes that your skimmer may initially go through. #aquamaxx #hobskimmer #proteinskimmer
Comments