Скачать с ютуб Smashing Pumpkin Paper Bomb - Pop-Up Toy Tutorial & Pattern - Kamikara - パンプキン爆弾 в хорошем качестве
Smashing Pumpkin Paper Bomb - Pop-Up Toy Tutorial & Pattern - Kamikara - パンプキン爆弾
7 лет назад
Скачать бесплатно и смотреть ютуб-видео без блокировок Smashing Pumpkin Paper Bomb - Pop-Up Toy Tutorial & Pattern - Kamikara - パンプキン爆弾 в качестве 4к (2к / 1080p)
У нас вы можете посмотреть бесплатно Smashing Pumpkin Paper Bomb - Pop-Up Toy Tutorial & Pattern - Kamikara - パンプキン爆弾 или скачать в максимальном доступном качестве, которое было загружено на ютуб. Для скачивания выберите вариант из формы ниже:
Загрузить музыку / рингтон Smashing Pumpkin Paper Bomb - Pop-Up Toy Tutorial & Pattern - Kamikara - パンプキン爆弾 в формате MP3:
Если кнопки скачивания не
загрузились
НАЖМИТЕ ЗДЕСЬ или обновите страницу
Если возникают проблемы со скачиванием, пожалуйста напишите в поддержку по адресу внизу
страницы.
Спасибо за использование сервиса savevideohd.ru
Smashing Pumpkin Paper Bomb - Pop-Up Toy Tutorial & Pattern - Kamikara - パンプキン爆弾
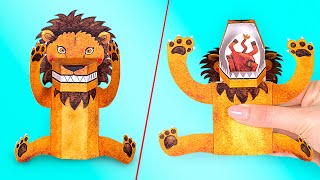
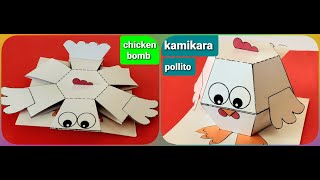
Get the step-by-step photo tutorial and free pattern to make this Smashing Pumpkin Paper Bomb (Design #53) at https://jennifermaker.com/smashing-pu... Learn how to put together a smashing pumpkin paper bomb! This paper toy was inspired by my penguin paper bomb, which was in turn inspired by artist Haruki Nakamura. Note that this is my design and differs from this (though I think it uses a similar mechanism to pop up the penguin). This is a form of papercraft known as Kamikara (kami is paper, kara is trick). SMASHING PUMPKIN PAPER BOMB MATERIALS (contains affiliate links) - 65 lb. 8.5″ x 11″ cardstock (I used one sheet of orange, one sheet of black, and one sheet of dark green) - http://amzn.to/2t4v19n - One rubberband (size 18, 3 inches long) - http://amzn.to/2usajne - Tacky glue - http://amzn.to/2t4uYKB - Toothpick (optional, used to spread the glue evenly) - A crochet hook or a piece of wire bent into a hook (optional) - Dimes or other small objects to use as weights (optional) - Hot glue gun and glue sticks to attach the dimes (optional) - A way to cut out your paper pieces (I use a Cricut - http://amzn.to/2wHzTnA ) - The pattern/cut files on my web site (Design #53) at https://jennifermaker.com/smashing-pu... UPDATES/CHANGES: Check for any updates, changes, or additional videos for this project at https://jennifermaker.com/updates HOW TO ASSEMBLE THE SMASHING PUMPKIN PAPER BOMB First, cut out all of your pieces. If you cut with a Cricut, upload the SVG file to Cricut Design Space, place it on your Canvas, click Ungroup on all layers, change the one red layer with score lines to “Score,” then hold down the Shift key and select the red score layer and all of the orange layers and click Attach. You need to attach these layers together so that the score lines stay with the sections that need them. If you cut with scissors, print out the PDF files onto the appropriately colored cardstock and then cut. I’ve included a pattern for solid color cardstock, as well as a patterned design that you can print onto white cardstock. First, fold the top of the pumpkin piece (the roundish piece without a hole in the middle). Fold in the triangle pieces on each side. Glue down the triangle sides. Glue a reinforcement rectangle over each set of triangles: Fold the rubber band holders down and up. Glue the rubber band holders. Now fold the remaining sides as tabs at the score lines. Turn the pumpkin top over and glue the stem base onto the top of it. Pick a stem, fold it at the base, and glue it onto the stem base. Do the same folding and gluing to the bottom of the pumpkin piece. It’s time now to fold the paper spring mechanism, which comes in two parts. The first part, which looks like a rectangle with wings, gets its tabs folded up at the base. The section that is longer gets down again. Here are photos of how it is folded and glued. (Note: The pieces shown in the photos are black because they are from the penguin paper bomb tutorial and are higher quality images than the pumpkin images I took. They get folded and glued the same way!) Tip: I included a second catch with this pumpkin paper bomb that you can use if you wish. It glues on top of the first catch to stick out a little more if you feel your pumpkin needs it. You can see how it is glued in my assembly video. Glue the mechanism and catch assembly into the top of the top pumpkin piece. The orientation is important so the catch can work properly. It’s time to glue these two pieces together, rubber band holder to rubber band holder. Once the two of the rubber band holders are attached, you can fold it closed and glue the other rubber band holder and all the other tabs together. Now pick out eyes, a nose, and a mouth, and glue them on your pumpkin where you want them to appear. I think it looks best if the eyes and nose are on the top half, and the mouth on the bottom half. Now let’s make it able to pop up! To do this, take your smaller rubber band (size 18 — about 3″ long when folded) and drop it into the pumpkin so one end of the rubber band loops around one end of a rubber band loop. Now reach into the head, grasp the rubber band, and hook it around the other end of the same rubber band holder. For the remaining steps and images please visit: https://jennifermaker.com/smashing-pu... Follow me at: Blog: https://jennifermaker.com Facebook Page: / jennifermakercrafts Facebook Group: / cricutcraftersandmakers Instagram: / jennifer.maker Pinterest: / jenuinemom Please subscribe to my channel at / jennifermaker for more video tutorials to craft a life you love! Credits: Introduction: PixelBytes (my child!) Music: Cute by Bensound (royalty free) Videography: Jennifer Marx on a Panasonic Lumix FZ-1000 DSLR 4K camera Design: A Jennifer Maker original!
Comments