Скачать с ютуб Modular 4.6 3v Short Block Build | в хорошем качестве
Modular 4.6 3v Short Block Build |
2 года назад
Скачать бесплатно и смотреть ютуб-видео без блокировок Modular 4.6 3v Short Block Build | в качестве 4к (2к / 1080p)
У нас вы можете посмотреть бесплатно Modular 4.6 3v Short Block Build | или скачать в максимальном доступном качестве, которое было загружено на ютуб. Для скачивания выберите вариант из формы ниже:
Загрузить музыку / рингтон Modular 4.6 3v Short Block Build | в формате MP3:
Если кнопки скачивания не
загрузились
НАЖМИТЕ ЗДЕСЬ или обновите страницу
Если возникают проблемы со скачиванием, пожалуйста напишите в поддержку по адресу внизу
страницы.
Спасибо за использование сервиса savevideohd.ru
Modular 4.6 3v Short Block Build |
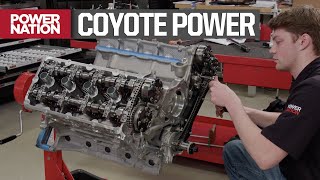
In this video I cover the short block build of the aluminum 3V 4.6 I put into my 2000 Mustang GT. I had the block decked, cleaned and honed for the new Mahle forged pistons at Livernois Motorsports. I paired them with a set of Eagle forged connecting rods. All told, if I had known I was going to be replacing the entire rotating assembly, as I did [due to unfortunate machine work on my crankshaft], I probably would have just built a stroker motor. Though, I've heard the longer throw on the crank doesn't like the revs as much as the stock 4.6 does. The flat-top Mahle pistons brought this engine up to a compression ratio of ~11:1. A nice bump from stock and will help in squeezing coyote power out of this bad boy. Which leads me to the question I get from time to time- "Why not just coyote swap it?" I have a few reasons. 1.) Cost. The coyote is a much more expensive engine to buy. Even a used truck motor. I picked this 3V 4.6 up for $750 and have less than $4000 into the rebuild. And all in, less than half of what it would have cost me to do the 'yote swap. It runs on the stock 2V ECU, so there is no need for aftermarket ECU swap or the control pack. And on these cars, the factory cluster only gets along with the stock computer. Adding aftermarket engine controls would mean aftermarket gauges, as well. While there is a better selection of parts available to swap the coyote into this car, such as headers, that's also an added cost. I was able to save money on headers also by cutting the 2V flanges off and welding on 3V flanges. 2.) Weight. This 3V has an aluminum block and weighs about ~25# less than the coyote. Not to mention, the additional weight of the coyote is in the heads, which is up high, exactly where you don't want it. 3.) Cost to operate. This maybe should be 1b. But, the 3V only has 2 camshafts and 24 valves. Whereas the coyote has 4 cams and 32 valves. Upgrading camshafts and valve train in any OHC motor comes with a big price tag. But the camshaft kit for a Coyote is about double the cost of cams for the 3V. And add in cost for the additional valves, followers and lash adjusters. The downside of the swap compared to a Coyote is obviously power. This engine, the way I built it, puts about the same power to the wheels as a Gen II Coyote would in stock form. And it's just about a max effort, streetable NA build. So, if making as much power as possible is of high importance to you, you probably want to look seriously at the Coyote over the 4.6 in general. When it comes to tracking SN95 Mustangs, power is not the only thing they lack. There's also $5-10,000+ worth of suspension, chassis, brakes and wheel and tire upgrades to be considered. Which, is going to be true of most any road vehicle that is being repurposed as a track toy, of course. But the SN95 offers a nice starting point as the aftermarket is huge for these cars and you can pick them up for a very good price, considering the last new edge made is almost 20 years old at this point. So, if you're trying to add some respectable power on a tighter budget like I was, have some fabrication skills and don't mind the effort, I do still recommend this engine as a viable swap. Parts I used for this engine build: Mahle Forged Pistons Eagle Forged Connecting Rods Clevite [Mahle] Main and Rod Bearings OEM Steel Crankshaft 2013 GT500 Oil Pan, Oil Pump, Pickup Tube and Windage Tray Intro: (0:00) File Fit Piston Rings: (0:36) Balancing Connecting Rods: (2:32) Balancing Pistons: (3:27) Deburring/Prepping Block: (4:57) Main Bearings: (6:44) Torque Main Bolts: (7:10) Blueprint Mains: (8:35) Issues with Crankshaft: (9:35) Installing Main Bearings and Crankshaft: (12:33) Installing and Torquing Main Bolts: (14:19) Crankshaft End Play: (17:03) Blueprint Rods: (17:18) Piston/Rod Assembly: (19:16) Installing Rings: (20:08) Prepping Cylinders: (20:58) Installing Pistons: (21:35) Torque Rod Bolts: (22:28) Piston-to-Deck Clearance: (22:55) Oil Pump|Pickup|Windage Tray|Oil Pan: (23:04) Outro: (23:23) 3V Mustang GT | 3V SN95 3V New Edge Mustang | 3V Engine Swap | Maximum Motorsports Track Build | Engine Build | Short Block
Comments