Скачать с ютуб LZS8WSLP & LZS8WSSP Installation Video в хорошем качестве
LZS8WSLP & LZS8WSSP Installation Video
8 лет назад
Скачать бесплатно и смотреть ютуб-видео без блокировок LZS8WSLP & LZS8WSSP Installation Video в качестве 4к (2к / 1080p)
У нас вы можете посмотреть бесплатно LZS8WSLP & LZS8WSSP Installation Video или скачать в максимальном доступном качестве, которое было загружено на ютуб. Для скачивания выберите вариант из формы ниже:
Загрузить музыку / рингтон LZS8WSLP & LZS8WSSP Installation Video в формате MP3:
Если кнопки скачивания не
загрузились
НАЖМИТЕ ЗДЕСЬ или обновите страницу
Если возникают проблемы со скачиванием, пожалуйста напишите в поддержку по адресу внизу
страницы.
Спасибо за использование сервиса savevideohd.ru
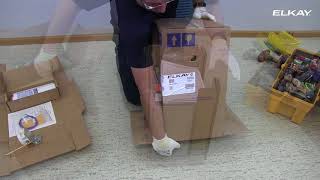
LZS8WSLP & LZS8WSSP Installation Video
(0:06) - Next Generation EZ and LZ Installation (0:11) - STEP 1: Remove (1) screw securing hanger bracket to cooler. (0:21) - STEP 2: Lift up and pull hanger bracket away from cooler. (0:29) - STEP 3: NOTE: Hanger bracket MUST be supported securely. Add fixture support carrier if wall does not provide adequate support. Anchor hanger securely to wall using all (6) 1/4" diameter mounting holes. IMPORTANT: For proper fit, 5-7/8" (150 mm) dimension from wall to centerline of trap must be maintained. (0:35) - STEP 4: Pick up cooler and set onto hanger bracket. Be certain hanger brackets are engaged properly in the slots on the back of the cooler. (0:43) - STEP 5: Remove (4) 5/16" lower front panel screws. (0:54) - STEP 6: Remove lower front panel from cooler. (1:03) - STEP 7: Install trap to waste line making sure end of waste line fits into trap. IMPORTANT: If it is necessary to cut the drain, loosen the screw at the black rubber boot and remove tube. Check for leaks after reassembly. (1:09) - STEP 8: Install (2) screws and washers (not supplied). Make sure the screws engage in a structural member. (1:15) - STEP 9: Remove (2) mounting screws, holding bottle filler to the wall bracket, with 5/32" Allen wrench or Torx T20 bit. NOTE: Do not discard mounting screws. They will be needed to secure bottle filler to mounting bracket. (1:25) - STEP 10: Remove wall mounting plate from bottle filler. (1:36) - STEP 11: Place wall plate against wall on top of basin. Center the wall plate side to side with the basin. Mark the (6) mounting holes with a pencil. (1:44) - STEP 12: Place tape over wire harness connection to keep debris from falling into connection when drilling holes. (1:51) - STEP 13: Secure wall plate using (6) 7/16" obround mounting holes (mounting bolts not included). Use appropriate fasteners for your wall type. (1:59) - STEP 14: Install gasket on bottom of bottle filler tower with gasket support bracket, (2) washers & and (2) screws. (2:10) - STEP 15: Ensure 3/8" water line for bottle filler is fed through hole in basin. (2:20) - STEP 16: Feed 3/8" water line behind brace on bottle filler. Connect to 3/8" John Guest fitting. (2:27) - STEP 17: Connect wiring harness to top of cooler. Ensure that you have the pins lined up correctly. (2:36) - STEP 18: Align bottle filler on top of basin. (2:45) - STEP 19: Place bottle filler on the (4) J-hooks protruding from the wall mounting plate installed on wall. Make sure round boss in gasket fits in hole of basin. (2:54) - STEP 20: Remove filter from carton. Remove protective cap and attach filter to filter head by firmly inserting into head and rotating filter clockwise. Ensure that blue label can be read when filter is installed. (3:05) - STEP 21: RECOMMENDED WATER SUPPLY LOCATION 3/8" O.D. UNPLATED COPPER TUBE CONNECT STUB WITH SHUT OFF (BY OTHERS) 3" (76 mm) MAXIMUM OUT FROM WALL. Turn on water supply. (3:14) - STEP 22: Inspect for leaks in both cooler and bottle filler. Fix all leaks before continuing. (3:20) - STEP 23: Plug cooler power cord into wall outlet. (3:29) - STEP 24: Replace (2) mounting screws, securing bottle filler to wall bracket, with 5/32" Allen wrench or Torx T20 bit. (3:40) - STEP 25: GREEN LED light should illuminate on the bottle filler showing good filter status along with the LCD bottle counter. (3:47) - STEP 26: Verify proper dispensing by placing cup, hand or any opaque object in front of sensor area and verify water dispenses. NOTE: The first initial dispenses might have air in the line which may cause a sputter. This will be eliminated once all air is purged from the line. (3:57) - STEP 27: Replace lower panel back on cooler. (4:05) - STEP 28: Replace (4) 5/16" lower front panel screws. (4:16) - STEP 29: Unit is now ready for use.
Comments