Скачать с ютуб Fix A Puncture - Patch A Bike’s Inner Tube в хорошем качестве
Fix A Puncture - Patch A Bike’s Inner Tube
12 лет назад
Скачать бесплатно и смотреть ютуб-видео без блокировок Fix A Puncture - Patch A Bike’s Inner Tube в качестве 4к (2к / 1080p)
У нас вы можете посмотреть бесплатно Fix A Puncture - Patch A Bike’s Inner Tube или скачать в максимальном доступном качестве, которое было загружено на ютуб. Для скачивания выберите вариант из формы ниже:
Загрузить музыку / рингтон Fix A Puncture - Patch A Bike’s Inner Tube в формате MP3:
Если кнопки скачивания не
загрузились
НАЖМИТЕ ЗДЕСЬ или обновите страницу
Если возникают проблемы со скачиванием, пожалуйста напишите в поддержку по адресу внизу
страницы.
Спасибо за использование сервиса savevideohd.ru
Fix A Puncture - Patch A Bike’s Inner Tube
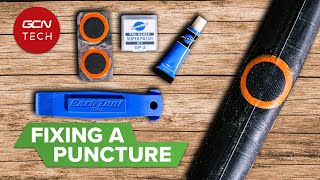
Even if you only ever plan to fit new inner tubes it's useful to know how to patch a inner tube. You may have multiple punctures on one trip and a patch kit - which only weighs a few grammes - will help get home. It's also useful if you meet a rider without puncture tools whose inner tubes are a different size to the ones you carry. If you want to patch inner tubes for routine re-use the most efficient way is to store punctured inner tubes until you have a few and then process them together. Subscribe to our videos: https://www.youtube.com/user/madegood... Visit our website: https://www.madegood.com/bikes/ Visit our YouTube page: / madegoodorg 00:06 Step 1 - Clean And Dry the inner tube If you used water to trace the hole make sure the inner tube is dry. Use fine sandpaper or an emery board to clean the area around the hole. Clean an area larger than the patch you intend to apply. 00:25 Step 2 - Spread The Cement Smear a thin layer of rubber solution around the hole. 00:47 Step 3 - Wait The cement is a solution. Don’t apply the patch until all the solvent has evapourated. If you sniff the layer of solvent you must smell only the rubber of the inner tube, not the alcohol solvent. The length of time this takes depends on the weather conditions it’s quicker in warm dry air, longer when it’s cold and wet. 00:56 Step 4 - Rediscover The Hole If you’re not certain where the hole is pump a small amount of air into the inner tube to show where the air escapes 01:09 Step 5 - Apply The Patch Peel the protective layer off the patch. If the patch has paper on one side and foil on the other it’s the foil that comes off. If it has paper and cellophane, it’s the paper. Apply the patch to layer of glue so the hole is centred under the patch. 01:33 Step 6 - Bond Place the inner tube on a firm smooth surface and rub the patch onto the inner tube with a smooth implement. A tyre lever works well. This action encourages the patch to bond to the inner tube. 01:52 Step 7 - Remove The Backing Fold the inner tube to crack the backing paper or cellophane and peel it off from the centre outwards. If you want to leave the backing on that’s no problem. The inner tube will work with it still on. 02:22 Step 8 - Dust Dust the patch and surrounding area with fine dust or chalk. A patch kit often has a block of chalk to generate this dust but you can use any fine dust lying around. The dust neutralises the glue around the patch so that the inner tube won’t stick to the inside of the tyre. Pro Tip If this is a routine patch – as opposed to an emergency repair – hang the inner tube up overnight with enough air in to hold an ‘O’ shape. If they haven’t sagged to an ‘I’ by morning they are holding air and ready for re-use. 02:36 Step 9 - Roll Roll the inner tubes carefully to force all the air out then fold with the valve on the inside and secure with a rubber band. #BikeRepair #HowTo #BicycleMaintenance
Comments