Скачать с ютуб How to Replace Your Motorcycle Brake Lever and Motorcycle Clutch Lever в хорошем качестве
How to Replace Your Motorcycle Brake Lever and Motorcycle Clutch Lever
9 лет назад
Скачать бесплатно и смотреть ютуб-видео без блокировок How to Replace Your Motorcycle Brake Lever and Motorcycle Clutch Lever в качестве 4к (2к / 1080p)
У нас вы можете посмотреть бесплатно How to Replace Your Motorcycle Brake Lever and Motorcycle Clutch Lever или скачать в максимальном доступном качестве, которое было загружено на ютуб. Для скачивания выберите вариант из формы ниже:
Загрузить музыку / рингтон How to Replace Your Motorcycle Brake Lever and Motorcycle Clutch Lever в формате MP3:
Если кнопки скачивания не
загрузились
НАЖМИТЕ ЗДЕСЬ или обновите страницу
Если возникают проблемы со скачиванием, пожалуйста напишите в поддержку по адресу внизу
страницы.
Спасибо за использование сервиса savevideohd.ru
How to Replace Your Motorcycle Brake Lever and Motorcycle Clutch Lever
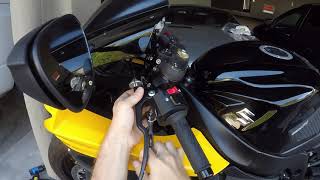
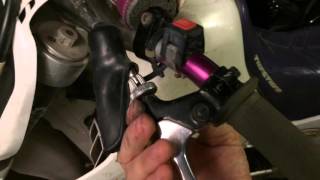
Replacing the stock clutch and brake levers is one of the easiest ways to improve the ergonomics and feel for your bike, especially if your stock levers offer no adjustment. It's not expensive either - we've found that adjustable levers on eBay do just the same job for a fraction of the price - sometimes as low as $20. Potentially they are probably more likely to bend in a crash, but at that price there's no problem with ordering a replacement pair. And trust us, the expensive ones scratch just as easily as the cheap ones if you drop your bike. Just make sure you research before you buy to ensure you get the correct levers for your make and model of bike. Check out the full article at http://therideadvice.com/how-to-repal... In addition to new levers, we recommend you also have handy some lithium grease, lubricant and of course any tools necessary to remove the levers such as allen keys, wrench and a screwdriver. We'll start with the easy lever first - the brake lever. 1. Unscrew the bolt holding the break leaver in place. To initially loosen it, you may need to use a wrench to loosen the nut while keeping the bolt still. 2. Apply marine grease or lithium grease to both the brake switch on your bike and on your lever where the brake switch sits, marked with the yellow circles below. 3. Put your new lever into position and secure it with the bolt and nut that you just removed. 4. Turn your bike on and modulate the new brake lever to see how it feels. Check that the rear brake light is illuminating and that the calipers on your brake disc are working correctly, too. Now, onto the clutch lever which can be a bit more fiddly. 1. The procedure to remove your clutch lever will vary depending on your bike but if you follow your nose you should be able to get it out. If you're having trouble, consult your service manual. Just make sure you put aside all the screws, nuts and bolts as you'll need to reuse them all. 2. Once you remove the end of the clutch cable from the lever, you'll note that it's nearly impossible to put it into your new lever. Don't force it as you'll either stretch or snap your cable. Instead, head to the other end of the clutch cable. 3. Depending on your bike, you may be able to adjust the clutch cable to provide more free play (in other words, loosening the cable) to allow you to put the cable head into your new lever. Sometimes however, you'll need to disconnect it from the cable holder to get the same result. 4. Now that the cable is loose, head back to front of the bike. Before putting the cable head into your new lever, apply grease to both it and the inside of the lever where it will sit. Spray lubricant on the end of the cable that moves in and out of the lever, too. 5. Reassemble the lever in the reverse order that you took it apart. Then reattach the cable to the cable holder that you took it out of earlier - spray some lubricant on it too for good measure. 6. Tighten or loosen the clutch cable adjuster adjacent to your clutch lever until it’s at a position that feels right. 7. Finally, start the bike in neutral to check that the clutch is engaging and disengaging correctly when you modulate the lever
Comments


![[How To] Install Aftermarket Levers](https://i.ytimg.com/vi/w3MExdZdv6w/mqdefault.jpg)