Скачать с ютуб How To Make Bookshelf Speakers - Woodworking - DIY Speakers в хорошем качестве
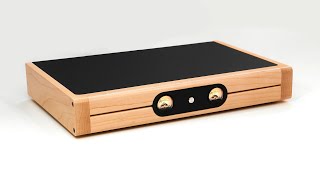
How To Make Bookshelf Speakers - Woodworking - DIY Speakers
5 лет назад
Скачать бесплатно и смотреть ютуб-видео без блокировок How To Make Bookshelf Speakers - Woodworking - DIY Speakers в качестве 4к (2к / 1080p)
У нас вы можете посмотреть бесплатно How To Make Bookshelf Speakers - Woodworking - DIY Speakers или скачать в максимальном доступном качестве, которое было загружено на ютуб. Для скачивания выберите вариант из формы ниже:
Загрузить музыку / рингтон How To Make Bookshelf Speakers - Woodworking - DIY Speakers в формате MP3:
Если кнопки скачивания не
загрузились
НАЖМИТЕ ЗДЕСЬ или обновите страницу
Если возникают проблемы со скачиванием, пожалуйста напишите в поддержку по адресу внизу
страницы.
Спасибо за использование сервиса savevideohd.ru
How To Make Bookshelf Speakers - Woodworking - DIY Speakers
Build article with more detail about these speakers: https://ibuildit.ca/projects/how-to-m... Some of the things to learn from this video: 1 - don't try to dress the full board when you will be cutting it into smaller pieces anyway. Instead, rough cut to length, then re-saw / dress - you'll lose less material / get more from your stock 2 - flatten one side on the jointer before trimming the edges. The stock will be more stable and safer to cut. 3 - use a point fence on the band saw when re-sawing and draw a guide line. blade drift can cause the cut to go off line when using a flat fence 4 - clamp freshly cut or planed stock to keep it from warping too much until the next operation.Even dry wood has varying moisture content, and when yo cut or plane deeper into the stock, the new surfaces have different moisture contents that can make the wood twist, cup or warp. 5 - solid wood expands and contracts with seasonal changes in humidity, so you can't use it in a place where it can do this freely, like the front or back of a speaker box. Instead, cut a piece of veneer and glue that to a plywood substrate. The plywood is dimensionally stable 6 - never trust the saw to make critical cuts accurately - cut a sample from scrap to check before using the good stock 7 - tape is an extremely effective way to clamp miters that are being glued. Use strong tape that won't break or come loose when you close the miter together. 8 - using a slower setting glue takes the stress out of complicated glue ups, giving you plenty of time to correctly position the parts and get the clamps in place 9 - sanding is a pain, but often the difference between what looks like amateur work and professional. Don't forget to finish by hand sanding everything to get rid of the swirls left by the machine. 10 - Cleats can replace rabbet cuts for back panels and are often faster to do. 11 - when cutting a circular hole with a router and circle jib, don't go all the way through. Leave just a sliver of material to hold the center in place then cut through that with a sharp knife. 12 - on figured wood, climb cutting with the router to round over the edge is the best way to prevent chip out. doing it in 2 or 3 passes is also recommended. 13 - seal the inside of solid wood projects to help block moisture absorption. Ways you can help support this channel: Patreon: https://www.patreon.com/user?u=865843... Project plans for sale: https://ibuildit.ca/plans/ Become A Member of this channel: / @johnheisz More videos on my second woodworking channel: / ibuildit My home reno channel: / ibuildithome My "Scrap bin" channel: / ibuilditscrapbin #ibuildit Website: https://ibuildit.ca/ Facebook: / i-build-it-258048014240900 Instagram: / i_build_it.ca
Comments