Скачать с ютуб How to: 95-04 Toyota Tacoma Parking Brake Adjustment в хорошем качестве
How to: 95-04 Toyota Tacoma Parking Brake Adjustment
4 года назад
Скачать бесплатно и смотреть ютуб-видео без блокировок How to: 95-04 Toyota Tacoma Parking Brake Adjustment в качестве 4к (2к / 1080p)
У нас вы можете посмотреть бесплатно How to: 95-04 Toyota Tacoma Parking Brake Adjustment или скачать в максимальном доступном качестве, которое было загружено на ютуб. Для скачивания выберите вариант из формы ниже:
Загрузить музыку / рингтон How to: 95-04 Toyota Tacoma Parking Brake Adjustment в формате MP3:
Если кнопки скачивания не
загрузились
НАЖМИТЕ ЗДЕСЬ или обновите страницу
Если возникают проблемы со скачиванием, пожалуйста напишите в поддержку по адресу внизу
страницы.
Спасибо за использование сервиса savevideohd.ru
How to: 95-04 Toyota Tacoma Parking Brake Adjustment
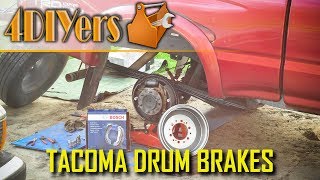
How to adjust the parking brake on a first generation Toyota Tacoma. This is a 2001 model and a similar procedure may apply to other Toyota models as well. If some of you haven’t seen already, I have already replaced the brake shoes, drums, wheel cylinders, and bell cranks. If you’re needing tutorials on those topics, please be sure to check out my videos for more information. Website: http://4diyers.com Patreon: / 4diyers Facebook: / 4diyers Twitter: / 4diyers Instagram: / 4diyers Tumblr: / 4diyers Pintrest: / 4diyers Tools/Supplies Needed: -wrenches -locking pliers -penetrating oil -wire brush -standard screwdriver or star wheel adjustment tool Procedure: The drum brakes should be properly adjusted and this is done using the star wheel adjuster. Once the new pads have been installed or if you’re working with old pads, press the brake pedal while the drum is installed, this will center up the shoes. Then adjust the brake shoes so there’s mild drag when removing or installing the brake drum. If you’re looking for a measurement based check and you have the correct tools to verify this, there should be 0.5mm or 0.020” to 0.6mm or 0.024” difference between the shoe diameter and inner brake drum diameter, both on the braking surfaces. Next is adjusting the bell crank. The drum must be installed for this. With the bell crank is pulled back lightly, there should only be a 0.016 to 0.031” or 0.4 – 0.8 mm space between the bolt and backing plate. Then tighten the lock nut to hold the bolt adjustment. Both the brake shoes and bell cranks adjustments are the same for both wheels. Make sure all the parking brake components are moving freely with no binding. If there is binding or seized components, the may not engage the parking brake or it may cause the brakes to drag. Almost directly under the driver’s seat, there is a lever and a cable with a threaded rod. As you can see now, there is slack in the cable, meaning it’s loose and it’ll need to be tightened. Loosen the lock nut, then tighten up the other nut so the slack is removed in the cable. Typically I’m not a fan of using locking pliers as it can cause damage on a surface where you’d normally place a wrench. However, with this being exposed to road debris under the truck, it may be seized and the wrench may not get sufficient grip on the threaded rod. You can also pass a wire brush over the threads. Then apply some penetrating oil. Test the parking brake as needed. The parking brake should be fully applied after 12-18 clicks when the lever is pulled. If you find the parking brake is too tight, then loosen as needed. When the parking brake is released, the bell cranks should return to their original position, so the bolt adjustment should be tight against the backing plate of the drum brakes. As when looking under the dash, make sure the cable from the lever isn’t pushed out from its assembly, this would indicate the cable is loose. That can be caused by improper adjustment or something is sticking and not allowing the parking brake assembly to return to its neutral position. Once done, tighten the locking, not on the parking brake cable lever and you’re officially done. Thank you to all those who watch my videos and support my content. Don't forget to subscribe to my channel for future tutorial videos and like my video if you found it helpful. New videos are always being uploaded every week! © 4DIYers 2013 All Rights Reserved No part of this video or any of its contents may be reproduced, copied, modified or adapted, without the prior written consent of the author.
Comments