Скачать с ютуб DIY Macrame Tutorial - Incorporating Colour Into A Square Knot Pattern! в хорошем качестве
DIY Macrame Tutorial - Incorporating Colour Into A Square Knot Pattern!
5 лет назад
Скачать бесплатно и смотреть ютуб-видео без блокировок DIY Macrame Tutorial - Incorporating Colour Into A Square Knot Pattern! в качестве 4к (2к / 1080p)
У нас вы можете посмотреть бесплатно DIY Macrame Tutorial - Incorporating Colour Into A Square Knot Pattern! или скачать в максимальном доступном качестве, которое было загружено на ютуб. Для скачивания выберите вариант из формы ниже:
Загрузить музыку / рингтон DIY Macrame Tutorial - Incorporating Colour Into A Square Knot Pattern! в формате MP3:
Если кнопки скачивания не
загрузились
НАЖМИТЕ ЗДЕСЬ или обновите страницу
Если возникают проблемы со скачиванием, пожалуйста напишите в поддержку по адресу внизу
страницы.
Спасибо за использование сервиса savevideohd.ru
DIY Macrame Tutorial - Incorporating Colour Into A Square Knot Pattern!
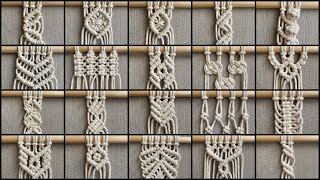
Material: 3mm Single Strand Twisted Cotton String 2mm and 3mm Natural Twisted Cotton String are available for purchase in my Etsy Shop: https://www.etsy.com/ca/shop/LotsofKn... Coloured string will be available soon! Stay tuned. Hey guys! I thought it was fitting to share this square knot pattern with you today because it is the same pattern that is used in my macrame shelf tutorial (which was released this past Wednesday) but this tutorial goes into further detail on how to create the pattern and how to create the pattern in a square shape vs. a “V” shape. The second half of this tutorial will show you how to incorporate colour into this pattern. I’ll be releasing a few more tutorials that incorporate colour so stay tuned for those over the next couple of weeks. Start by tying 4 square knots. Working about 1/2-1 inch down from your first row, tie 3 more square knots. Alternate the inner and outer cords before you tie your square knots. Continue this pattern until you’ve reached your desired length - tie a row of 4 square knots, then a row of 3 square knots. I’ll tie one more row. Next we will use the same pattern but will use 4 strands of beige string and 4 strands of mustard string. tart by tying 4 square knots. Working about 1/2-1 inch down from your first row, tie 3 more square knots. Alternate the inner and outer cords before you tie your square knots. Continue this pattern until you’ve reached your desired length - tie a row of 4 square knots, then a row of 3 square knots. I’ll tie a few more rows for you so you can see how it looks incorporating the coloured string. Thanks so much for watching!
Comments