Скачать с ютуб How to Install - Real Wood Veneer Wallcovering в хорошем качестве
How to Install - Real Wood Veneer Wallcovering
3 года назад
Скачать бесплатно и смотреть ютуб-видео без блокировок How to Install - Real Wood Veneer Wallcovering в качестве 4к (2к / 1080p)
У нас вы можете посмотреть бесплатно How to Install - Real Wood Veneer Wallcovering или скачать в максимальном доступном качестве, которое было загружено на ютуб. Для скачивания выберите вариант из формы ниже:
Загрузить музыку / рингтон How to Install - Real Wood Veneer Wallcovering в формате MP3:
Если кнопки скачивания не
загрузились
НАЖМИТЕ ЗДЕСЬ или обновите страницу
Если возникают проблемы со скачиванием, пожалуйста напишите в поддержку по адресу внизу
страницы.
Спасибо за использование сервиса savevideohd.ru
How to Install - Real Wood Veneer Wallcovering
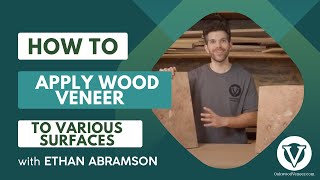
0:15 - Receiving & Conditioning the Material 1:06 - Preparing the Drywall 1:50 - Preparing for Application 3:08 - Application 6:22 - External Corners 7:13 - Clean Up Learn more https://romandecoratingproducts.com/h... HOW TO INSTALL REAL WOOD VENEER WALLCOVERING Recommended Primer and Adhesive: Primer – PRO-977 Ultra Prime Wallpaper Primer Adhesive – PRO-732 Extra-Strength Clay Wallcovering Adhesive Wood veneer wallpaper can provide a visually attractive rustic flavor that appeals to many homeowners. It’s also a very durable material. Install your wood veneer panels carefully! RECEIVING & CONDITIONING THE MATERIAL Check to see that the wallcoverings are delivered undamaged. Prior to installation, keep wallcoverings in a dry and clear area, preferably in a low humidity environment with a temperature between 45 to 85 degrees. Lay flat and face-down. Cover the wallcoverings with a sheet of vinyl and place a sheet of plywood on top of the vinyl. Rest 48 hours to allow the materials to acclimatize to the environment. PREPARING THE DRYWALL Clean the surface of the wall. The moisture content of the wall substrate should be 9% or less. Use a moisture meter to check. Prepare the drywall by applying ROMAN’s PRO-977 Ultra Prime. If your wall has been previously covered or painted, lightly sand the surface to break the seal prior to applying the primer. As you prime the surface, always follow the spread rate and dry time recommended by the manufacturer. PREPARING FOR APPLICATION On the bottom backside of each sheet of veneer is a flitch number and a sequence number. It is important to install your wood wallcovering from left to right in numerical order. You can determine the correct order by checking the flitch number and sequence number that can be found on the bottom backside of each sheet of veneer. ROMAN recommends that you lay your sheets end-to-end on the floor to ensure matching of the wood grain of the veneer, as this is vital for a pleasing appearance. Make sure that the pieces match up bottom to bottom or top to top depending on the orientation of your woodgrain. Apply a uniform layer of the Roman PRO-732 Extra-Strength Clay adhesive using a standard ⅜ to ¾ inch nap paint roller. The entire backside of the sheet should be coated. Now book the sheets and let them sit for 20 minutes. It’s important to give your wood veneer adhesive enough time to tack properly after application to prevent future bubbling of the wallcovering. APPLICATION Draw a vertical line at your starting point, using a level or plumb line to aid you. Draw all the vertical lines along the desired length to be covered. Mark the lines at the net width to account for overlap. Measure wall height. Cut your wood veneer wallpaper to length, making sure to add at least two inches to the measurement. Apply ROMAN’s PRO-732 Extra-Strength Clay on the surface. Cover enough area for three wood veneer panels. Beginning from left to right, hang your first piece of veneer while making sure the right edge is following your straight, vertical line. Trim off the excess veneer at the ends using a straightedge and a razor blade. Starting at the top, hang the next veneer panel along the second vertical line, but do not to press it into place. The panel should overlap with the first panel of veneer. Slightly raise the second panel of wood veneer and align the woodgrain to match the patterns. Once the panels are properly aligned, press the veneer into place to remove any air bubbles. Then cut off the excess veneer at the top and bottom. Repeat the process for the third piece of veneer. Make an incision on the double seam at the top and bottom. Double-cut through both panels of veneer to remove the extra material. Press the seam into place. Repeat steps above until you have covered the entire wall. EXTERNAL CORNERS Apply veneer to an external corner in the same manner as a heavy-duty vinyl wallcovering. However, when bending around an outside corner, wet the face of the veneer with clean water and a lint-free rag. Moisture will make the veneer supple and enable the material to bend without breaking. Have at least 4-6 inches on either side of the bend to prevent springback. When using veneer on a corner, you should wrap only with long grain. Don’t wrap corners cross-grain. The same steps apply for internal corners as well. CLEAN UP Remove excess adhesive or dust from the wall with a cellulose sponge and clean water. Dry the surface by gently rubbing it with a lint-free rag. Change the water often. Remember to visit ROMAN Products for more information on our world-class wallcovering adhesives, primers, removers, and other accessories. Our catalog includes: PRO-732 Extra-Strength Clay Wallcovering Adhesive: https://romandecoratingproducts.com/p... PRO-977 Ultra Prime Wallpaper Primer: https://romandecoratingproducts.com/p...
Comments