Скачать с ютуб How to Paint a House with a Paint Sprayer в хорошем качестве
How to Paint a House with a Paint Sprayer
4 года назад
how to paint a house
how to paint
how to
how to paint fast
how to paint a wall
how to paint like a pro
how to paint house
how to paint home
how to paint a house fast
how to paint a house right
paint
how to paint a stucco house
steps painting a house
how to paint a house the right way
how to paint a bedroom
how to paint a house right youtube
how to paint a room fast
home improvement
life hacks painting a house
wagner
wagner paint sprayer
paint sprayer
Скачать бесплатно и смотреть ютуб-видео без блокировок How to Paint a House with a Paint Sprayer в качестве 4к (2к / 1080p)
У нас вы можете посмотреть бесплатно How to Paint a House with a Paint Sprayer или скачать в максимальном доступном качестве, которое было загружено на ютуб. Для скачивания выберите вариант из формы ниже:
Загрузить музыку / рингтон How to Paint a House with a Paint Sprayer в формате MP3:
Если кнопки скачивания не
загрузились
НАЖМИТЕ ЗДЕСЬ или обновите страницу
Если возникают проблемы со скачиванием, пожалуйста напишите в поддержку по адресу внизу
страницы.
Спасибо за использование сервиса savevideohd.ru
How to Paint a House with a Paint Sprayer
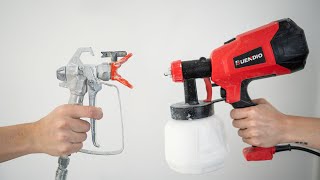
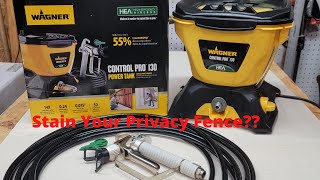
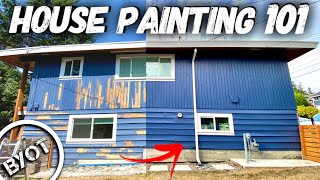
Painting a house may seem intimidating, but with the right tools you’ll have the project done in no time. Your home is your biggest investment, so keeping it protected and looking great is important. Paint spraying your house might seem like a really big job, but it really just involves some basic preparation and a good paint sprayer like a Wagner High Efficiency Airless sprayer. Read more about these sprayers: https://bit.ly/32GEdUr Browse more DIY products to use on your next home improvement project: https://www.wagnerspraytech.com/ Step 1: Power Wash and Remove Loose Paint The first step towards spray painting a house is prepping the siding for a new layer of paint. Whether your home is covered in wood siding, stucco, or even brick, old peeling and faded paint is more than just ugly. Left alone, it’ll get worse and could lead to rotting and cracking. Start by power washing the entire house to blast away dirt, grime and loose paint. This will give the new layer of paint a nice, clean surface to adhere to. Allow the siding to dry for one or two days in good weather before applying the first coat of paint. You should also scrape off any remaining loose paint that the power washer couldn’t get. This can be done using a combination of hand scrapers and Wagner’s PaintEATER disc sander tool. The PaintEATER does a great job of removing loose paint and smoothing the surface. Step 2: Prep the Space Now that the exterior is clean, it’s time to make repairs and prep the space for painting. Start this process by spot priming any bare wood areas and caulking gaps between the wood. It’s also important to fill holes in the wood siding and replace missing or damaged mortar in the brick. You should also cover any light fixtures, windows, and shrubbery with plastic sheeting to protect them from overspray. Gutters and downspouts can also be removed if needed. We recommend removing downspouts to allow for easier access when spraying the siding. Step 3: Prepare the Paint Sprayer for the House Prepare and prime your sprayer to get ready for painting per the owners manual. The Wagner Control Pro airless paint sprayer is a great paint sprayer for house exteriors. It’s a high-efficiency airless sprayer, giving you professional speed and up to 55% less overspray than traditional airless sprayers. It’s a good idea to practice the paint spray on a big piece of cardboard before painting the house and adjust your pressure as you find a spraying speed you’re comfortable with, the higher the pressure the faster you will need to move the spray gun. Keep the spray gun about 12-inches away from and parallel with the surface, whether you’re spraying side-to-side or up-and-down. Start moving your hand before pulling the trigger to avoid any heavy spots and release the trigger after you finish each pass. Step 4: Paint Eaves and Trim with the Sprayer Begin by painting the eaves and trim with the paint sprayer. The Control Pro sprayer comes with a 515 spray tip, but when spraying trim it’s recommended to use a 313 or 413 spray tip. These spray tip sizes will produce a narrower spray pattern with lower flow, which is great for spraying trim. Make sure you’re spraying in the direction of the wood grain. For trim, that can mean up and down for some boards and side-to-side for others. Make sure you adjust the tip correctly for the direction you’ll be spraying in. We also recommend not spraying when it’s windy outside. Not only will it affect your spray pattern, but you might get paint on something you don’t want to. Step 5: Paint Exterior of House with a Sprayer With the trim painted, now it’s time to paint the siding. Make sure the trim is fully dry, then mask off the trim with painter’s tape and plastic sheeting. For the siding, you can use the 515 tip that comes with the sprayer to get the fastest coverage, plus it’s ideal for exterior latex paints. Test the spray pattern again on some cardboard until you find a pressure setting you’re comfortable with. Start at the top of the house and work your way down. If you’ll be working from a ladder, spray in sections as wide as you can safely reach, but don’t let a section dry before painting the next section or you might see heavy spots. Point the spray gun up at an angle toward the bottom of each row for best coverage and color. If you have any drips while spraying, you can level them out with a paint brush and then continue spraying. In addition, using a paint shield helps protect parts of the house from overspray that might be hard or impossible to mask off with plastic or a dropcloth. Step 6: Enjoy the Transformed Home Exterior After a thorough prep job and a couple of days of painting, you can dramatically change the look of your house with an updated color and apply a protective layer against the elements that will last for many years. Plus, by doing it yourself you can save thousands of dollars versus hiring a contractor!
Comments