Скачать с ютуб Yamaha R6 Engine Rebuild Part 1: Bottom End to Piston Install | Partzilla.com в хорошем качестве
Yamaha R6 Engine Rebuild Part 1: Bottom End to Piston Install | Partzilla.com
7 лет назад
Скачать бесплатно и смотреть ютуб-видео без блокировок Yamaha R6 Engine Rebuild Part 1: Bottom End to Piston Install | Partzilla.com в качестве 4к (2к / 1080p)
У нас вы можете посмотреть бесплатно Yamaha R6 Engine Rebuild Part 1: Bottom End to Piston Install | Partzilla.com или скачать в максимальном доступном качестве, которое было загружено на ютуб. Для скачивания выберите вариант из формы ниже:
Загрузить музыку / рингтон Yamaha R6 Engine Rebuild Part 1: Bottom End to Piston Install | Partzilla.com в формате MP3:
Если кнопки скачивания не
загрузились
НАЖМИТЕ ЗДЕСЬ или обновите страницу
Если возникают проблемы со скачиванием, пожалуйста напишите в поддержку по адресу внизу
страницы.
Спасибо за использование сервиса savevideohd.ru
Yamaha R6 Engine Rebuild Part 1: Bottom End to Piston Install | Partzilla.com
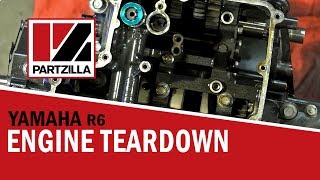
Watch part one in our series where we are rebuilding a Yamaha R6 engine. Here is a list of the parts you need: http://bit.ly/R6-parts-list-1 You’ll also need this crankcase diagram for the R6: http://bit.ly/Crankcase-Diagram-R6 In this video, John begins to prepare the crankcase by installing head studs and bearings. He also assembles the transmission on the R6. Ahead in the next video, John will install a Wiseco 636 kit to add more displacement to the engine, translating to more power. Ready for the next step? Part two of our R6 engine rebuild is here: https://www.youtube.com/watch?v=Lb9uF... Read how to do this job step-by-step: https://www.partzilla.com/blog/yamaha... VIDEO HIGHLIGHTS: Installing head studs - 2:05 Replacing bearings - 3:25 Assembling the transmission - 5:15 To buy OEM Yamaha motorcycle parts, click here: http://www.partzilla.com/parts/search... Talk to us: Twitter: / partzilla Facebook: / partzilla Instagram: / partzilla In the video we’re working with a 2008 Yamaha YZF R6, but you may have similar steps for your machine. If you’re not sure whether these steps apply to your motorcycle, leave a comment and we’ll get back to you. RELATED CONTENT: Yamaha R6 engine teardown: • Yamaha YZF R6 Engine Teardown | Partz... Yamaha R6 engine rebuild part 3: https://www.youtube.com/watch?v=-Ngkn...
Comments