Скачать с ютуб LoRa IoT Project using Arduino ESP8266 with Google Assistant and Alexa | Lora tutorial 2022 в хорошем качестве
LoRa IoT Project using Arduino ESP8266 with Google Assistant and Alexa | Lora tutorial 2022
2 года назад
Скачать бесплатно и смотреть ютуб-видео без блокировок LoRa IoT Project using Arduino ESP8266 with Google Assistant and Alexa | Lora tutorial 2022 в качестве 4к (2к / 1080p)
У нас вы можете посмотреть бесплатно LoRa IoT Project using Arduino ESP8266 with Google Assistant and Alexa | Lora tutorial 2022 или скачать в максимальном доступном качестве, которое было загружено на ютуб. Для скачивания выберите вариант из формы ниже:
Загрузить музыку / рингтон LoRa IoT Project using Arduino ESP8266 with Google Assistant and Alexa | Lora tutorial 2022 в формате MP3:
Если кнопки скачивания не
загрузились
НАЖМИТЕ ЗДЕСЬ или обновите страницу
Если возникают проблемы со скачиванием, пожалуйста напишите в поддержку по адресу внизу
страницы.
Спасибо за использование сервиса savevideohd.ru
LoRa IoT Project using Arduino ESP8266 with Google Assistant and Alexa | Lora tutorial 2022
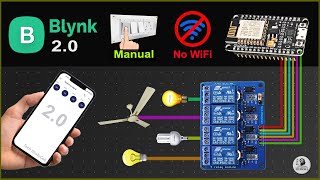
In this Lora tutorial, I have shown how to make a Lora IoT project using Arduino ESP8266 with Google Assistant and Alexa. Explained both the transmitter and receiver LoRa circuit and source code to control the relays with the Google Home IoT platform. To try out the FREE trial version of Altium, click here - https://www.altium.com/yt/techstudycell Help 🙏🏻 my projects on Patreon: / techstudycell Feel free to donate any amount: https://paypal.me/sdaspay I have covered the following topic in this Lora Arduino IoT project: 02:49 Demonstrated LoRa IoT ESP8266 Arduino project with Sinric Pro 04:05 Explained Transmitter Lora circuit using NodeMCU. 04:18 Explained Receiving Lora circuit with Arduino UNO. 04:50 Setup FREE Sinric Pro account for LoRa ESP8266 project. 05:44 Explained the source codes for this Lora Arduino project. 08:17 Setup Google Home app for this IoT project. 09:08 Setup Amazon Alexa app for the voice control LoRa project. 09:51 Control high voltage appliances with LoRa and voice assistant. Required components for the Transmitter Lora circuit: 1. Lora Module REYAX RYLR998 1no 2. ESP8266 NodeMCU 1no 3. 1k Resistors 2no 4. 4.7k Resistor 1no 5. 10k Resistor 1no 6. 5-mm LED 2no 7. 0.96" OLED Display 8. Push button 5no Required components for the Receiver Arduino Lora circuit: 1. Lora Module REYAX RYLR998 1no 2. Arduino UNO 1no 3. 5v 4-channel Relay Module 1no 4. 2k Resistor 1no 5. 4.7k Resistor 1no 6. 5-mm LED 1no 7. Push Buttons or Switch 4no Amazon India Affiliate links: NodeMCU : https://amzn.to/3fJA4EG 4-channel 5V Relay Module: https://amzn.to/2BQ5Y3o Amazon United States Affiliate links: Lora Module RYLR998: https://amzn.to/3FNjsc9 NodeMCU : https://amzn.to/2WoR2A2 4-channel 5V Relay Module: https://amzn.to/3r2HuJ4 Required Components for the NodeMCU LoRa PCB: 1. REYAX RYLR998 or RYLR896 1no 2. ESP8266 NodeMCU 1no 3. 1k Resistors 2no 4. 4.7k Resistor 1no 5. 10k Resistor 2no 6. 5-mm LED 2no 7. Push button 6no 8. Jumper 2no 9. Terminal connector 2 pin 1no 10. 0.96" OLED Display Important Links: Download Code for this Arduino ESP8266 LoRa IoT project from the following article. https://iotcircuithub.com/lora-esp826... Download PCB Gerber file for the transmitter LoRa ESP8266 circuit https://iotcircuithub.com/wp-content/... Previous Lora Tutorial video: • LoRa Project Arduino ESP8266 control ... Datasheet REYAX RYLR896 Lora Module: https://reyax.com/tw/wp-content/uploa... AT command guide for REYAX Lora module: https://reyax.com/tw/wp-content/uploa... Important points: 1. The Network ID and BAND should be the same for the transmitter and receiving end Lora module. 2. Set the BAND as per the eligible LoRa bands in your country. 3. All the AT commands for configuring the LoRa modules are defined in the void setup() function of the source code. 4. The range for this LoRa project will be up to 5KM in rural areas. (Range will decrease if the number of obstacles increases in the signal path). 5. During the restart of the NodeMCU, the WiFi should be available. 6. As I have used the FREE Sinric account, so you can control only 3 relays with Google Assistant and Amazon Alexa. 7. After restart, please wait until the STATUS LED turns off. 8. I have used EEPROM of Arduino UNO, so it can remember the previous states. 9. Please watch the complete video, otherwise you may face some issues. **Please take proper safety precautions while working with high voltages. During this Lora IoT tutorial video, I explained all the required information to make this LoRa ESP8266 project. You can monitor the real-time feedback in the Google Home and Amazon Alexa app. You can use any microcontroller with the LoRa module. Both the microcontroller and LoRa module communicate through the serial terminal at the 3.3V logic level. The range for this LoRa module is up to 5KM, So this project is very useful in rural are where WiFi is not available. The range may decrease in urban areas due to more obstacles in the path. #lora #arduino #esp8266 Thanks For Watching... ✅ SUBSCRIBE ✅LIKE ✅SHARE ✅ COMMENTS Find out more such projects: https://iotcircuithub.com/ Facebook: / techstudycell Instagram: / techstudycell Telegram: https://t.me/techstudycell/ WARNING: This video is for demonstration and educational purposes only. Each demonstration presents risks and hazards that must be fully understood before attempting. And should be performed only by professionals Other useful IoT projects: Latest NodeMCU projects playlist: • NodeMCU Projects Arduino Home Automation Projects playlist: • Arduino Projects
Comments