Скачать с ютуб Soap Making Glycerin Soap Swirl The Acorn Swirl в хорошем качестве
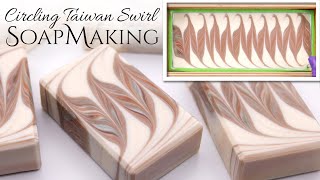
Soap Making Glycerin Soap Swirl The Acorn Swirl
5 лет назад
Скачать бесплатно и смотреть ютуб-видео без блокировок Soap Making Glycerin Soap Swirl The Acorn Swirl в качестве 4к (2к / 1080p)
У нас вы можете посмотреть бесплатно Soap Making Glycerin Soap Swirl The Acorn Swirl или скачать в максимальном доступном качестве, которое было загружено на ютуб. Для скачивания выберите вариант из формы ниже:
Загрузить музыку / рингтон Soap Making Glycerin Soap Swirl The Acorn Swirl в формате MP3:
Если кнопки скачивания не
загрузились
НАЖМИТЕ ЗДЕСЬ или обновите страницу
Если возникают проблемы со скачиванием, пожалуйста напишите в поддержку по адресу внизу
страницы.
Спасибо за использование сервиса savevideohd.ru
Soap Making Glycerin Soap Swirl The Acorn Swirl
Hi, I’m sass with Oakleaf and Ocotillo Soap Company. Today, I’m going to show you how to get gorgeous swirls like these in your glycerin soap. This video is geared toward advanced melt and pour soap making. If you are new to soap making and new to melt and pour soap please refer back to this channel for future tutorials geared more toward beginners. For a basic two color soap swirl you will need: Melt and pour soap (enough for a full loaf, 38-48 ounces) Loaf mold Fragrance oil Measuring scale 2 Pyrex or other heat resistant microwaveable containers Colorant of choice. I used mica in a glycerin base and titanium dioxide. Pencil Spoon Spray bottle with isopropyl alcohol This soap recipe works best when you keep your glycerin soap around 120 degrees. Split the melt and pour soap base into thirds. You will want 2/3 to be in one container. This will be your dominant color. I chose green for this tutorial. You will want to put the other 1/3 of your soap in another container. This will be your accent color. I chose white. For your first glycerin soap pour, you will want to pour half of your dominant color into the mold, spray down the bubbles with your alcohol spritzer, and then set your timer for 15 minutes (check your soap around 10 to be safe as times can vary depending on humidity and room temperature). So after about 15 minutes the melt and pour soap should not ripple when you blow on it. You will want to take out your pencil, and with the eraser end down, you will want to lightly press down on the top of the glycerin soap. You don’t want to punch through the soap. Instead you are looking for the soap to give a little and then bounce back. Make sure there are no soft spots in the surface. If it’s giving and bouncing back (like a trampoline) you are ready to pour your second layer of melt and pour soap. Make sure to spritz the surface with alcohol first. Be careful to pour low and slow so you don’t break through the surface. Keeping that surface layer solid during the pour is important for the swirl to work properly. Now that you have poured the second layer of glycerin soap, pick up your spoon and punch through the soap in one of the corners. You want to punch the spoon down through to the bottom of the mold and then move in a zig zag pattern working your way to the opposite corner. Make sure to only do one pass through the soap. Spritz the bubbles away and set your timer for 5-10 minutes. Repeat step 2 and 3 remembering to spritz the layers before pouring so the soap layers adhere to one another and spritz after to get rid of bubbles. Wait until Soap has completely cooled before unmolding. I started making soap about 10 years ago. Like many new handcrafted soap artisans there were a few fails along the way, mostly regarding design. I eventually found my niche, my method, albeit by accident. Over the years I have had a number of inquiring emails about my soap swirl method, but I wasn’t quite ready to divulge my serendipitous discovery until now. In 2009 I was very excited to see that SoapQueen had released a 12 layer glycerin soap swirl video. So, of course, I jumped right in! I had been doing chunky embeds and layers up to that point. So one day I was using SoapQueen’s 12 layer swirl technique when I got distracted with kids, or life, or whatever. It was so long ago I don’t even remember. However, it turned out to be a great distraction. Even though I had forgotten about my first layer of soap, I decided to go ahead and pour in three layers instead of the usual 12. I also decided to wait until the surface was thicker than it would have been with the 12 layer method. Since glycerin soap surface was so thick once I remembered, I decided to keep all layers the same consistency before swirling. I’m glad I did. I ended up with big fluffy black and purple swirls. I call this method the Acorn Swirl since it’s a signature of Oakleaf and Ocotillo Soaps. I hope you enjoyed this tutorial on how to swirl glycerin soap. If you are new to soap making this is a great way to get started without having to deal with lye and saponification. Please like and subscribe to be made aware of our next tutorial due the first week of February. If you are interested in purchasing this soap, but don’t want to make soap yourself please visit the link below or click on the E symbol on our banner which will take you to our Etsy shop. https://www.etsy.com/listing/65969686... Our Soap https://www.etsy.com/shop/OakleafandO... Handcrafted Soap Pics / oakleafandocotillo Oakleaf and Ocotillo Handcrafted Soap Facebook page / oakleafandocotillo YouTube Teaser • Melt_and_Pour_Swirl_Technique Post your results to Instagram with #acornswirl so we can find you. #glycerinsoap #meltandpoursoap #acornswirl #glycerinsoapswirl #soapmaking
Comments