Скачать с ютуб How to fit shower wall panels | Fitting tips from Victoria Plum в хорошем качестве
How to fit shower wall panels | Fitting tips from Victoria Plum
1 год назад
Скачать бесплатно и смотреть ютуб-видео без блокировок How to fit shower wall panels | Fitting tips from Victoria Plum в качестве 4к (2к / 1080p)
У нас вы можете посмотреть бесплатно How to fit shower wall panels | Fitting tips from Victoria Plum или скачать в максимальном доступном качестве, которое было загружено на ютуб. Для скачивания выберите вариант из формы ниже:
Загрузить музыку / рингтон How to fit shower wall panels | Fitting tips from Victoria Plum в формате MP3:
Если кнопки скачивания не
загрузились
НАЖМИТЕ ЗДЕСЬ или обновите страницу
Если возникают проблемы со скачиванием, пожалуйста напишите в поддержку по адресу внизу
страницы.
Спасибо за использование сервиса savevideohd.ru
How to fit shower wall panels | Fitting tips from Victoria Plum
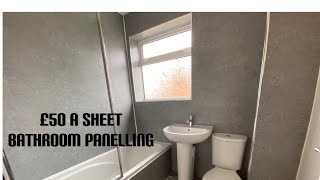
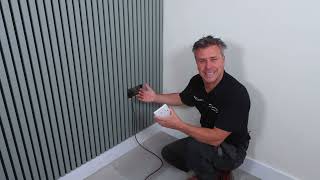
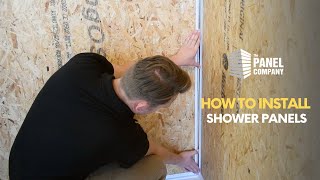
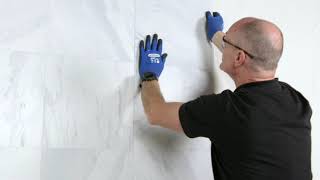
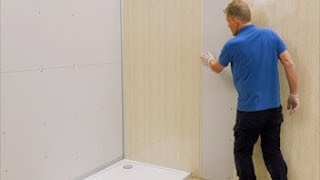
Wall panels are a quick and easy alternative to tiles. Find out how simple fitting them can be with this how to guide. For more information please visit https://victoriaplum.com/blog/posts/h... How to fit wall panels - pvc wall panel installation - cladding - Orchard Bathrooms Choosing shower wall panels over conventional tiles will make installing a waterproof surface easier and faster. Once you have chosen your panels, we recommend purchasing the orchard shower wall panel installation kit from our website. This includes fitting guide, dual purpose clear adhesive sealant, a roll of foam tape, sanding pad, tile spacers and a silicone finishing tool. You will also need a caulking gun, safety goggles, tape measure, a sharp blade and an electric or fine tooth saw. Remember to always consult the instruction manual when installing this product. First measure the area where the wall panels will be fitted. This includes both horizontally and vertically. Wall panels can be fitted over multiple surfaces. Here we are covering both tiles and plasterboard. Take your panel and lay it flat on supports with the front facing up. Then mark out the cutting lines on the panel. Strips of masking tape will help protect the edges while cutting the panels down to the required size. Using the electric saw, carefully remove the excess wall panel. Remember to use the safety goggles when using these tools. We will be using the chrome trims to give a nice clean finish to our edges, so we are removing the tongue and groove joint from both sides of the panel. Some trims may have to be screwed in using a screwdriver or power drill. Next, take a sanding pad and run this along all of the cut edges. This will create a smooth finish and remove any debris. Now flip the panel over and use the sanding pad to rough up the surface. This will allow the sealant to form a stronger bond. To fit the panels together, we are using the corner trim piece (sold separately). Add a small bead of sealant to the wall and place the corner piece into position. Place tile spacers underneath the location of the wall panel. This will allow for sealant to be added afterwards. We are now ready to apply the sealant to the rear side of the wall panel. Begin by laying three parallel strips of foam tape along the entire length of the board. Then apply the sealant. First with a thin line down either side. Then zig zag the top and bottom for greater coverage. Finish with large circles of sealant to make sure it’s spread evenly. Now we are going to fit the end trim piece to the board. Add some sealant to the inside of the trim, as well as the very edge of the wall panel. Then position the trim in place, making sure the sealant is covered entirely. After adding some sealant to the corner trim piece, remove the backing layer from the foam tape. Lift the panel into position and slide into the corner piece. Prevent the tape from sticking to the wall until the panel is in the correct position. Repeat the process with the remaining wall panels. Again, ensuring it’s correctly positioned before smoothing down firmly. If you want a less visible join, you can make use of the tongue and groove joints. By adding some masking tape here, we can keep a nice neat finish when applying the sealant. Slide into place and remove the tape. Finish the joint by running the silicone finishing tool along the groove. We can use the same technique when sealing the panels to the floor. A little sealant and you’re done. Wall panels are a quick and easy alternative to tiles. Add in some fantastic Victoria plum products and your bathroom makeover is complete. Connect with us: Facebook - / victoriaplumuk Instagram - / victoriaplumuk Pinterest - https://www.pinterest.co.uk/VictoriaP... Twitter - / victoriaplumuk
Comments