Скачать с ютуб How to Reset a 40 Volt Ryobi Battery! Fix for Battery Not Charging & Blinking Light Issue Full Video в хорошем качестве
How to Reset a 40 Volt Ryobi Battery! Fix for Battery Not Charging & Blinking Light Issue Full Video
2 месяца назад
Скачать бесплатно и смотреть ютуб-видео без блокировок How to Reset a 40 Volt Ryobi Battery! Fix for Battery Not Charging & Blinking Light Issue Full Video в качестве 4к (2к / 1080p)
У нас вы можете посмотреть бесплатно How to Reset a 40 Volt Ryobi Battery! Fix for Battery Not Charging & Blinking Light Issue Full Video или скачать в максимальном доступном качестве, которое было загружено на ютуб. Для скачивания выберите вариант из формы ниже:
Загрузить музыку / рингтон How to Reset a 40 Volt Ryobi Battery! Fix for Battery Not Charging & Blinking Light Issue Full Video в формате MP3:
Если кнопки скачивания не
загрузились
НАЖМИТЕ ЗДЕСЬ или обновите страницу
Если возникают проблемы со скачиванием, пожалуйста напишите в поддержку по адресу внизу
страницы.
Спасибо за использование сервиса savevideohd.ru
How to Reset a 40 Volt Ryobi Battery! Fix for Battery Not Charging & Blinking Light Issue Full Video
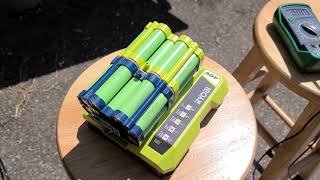
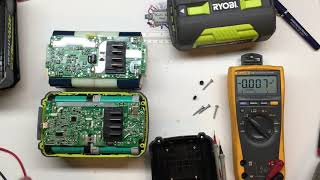
In this full version, DIYNate shows the entire process he went through for in trying to reset his 40 Volt Ryobi batteries to come back to life. This long / full version of the video shows the entire experience and 1 of the 2 videos was able to be charged again (both were reset, but only 1 took a charge). 🎥 Watch the shorter / abbreviated version here: • Ryobi 40 Volt Battery Not Working? Ho... 🛠️ Get your Torx security bits here: https://amzn.to/3W0oJq2 🧰 For a variety of security bits and full handle Torx screwdrivers, use this link: https://amzn.to/3WkvHrc 🛒 Need to purchase some project supplies on Amazon? Shop here: https://amzn.to/31mlhvl 🟧 Find more Ryobi 40 Volt products and many other tools at DIYNate's favorite hardware store - The Home Depot: https://homedepot.sjv.io/qPJ5Y 👍 SUBSCRIBE for more great videos! https://www.youtube.com/c/diynate?sub... 🌐 Check out DIYNate's website: www.DIYNate.com 💲 Enjoy this content and want to support DIYNate's efforts? Consider https://www.buymeacoffee.com/DIYNate or visit GoFundMe @ https://tinyurl.com/yauc4dtu In this video, DIYNate shows how he took two Ryobi batteries apart, used a paper clip wrapped with electrical tape for insulation, and was able to reset the battery to once again be able to charge. He tried the first battery twice, and while he was able to reset it, the battery continued to not charge after reset. The second battery did reset and take a charge, and he is now using this battery around the house on a regular basis. The steps include: 1. Confirm the blinking light issue on both battery and charger (blinking red and green on charger; blinking all lights on battery when button is pushed) 2. Remove the T10H Security Screws (note, you may void the warranty by opening up the batteries); also, use caution / warning - electricity is dangerous and so are batteries. Video for entertainment purposes only, and DIYNate assumes no liability. 3. Peel back the sticker that separates both halves of the battery, or cut a line through the sticker enabling the top part of the battery to separate from the bottom part. 4. Remove the top cover and find the battery reset holes (2 small ports next to each other about halfway along the battery length toward one side). 5. Use an insulated wire or wrapped paperclip to depress the two reset ports; make sure to protect / insulate / ground yourself just in case. 6. Light flashes when the reset ports are both pushed in at the same time indicating the battery has been reset. 7. Put the battery back together with the T10H security screws (you may only want to put 2 screws in initially in case the fix doesn't work and you need to access again). 8. Attempt to charge the battery again; if you are lucky / fortunate, it will charge and you will be able to use your battery again. 9. If you did not finish putting the security screws in, finish sealing the battery with the remaining security screws. Note that if your battery is under warranty, you are likely better off partnering with Ryobi or The Home Depot for repair / service vs. doing this, as it may void your warranty. However, if your batteries are beyond warranty, this hack / trick may very well keep your batteries alive for a longer period of time. (Reminder, DIYNate assumes no liability). Good luck - hope this repair works well for you! Nothing like dealing with high dollar batteries that are failing or no longer working correctly. Warning / Disclaimer: Video for entertainment purposes only. DIYNate assumes no liability. Batteries and electricity are dangerous and can result in serious injury or issues. If you are not comfortable repairing power tools or working with electricity, seek professional assistance. For other ways to support DIYNate or see my other content and information, please check out my website: www.DIYNate.com Thanks for watching and please like, subscribe, and comment if you found this video helpful. Appreciate your support! DIYNate 💬 Connect @ Facebook: DIYNate79 Instagram: DIYNate79 Twitter: DiyNate Pinterest: DIYNate www.DIYNate.com Note: As an Amazon Associate, I earn from qualifying purchases. I may earn other referral fees for product promotion and placement with no added cost to purchasers. Recommendations and purchase suggestions are strictly my opinions with no expressed or implied warranty.
Comments